
Performing a perfect planche requires a systematic approach to progression, ensuring that each step builds upon the foundation of previous abilities. Progression in mastering a planche is crucial as it allows individuals to develop the necessary strength, flexibility, and technique without risking injury. The journey from beginners to achieving a full planche involves a series of steps that gradually challenge the body’s capabilities while maintaining proper form.
Initially, it is essential to establish a strong foundation in upper body strength, particularly focusing on the triceps, shoulders, and core muscles. Exercises such as push-ups, dips, and planks are instrumental in building this base. As one progresses, incorporating variations like diamond push-ups or incline push-ups can further enhance strength and muscle endurance. Flexibility plays a vital role as well; dynamic stretching and mobility exercises targeting the shoulders, wrists, and hips prepare the body for the demands of the planche.
Once foundational strength is developed, progression involves moving from more supportive positions to less supported ones. Beginners can start with a wall planche, where the hands rest against a wall, providing support as the body gradually lowers into the position. This allows individuals to familiarize themselves with the alignment and control required for a planche without the full weight-bearing challenge. As comfort and confidence increase, transitions to freestanding planche drills are made, using progressively lower surfaces such as a bench or elevated platform to reduce the difficulty.
Another critical aspect of progression is developing core stability and body awareness. Exercises like hollow body holds and side planks strengthen the core muscles necessary for maintaining balance in a planche. Practicing these in conjunction with arm balances, such as forearm stands or handstands, enhances proprioception and coordination, which are essential for executing a perfect planche.
Consistency and patience are paramount throughout the progression process. It is important to listen to the body and allow adequate rest and recovery to prevent overtraining and potential injuries. Incorporating active recovery, such as light stretching or yoga, can aid in maintaining flexibility and reducing muscle soreness.
In larger systems or hierarchies of exercise routines, progression serves as a scaffold that supports the development of more complex skills. By methodically building strength, flexibility, and technique, individuals can successfully integrate planches into advanced routines or athletic performances. This hierarchical approach not only facilitates mastery of specific movements but also fosters a deeper understanding of the body’s capabilities and limitations, ultimately leading to more efficient and effective training.

How to Do a Perfect Ring Full Planche
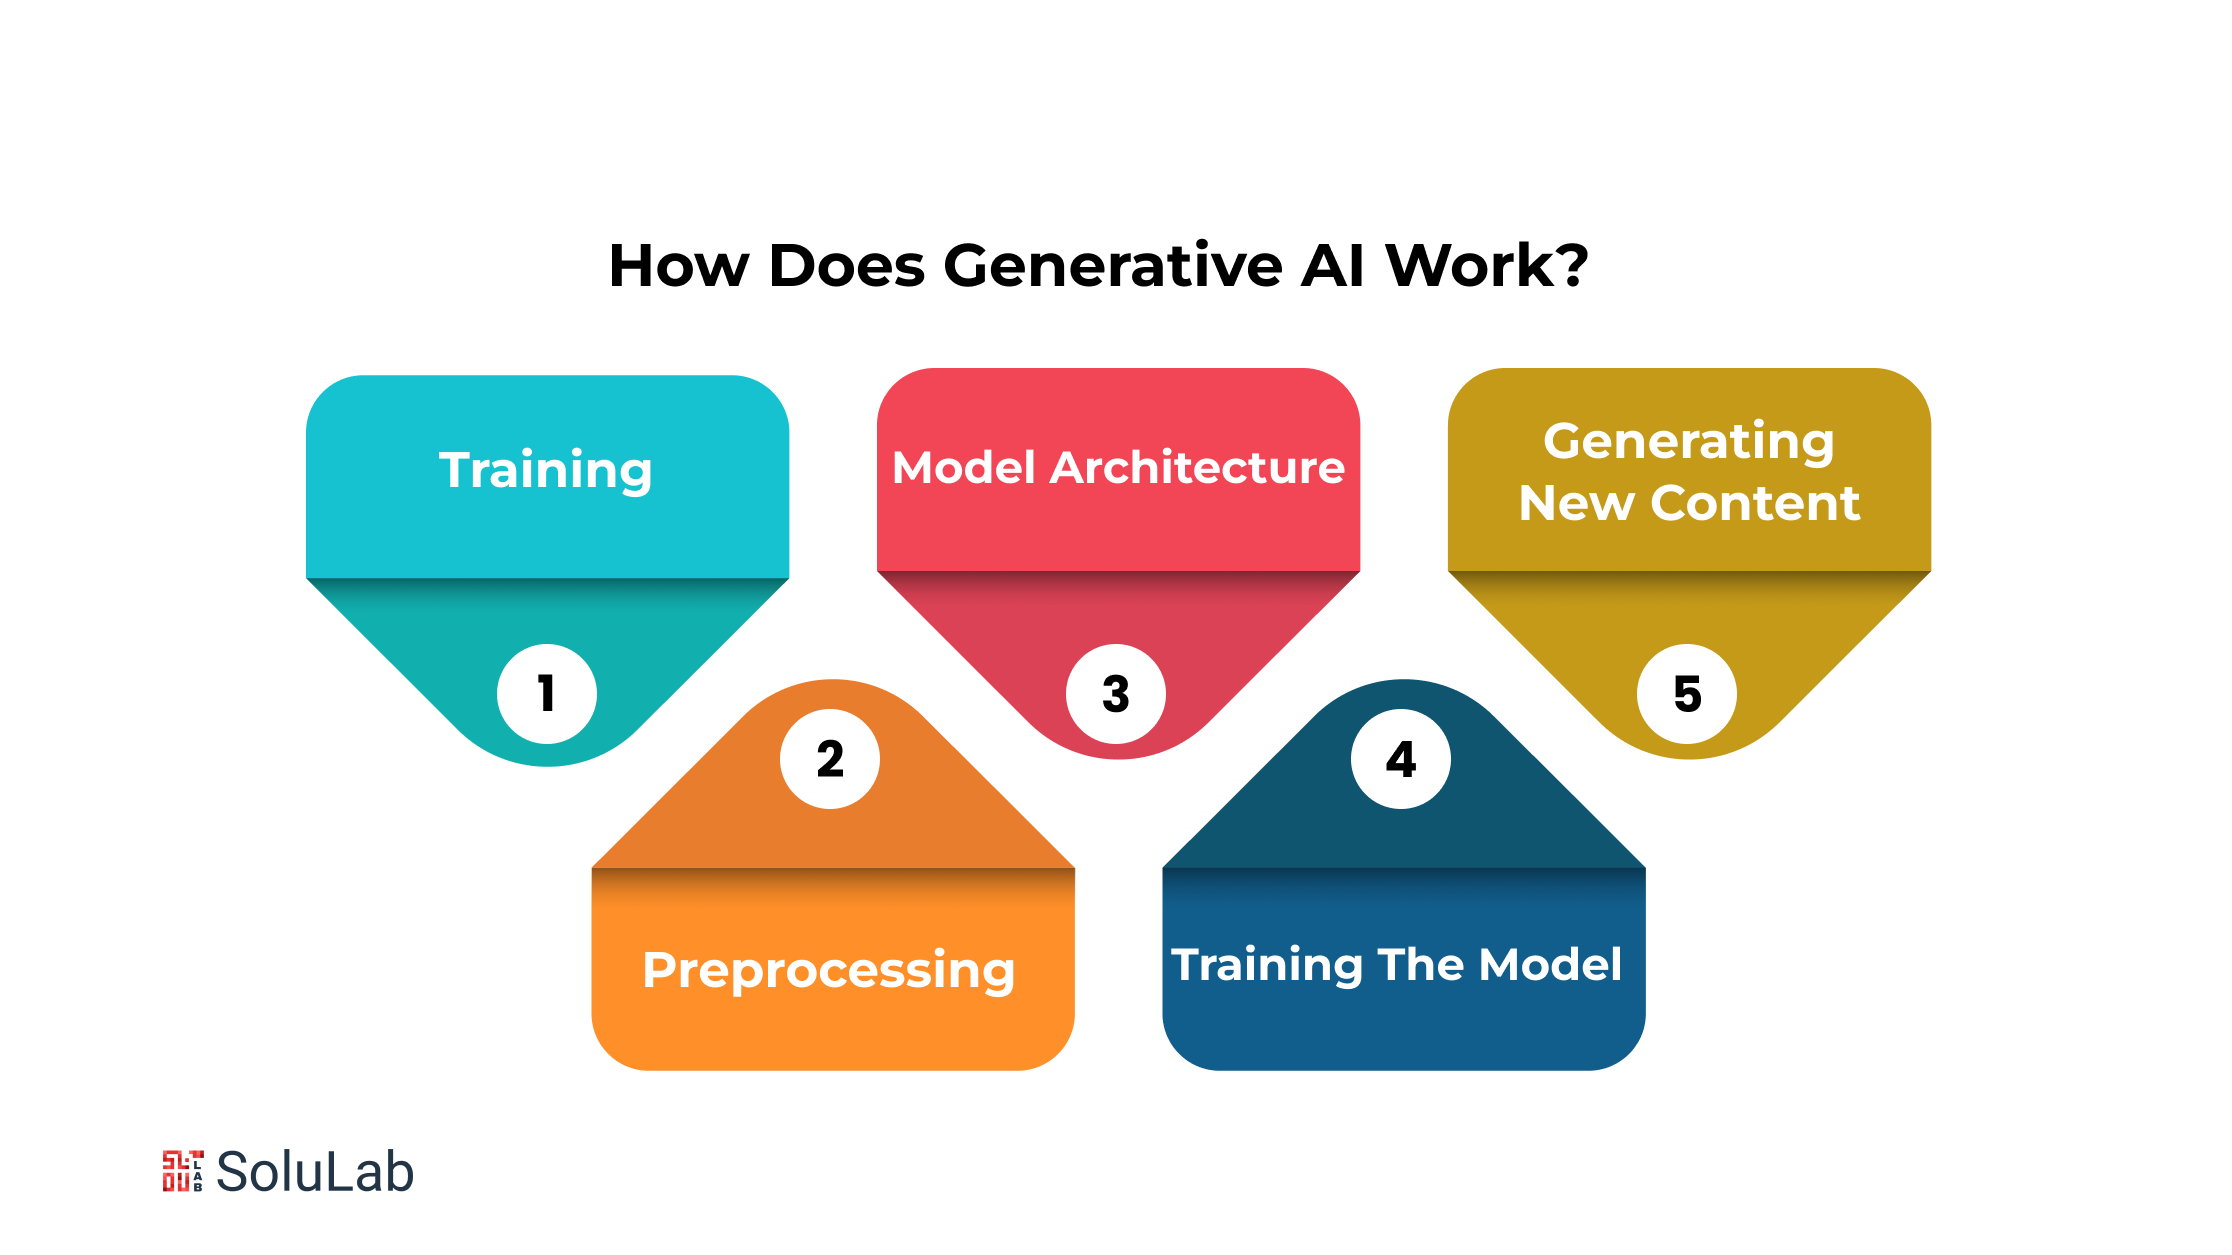
The first quadrant is labeled “Training” and has a blue background. The second quadrant has a red background with the words “Model Architecture” written in white. The third quadrant also has a yellow background with a white text that reads “Generating New Content”. The fourth quadrant shows “Preprocessing” and “Training The Model”.
Each quadrant represents a step in the process of generating new content. The first step is numbered 1, followed by a number 2, 3, 4, 5, and 6. The fourth step is labeled as “Preprocessing”. The fifth step is titled “Training”. The sixth step is labelled as “The Model”. The seventh step is highlighted in orange.
Overall, the image is meant to illustrate the concept of generating AI and how it can be used to improve the performance of a product or service.
To achieve a perfect ring full planche, it is essential to understand the foundational elements of this advanced exercise. The ring full planche involves maintaining a straight body position while suspended from a bar or rings using only your arms and core strength. This movement requires a combination of upper body strength, core stability, and precise technique.
Begin by focusing on building the necessary muscle strength through progressive exercises such as push-ups, pull-ups, and planks. Incorporate variations like diamond push-ups and ring rows to target specific muscles involved in the full planche. As you progress, integrate dynamic movements that mimic the full planche, such as press-ups into a planche hold or transitioning from a handstand back into a full planche.
Core strength is paramount for maintaining the straight body position required in the full planche. Include exercises like Russian twists, leg raises, and stability ball holds to enhance your core endurance. Practicing planks with various modifications, such as side planks or dynamic plank transitions, can further strengthen the stabilizing muscles.
Flexibility plays a crucial role in achieving a full planche. Regular stretching routines should focus on the shoulders, wrists, and hips to prevent injury and improve mobility. Dynamic stretches before training sessions can prepare the muscles for the intense effort required, while static stretches post-workout can aid recovery.
As you refine your technique, focus on proper breathing and visualization. Inhale as you descend into the position and exhale as you push back up. Mental imagery of successfully completing the movement can reinforce muscle memory and boost confidence.
Gradually increase the duration of your holds and the number of repetitions to build endurance. Consider using spotting or assisted methods for initial practice, gradually reducing reliance on support as strength improves. Consistency is key; dedicate time each week to refining your skills through targeted drills and full movement practice.
Incorporate rest and recovery into your training regimen to prevent overtraining and allow muscles to adapt. Listen to your body and adjust your progression accordingly, ensuring that you do not compromise form for the sake of advancing too quickly. With patience, dedication, and a well-rounded approach, achieving a perfect ring full planche is within reach for committed individuals.
How to Do a Perfect Straddle Planche
Achieving a perfect straddle planche requires a combination of strength, flexibility, and technique. To begin, ensure you have a solid foundation in plank exercises as the straddle planche is an advanced variation that demands core stability and hip mobility. Start by practicing traditional planks to build endurance and muscular strength. Gradually progress to side planks to enhance hip strength and stability, which are crucial for maintaining balance during the straddle position.
Flexibility plays a significant role in executing the straddle planche correctly. Tight hips can limit the range of motion required to spread the legs apart without compromising the body’s alignment. Incorporate dynamic stretches and static holds focused on the hip flexors, adductors, and hamstrings into your warm-up routine. Yoga poses such as downward dog, pigeon pose, and butterfly stretch can be particularly beneficial in improving hip flexibility.
The execution of the straddle planche begins with a strong push-up position. Engage the core muscles to maintain a flat back and prevent any sagging or arching. As you transition into the planche, focus on keeping the body straight from head to heels, avoiding any lateral tilting or rotation that could compromise balance. The legs should be extended and parallel to the ground, with the feet hip-width apart to ensure stability.
External conditions such as surface hardness and grip can significantly influence the stability of the technique. A firm, non-slip surface like a yoga mat or gym floor provides better traction and control, allowing for more precise execution. In contrast, slippery surfaces may require adjustments in body positioning to maintain balance. Additionally, ambient conditions such as wind or uneven terrain can affect stability, necessitating increased focus and concentration to maintain form.
To progress towards the perfect straddle planche, start with partial reps where you practice lifting one leg at a time before attempting both simultaneously. This approach helps build confidence and muscle memory. As proficiency increases, incorporate pauses or holds in the position to enhance strength endurance. It is also beneficial to practice the reverse transition from planche back to a push-up to ensure smooth movement control.
Incorporating accessory exercises that target specific muscle groups can further support your straddle planche progression. Core circuits, leg raises, and hip bridges are effective in building the necessary strength and endurance. Regular practice and progressive overload are key; gradually increase the duration of holds or add weights to challenge advanced practitioners.
Remember that consistency and patience are vital in mastering the straddle planche. Listen to your body and adjust your approach as needed to avoid injury. With dedication and a systematic progression plan, achieving a perfect straddle planche is attainable for those committed to honing their technique and physical capabilities.
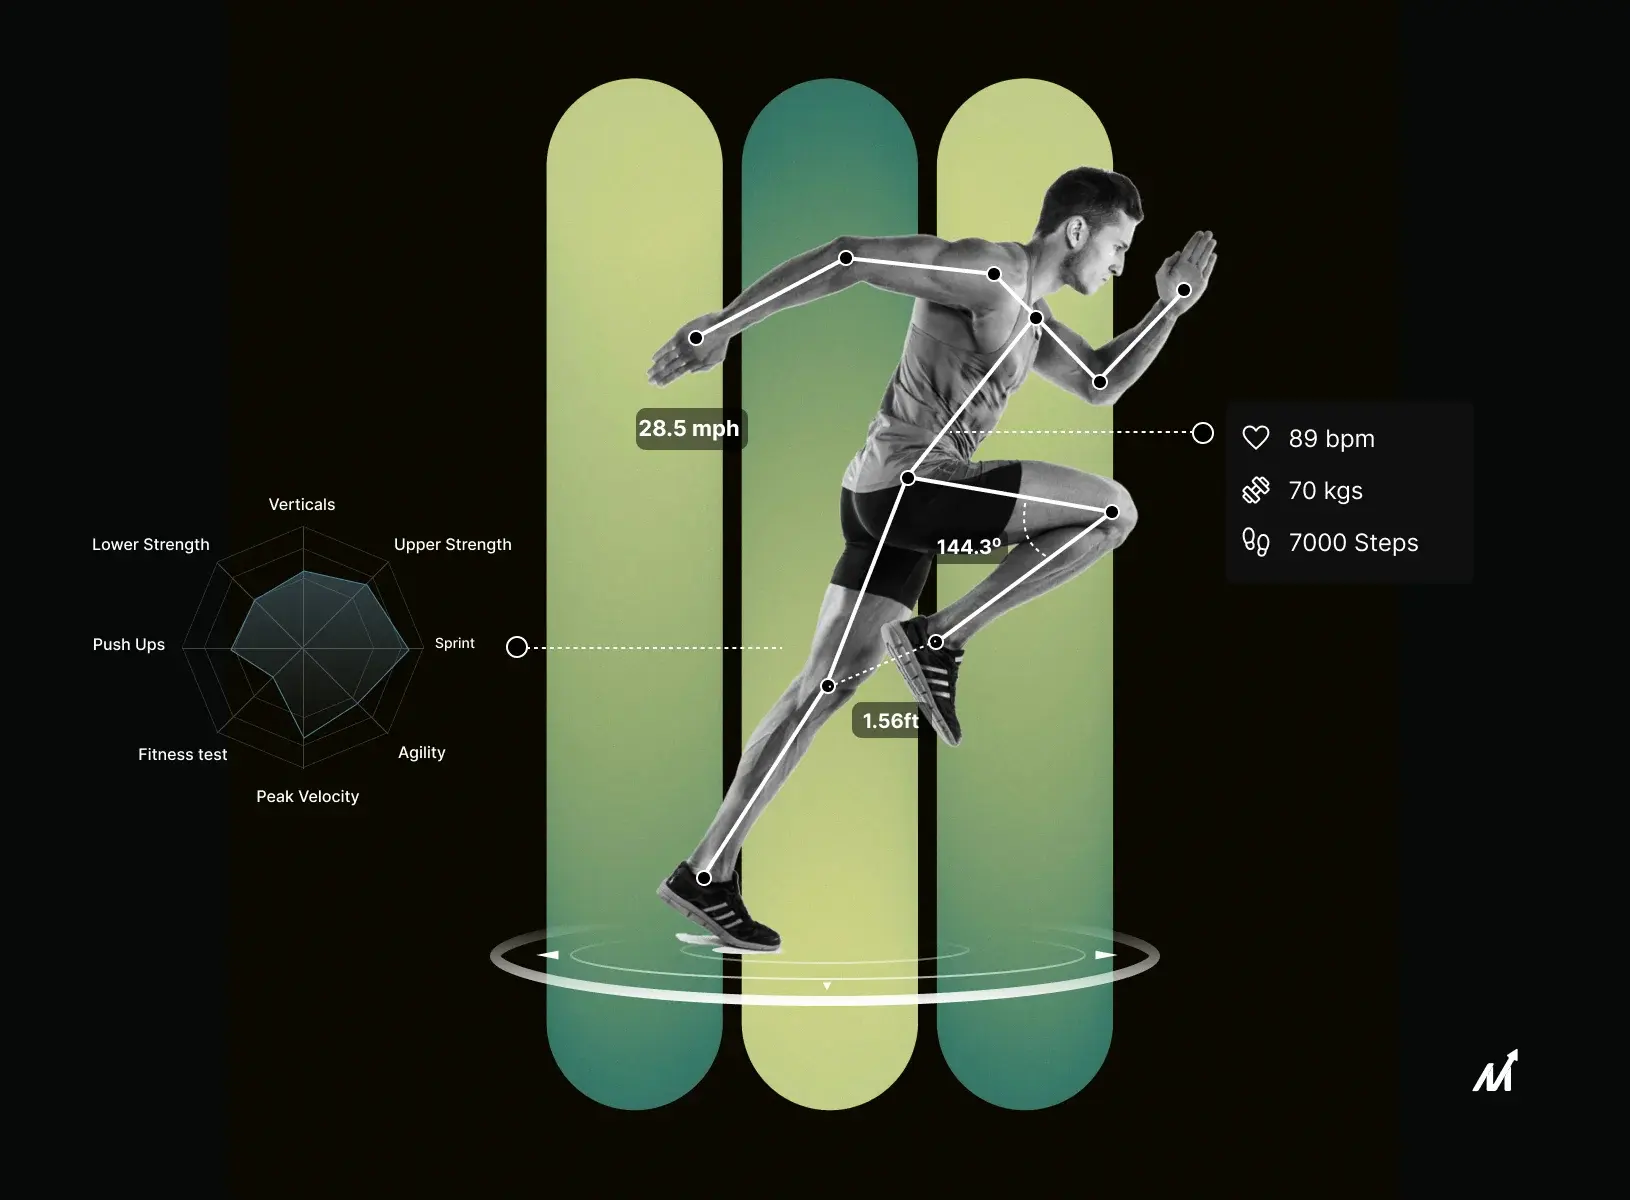
On the left side of the image, there is a hexagon-shaped graphic with the words “Lower Strength” and “Push Ups” written on it. Below the hexagon, there are three lines of text that represent the different steps of the running process. The first line shows the man’s upper strength, the second line shows his lower strength, and the third line shows how he performs the exercise. The text on the right side reads “89 bpm”, “70 kgs”, and “9,000 steps”.
The image also has a white circle in the center, which is likely representing the speed and distance of the man running. The overall design is modern and minimalistic, with a focus on the man and his movements.
How to Do a Perfect Full Planche
The most critical parameter in executing a perfect full planche hinges on precise body alignment. Achieving the correct alignment ensures that weight is evenly distributed across the shoulders, arms, and core, mitigating undue strain on any single area. This symmetry allows for maximal strength utilization while maintaining control over movement dynamics. Body alignment also influences stability; deviations from the ideal position can lead to instability, increasing the risk of injury or improper execution.
To establish the correct alignment, first focus on the shoulders and arms. The hands should be placed directly beneath the shoulders with fingers spread wide for optimal grip and support. Elbows must remain tucked in slightly, neither locked nor overly bent, as this positioning enhances shoulder stability and reduces compression on the joint structures. Shoulders should be drawn down and back to maintain a broad upper back, which is essential for maintaining a rigid torso.
Consider the position of the core. Engaging the abdominals, obliques, and lower back muscles is vital to keeping the body straight from the hips to the neck. This engagement acts as an internal brace, stabilizing the spine and distributing forces evenly throughout the躯干 (torso). The glutes should also be squeezed tightly to help maintain a neutral pelvic position, preventing excessive arching or rounding of the lower back.
Legs play a significant role in maintaining alignment within a full planche. The legs must be straight and held together tightly, with toes pointed forward. This positioning maximizes the leverage available to support body weight through the arms and shoulders while enhancing balance. Hips should remain directly above the shoulders, avoiding any lateral deviation that could compromise stability.
Ensure head alignment by keeping it in a neutral position, neither looking up nor down. Maintaining this neutral stance is crucial for preserving proper spinal alignment and preventing neck strain. The eyes can focus on a fixed point ahead to help maintain balance without overextending the neck.
Practicing with precise body alignment from the outset helps build muscle memory and reinforces correct movement patterns. Over time, as strength increases, this initial foundation allows for greater control over subtle adjustments needed to perfect the planche. It is also important to note that maintaining proper alignment requires consistent attention and effort, particularly during challenging progressions in training.
Good Ring Planche Technique

The ring planche, a hallmark of impressive bodyweight strength and control, often sees beginners rushing into the full move before mastering foundational elements. A common misconception is that good form simply requires enough core strength; while core engagement is crucial, it’s only one piece of the puzzle. The key lies in achieving near-perfect scapular depression and thoracic extension, alongside a solid understanding of how to effectively transfer weight through the rings. This starts with a great set up – ensuring the rings are positioned at roughly shoulder height provides an ideal starting point for many athletes.
Scapular depression, often overlooked, involves drawing the shoulder blades down toward the ribcage, essentially creating a more stable base from which to push. Think of it as lengthening the line from your shoulders to your hips; this lengthens the lever and helps distribute the load more efficiently. A good drill for isolating this is the “ring scapular sweep,” where one starts in a hanging ring position and focuses solely on pulling the shoulder blades down and back, feeling the stretch in the lats and chest. Thoracic extension, or arching the upper back, counteracts the tendency to collapse into a rounded posture as often happens when fatigue sets in. This can be encouraged with some good mobility work focused on opening up the chest and improving shoulder flexibility.
Weight transfer is arguably the most important aspect for efficient ring planche execution. The ideal weight distribution sees the core actively pushing the hips forward, ensuring that the bodyweight isn”t just sinking towards the rings but being pressed into them. A good visual cue to check this is to look down and see the ground – a common mistake is looking up which leads to a sag in the core. This requires consistent practice of smaller progressions like the “ring push planche,” where the legs are lightly touching the floor, allowing for more manageable entry and exit points. The arms should remain relatively straight throughout the move, ready to lock out at the top.
Another useful drill is the “lazy planche” – a slightly less demanding variation that focuses on maintaining good body positioning while enjoying a little bit of leg assist. This allows the athlete to really feel where their weight needs to be and how it’s being transferred. A crucial element for all progressions involves keeping an eye out for excessive elbow bend; this is often a sign of needing more thoracic extension or not pushing enough with the core.
Consistent practice and mindful attention to these details will yield impressive results. The ring planche isn’t just about strength – it’s about mastering a dynamic combination of scapular control, thoracic mobility, and precise weight transfer. Focusing on these elements ensures a solid foundation for progression and ultimately, a more efficient and aesthetically pleasing planche!
A Beginner’s Guide to the Ring Planche

The ring planche is a foundational exercise in gymnastics and calisthenics that demands strength, balance, and technique. It involves holding the body in a straight line from head to heels, supported solely by the arms, with feet engaged on either side of two parallel rings or bars. For beginners, mastering this skill requires a structured progression that builds strength, flexibility, and body awareness.
To initiate the ring planche journey, it is crucial to establish a strong foundation in push-ups, planks, and handstands. Push-ups develop upper body strength, particularly in the chest, shoulders, and triceps, which are essential for supporting the weight of the entire body. Planks enhance core stability and endurance, crucial for maintaining a rigid torso during the planche. Handstand practice improves balance and familiarity with inverted positions, reducing anxiety when attempting the planche.
A common progression begins with wall planches, where the practitioner leans against a wall to support the upper body while keeping the legs straight. This allows for adjustments in form without the full weight-bearing demand of free planches. As comfort and control improve, practitioners can transition to knee planches, where knees are bent to reduce strain on the wrists and shoulders, facilitating a smoother transition to full planches.
Incorporating isometric holds and dynamic movements can further refine technique. Isometric exercises, such as holding a plank position for extended periods, strengthen the muscles without movement, building endurance necessary for sustaining the planche. Dynamic movements, like walking planks or push-ups with controlled speed, enhance muscle activation and coordination.
Flexibility plays a pivotal role in achieving and maintaining proper form. Stretching exercises targeting the shoulders, wrists, and hips are essential to prevent injury and improve range of motion. Practitioners should focus on dynamic stretches before training and static stretches post-session to optimize flexibility and recovery.
Interdisciplinary connections between gymnastics and dance can enhance progression. Dance techniques emphasize fluidity, grace, and control, qualities transferable to the ring planche. Incorporating elements of dance, such as floor work or balance exercises, can improve body awareness and coordination, aiding in the development of precise control during the planche.
Consistency and patience are vital components of the learning process. Regular practice, combined with rest periods to prevent overtraining, allows muscles to adapt and strengthen. Tracking progress through video analysis or incremental time holds can provide insight into form and areas for improvement.
Perfect Planche Form Breakdown
The planche is a complex bodyweight exercise that requires significant upper body and core strength, as well as advanced balance and control. Achieving the perfect planche form involves mastering several key components.
The wrists play a crucial role in planches. They must be strong enough to support your body weight in an extended position, with the fingers spread wide apart for maximum surface area contact. To build wrist strength, try exercises such as wrist curls with resistance bands or hollow hand holds.
The core muscles are essential for maintaining the necessary tension and stability throughout the planche. Engaging the abs, obliques, and lower back will help to keep your body in a straight line, preventing excessive arching or rounding of the back. Core exercises such as planks, Russian twists, and leg raises can be used to strengthen these muscles.
Incorporating progressive drills into your training routine is essential for successfully mastering the planche. Begin with foundational exercises like push-ups, dips, and planche leans to build the necessary strength and control. As you progress, try advanced drills such as tuck planches, straddle planches, and pike planches to further challenge your abilities and prepare yourself for the full planche.
Remember, consistency and patience are key when working towards achieving the perfect planche form. By focusing on the proper technique and incorporating progressive drills into your training regimen, you’ll be well on your way to mastering this impressive feat of strength and balance.
Ring Planche Drills and Exercises
Ring planche drills and exercises form a cornerstone of bodyweight training for those seeking to master the advanced skill of the planche. These movements focus on developing core strength, upper body power, and precise control over shoulder girdle stability. For beginners, the process involves starting with simpler, more accessible variations before progressing to full ring planches, allowing gradual strengthening of relevant muscle groups while minimizing injury risk.
A primary drill for beginners is the tuck planche progression. This exercise begins with a seated tuck position on parallel bars or a sturdy ledge. The individual pulls their legs up toward the chest and holds them tightly together, engaging the abdominals and lower back to maintain an upright posture. Beginners should aim to hold this position for short durations, gradually increasing time as strength improves. Advanced variations include leaning forward slightly and adding slight hip flexion to enhance engagement of the anterior core and shoulder stabilizers.
Beginners often progress to the straddle planche. This requires moving from a seated tuck into an upright position with legs spread wide apart, forming a V-shape. The arms must remain straight throughout the exercise, pushing down into the bars or ledge to stabilize. Beginners should maintain this position for brief periods at first, then slowly increase duration as their shoulder and core muscles adapt. Progressions include moving from seated to standing positions while maintaining control over leg positioning.
The pike planche is another valuable step for beginners. This drill starts with a seated pike position, legs straight and torso upright, then progresses toward lifting the hips higher, bringing the legs closer to the body but not yet extending them into a full planche. Holding this intermediate position strengthens both the shoulders and core without requiring full shoulder extension. As confidence grows, individuals can add small shoulder rotations or lean forward slightly to engage the anterior deltoids more intensely.
Once sufficient strength is developed through these preparatory drills, beginners may attempt a partial planche pushup. This exercise involves performing a standard pushup but with the body held in an elevated position, either on rings or parallel bars, so only the upper arms and forearms bear weight while the legs are extended behind. Holds can be increased incrementally before moving onto full planche holds.
For those seeking advanced preparation, hanging exercises such as front levers and L-sits provide crucial strength gains. Front levers involve pulling oneself up into a horizontal position using the arms and back muscles, while L-sits focus on maintaining an upright torso with legs straight and parallel to the ground, all supported solely by the hands. These movements enhance both upper body endurance and core control, key components for executing a full planche.
When transitioning into full ring planches, beginners should ideally start with partial holds using support or assistance from training partners before attempting independent holds. Increasing time spent in a controlled planche position builds the strength necessary to handle the full weight load of the body without risking injury. Visual aids such as mirrors can help monitor posture and alignment throughout the exercise.
Throughout all these drills, it is essential for beginners to prioritize quality over quantity, maintaining strict form even when fatigue sets in helps prevent incorrect muscle recruitment patterns that could lead to strain or injury. Breathing techniques should remain controlled and steady; inhaling during exertion and exhaling as the position is held enhances oxygen flow and supports sustained effort.
Recovery between sessions is equally important; incorporating rest days or lighter workout periods allows muscles time to repair and grow stronger. Stretching routines focused on the shoulders, chest, and back should be integrated into the training plan to maintain flexibility and prevent tightness that could impede progress.
Consistent practice remains vital for developing muscle memory and confidence. Even brief daily sessions can lead to significant improvements over time when paired with proper technique and gradual progression. By methodically working through these ring planche drills and exercises, beginners will build the necessary strength and control required for mastering this advanced bodyweight movement.
How to Do a Perfect Ring Planche
Achieving a perfect ring planche requires a blend of strength, flexibility, and technique. Begin by focusing on building the necessary core and upper body strength through exercises like planks, push-ups, and dips. These foundational movements enhance stability and power, essential for maintaining the planche position. Flexibility in the shoulders and hips is equally crucial; incorporate dynamic stretches and mobility drills into your routine to improve range of motion.
To progress towards a ring planche, start with simpler exercises that mimic the movement pattern. A common drill is the planche hold, where you maintain the position against a wall or using resistance bands to support your body weight. Gradually reduce support by performing the hold on an inclined surface and eventually in mid-air. Another effective drill is the diamond push-up, which strengthens the muscles used in the planche while improving control and balance.
Practice controlling your body weight during transitions into and out of the planche position. Begin with slow, controlled movements to build muscle memory and prevent injury. Utilize a spotter or mirror for feedback on form and alignment. Ensure your body remains straight from head to heels, avoiding sagging or arching in the spine. Maintain engagement in the core muscles to stabilize the torso.
Incorporate plyometric exercises to enhance explosive power, such as clap push-ups or jump squats, which can contribute to the dynamic nature of the ring planche. These drills not only build strength but also improve neuromuscular coordination, allowing for smoother transitions and more controlled execution.
Visualization techniques can aid in mastering the technique; mentally rehearse each movement to reinforce proper form. As you advance, experiment with adding weight or resistance to further challenge your muscles. Consistency is key, dedicate regular practice sessions to refine your skills and build endurance.
Integrate these drills with other common elements like balance exercises and isometric holds to create a well-rounded training program. Balance drills, such as one-leg stands or single-arm planks, enhance stability, while isometric holds improve muscular endurance. By systematically building strength, flexibility, and technique, you can progress towards executing a perfect ring planche with precision and control.
How to Do a Perfect Step-Up
The step-up is a versatile exercise that effectively targets the lower body, particularly the quadriceps, glutes, and hamstrings. To achieve a perfect form in this movement, it is crucial to understand the biomechanics involved and progressively build strength and coordination. Begin by setting up the equipment, which can be a sturdy bench or step, ensuring it is stable and free from obstructions. The initial position involves standing with feet shoulder-width apart, knees slightly bent, and weight evenly distributed over both feet. Engage the core muscles to stabilize the spine and maintain an upright posture throughout the movement.
To initiate the step-up, drive through the leading foot while simultaneously pushing off the trailing leg, lifting the body upward until the front knee is at hip height or slightly higher. The rear knee should remain close to the ground but not touching it. Pause momentarily at the top of the movement to activate the glutes and then slowly return to the starting position by lowering the trailing leg back to the floor. Repeat the exercise on the opposite side, maintaining control and balance throughout each repetition.
As proficiency increases, incorporating variations can enhance muscle engagement and challenge different motor patterns. Lateral step-ups, where the foot is placed beside the bench rather than in front, engage the adductors and improve hip mobility. Single-leg step-ups require greater balance and stability, focusing on unilateral strength development. Including a pause at the top of each repetition allows for increased time under tension, promoting muscle hypertrophy.
For advanced practitioners, adding resistance such as a dumbbell or kettlebell held in both hands or placed strategically can further progress the exercise. Performing step-ups on an unstable surface, like a BOSU ball or a wobble board, introduces instability to challenge proprioception and core strength. Progressive overload can also be achieved by increasing the height of the bench or step, requiring greater range of motion and hip flexion.
How to Get a Perfect Ring Planche

The ring planche is a dynamic, full-body strength exercise that demands precise body control and core stability. To achieve a perfect execution, one must understand the fundamental principles of biomechanics involved in this movement. The key to mastering the ring planche lies in developing the necessary muscular endurance and technique through targeted training progressions.
Begin by establishing a strong foundation in basic calisthenics. Focus on building upper body strength with exercises such as pull-ups, chin-ups, dips, and push-ups. These movements will enhance the muscle groups responsible for supporting the planche position, primarily the lats, deltoids, triceps, and pectorals. Additionally, prioritize core strengthening through planks, leg raises, and Russian twists to develop the stabilizing muscles that maintain proper alignment during the exercise.
Flexibility plays a crucial role in executing the ring planche effectively. Stretch regularly to improve shoulder mobility and hip hinge, which are essential for maintaining an efficient body position. Incorporate dynamic stretches before training sessions and static holds post-workout to optimize range of motion.
The progression to the ring planche should be gradual, starting with simpler variations that build foundational skills. Begin with bodyweight planche drills on the ground, focusing on maintaining a straight line from head to heels while engaging the core and scapular stabilizers. Transition to wall planches to reinforce technique and control without the added complexity of balancing in mid-air.
As proficiency increases, practice planche holds on parallel bars or rings, progressively reducing support until executing the movement independently. Emphasize maintaining a tight, stable core throughout the exercise to prevent sagging or excessive rotation. Breath control is also vital; exhale as you lift into the position and inhale as you lower back down to maintain rhythm and stability.
Incorporate specific drills to refine technique, such as planche push-ups and lateral slides, which enhance shoulder stability and hip mobility. Regularly assess form through video analysis or a spotter’s feedback to identify areas for improvement. Consistency is key; dedicate several days weekly to targeted training sessions that combine strength, flexibility, and technique work.
Prioritize rest and recovery to prevent overtraining and injury. Listen to your body and adjust training volume as needed. With persistent effort and adherence to proper progression, one can achieve a perfect ring planche through a combination of strength, control, and precision.
Tips for a Clean Ring Planche
For beginners aiming to master the ring planche, a clean execution is essential to ensure proper form and prevent injury. The following sequence outlines the typical progression to help you build the necessary strength and technique for a successful ring planche.
Ring Support: Begin by developing a strong foundation in ring support. Sit on the ground with rings at shoulder width. Engage your core, glutes, and quads to lift yourself off the floor, keeping your shoulders directly over your wrists. Maintain this position, focusing on pressing your hands into the rings and keeping your body in a straight line.
Tuck Planche: Once you’re comfortable holding ring support, progress to the tuck planche. Bend your knees, bringing them towards your chest while maintaining a tight core and glutes. Keep your shoulders directly over your wrists as you lift your legs off the ground. Lower yourself back down with control, focusing on maintaining proper form throughout the movement.
Straddle Planche: After mastering the tuck planche, move on to the straddle planche. Spread your legs wide apart while keeping your core engaged and shoulders directly over your wrists. Lift one leg off the ground for balance, then lift the other leg as you extend both arms straight. Lower yourself back down with control, keeping your body in a straight line.
Kick-up Planche: The kick-up planche is the next progression and involves kicking your legs up into a planche position from a push-up starting point. Begin in a deep squat with rings at shoulder width. Lower yourself into a push-up, then engage your core and quads to explosively kick your legs up as you press into the rings. Maintain a tight body and keep your shoulders directly over your wrists as you hold the position momentarily before lowering back down with control.
Planche Push-ups: Once you’ve mastered the kick-up planche, it’s time to add the push-up element. Begin in a planche position with hands shoulder-width apart and feet hip-width apart. Lower your body as if performing a push-up, keeping your elbows close to your sides and your core engaged. Push yourself back up to the starting position with control before repeating.
Planche Leans: For added challenge and to develop the necessary strength and balance for a clean ring planche, practice planche leans. Begin in a planche position, then lean forward slightly while maintaining a tight core and glutes. Keep your shoulders directly over your wrists as you lean, then return to the starting position with control. Repeat this exercise several times before progressing to more advanced techniques.
Planche Transitions: To finish mastering the ring planche, practice transitions between different variations, such as straddle planche to tuck planche or tuck planche to straddle planche. Focus on maintaining proper form throughout each transition, ensuring a clean and controlled movement. With consistent practice, you’ll be well on your way to a successful ring planche execution.

How to Do a Perfect Ring Straddle Planche
Begin by focusing on building upper-body strength, as the Ring Straddle Planche primarily engages the shoulders, triceps, core, and back muscles. Push-ups are an excellent starting point; they strengthen the chest, shoulders, and triceps while improving shoulder stability. For additional isolation of the shoulder joints, incorporate exercises like push-up variations (such as diamond or incline push-ups) to enhance rotator cuff strength. Plank holds and side planks help develop core endurance and stabilization, crucial for maintaining proper form during the exercise.
Flexibility is another key component of executing a perfect Ring Straddle Planche. The movement requires significant shoulder mobility, as well as hip and wrist flexibility. Beginners should incorporate dynamic stretching routines that target these areas, focusing on controlled movements to avoid injury. Incorporate exercises like arm circles, shoulder rolls, and scapular retraction drills to improve joint mobility. For the hips and wrists, try gentle stretches such as hip openers and wrist rotations to enhance range of motion.
Balance and body control are equally important for this advanced skill. Begin by practicing basic planche holds to build endurance and develop a sense of equilibrium. As proficiency increases, transition into single-ring straddle planche drills, where one foot is placed on each ring while maintaining a planche position. This progression helps acclimate the body to the unique biomechanics of the movement and builds confidence in balancing over two unstable surfaces.
To further refine technique, incorporate drills that focus on controlled transitions between positions. Start with single-ring straddle planches and gradually introduce lateral movements or small jumps between rings to simulate the dynamic nature of the full exercise. These drills enhance neuromuscular coordination and improve proprioception, allowing for smoother execution once the full skill is attempted.
Prioritize consistency in practice and listen to your body’s needs for rest and recovery. Incorporate active recovery techniques such as yoga or foam rolling to alleviate muscle tension and prevent injury. By systematically building strength, flexibility, balance, and technique through targeted drills, beginners can progressively master the Ring Straddle Planche, unlocking a new level of athletic achievement.
Ring Planche Progression Guide
Technique in the practice of ring planche progression typically unfolds through a series of incremental adaptations, each building upon the stability and strength required for advanced mastery. Initially, beginners often approach the rings with a mindset focused on maintaining balance without fully grasping the nuances of body alignment. Their movements are often erratic or overly reliant on upper body strength alone, lacking the subtle control necessary to transition smoothly between positions. As practice progresses, practitioners begin to integrate foundational techniques that emphasize core engagement and controlled breathing. These early stages involve mastering the basic planche hold, where the weight is distributed evenly across both hands, with fingers locked into place to maximize grip strength.
Progression hinges on developing precision in body positioning. The shoulders must remain externally rotated, allowing the scapulae to depress and retract, creating a stable platform for the upper body. Elbows should be tucked close to the torso, reducing strain and enhancing force transfer from the arms through the shoulders. The core is engaged continuously, drawing the belly button inward to stabilize the pelvis and spine. This activation creates a rigid line of tension running from the heels to the crown of the head, crucial for maintaining equilibrium during sustained holds.
Beginners often struggle with the initial stages due to weak grip strength or lack of posterior shoulder mobility. To address these challenges, practitioners may incorporate supplementary exercises such as dead hangs on parallel bars or inverted rows using a suspension trainer. These activities help build forearm endurance and improve scapular depression range of motion, both foundational elements for advanced ring work. As grip strength improves, the focus shifts to refining hand placement and finger positioning within the rings. Proper finger arching ensures optimal weight distribution across the palms while preventing undue stress on specific joints or tendons.
Progression also involves incremental increases in hold duration, starting with short practice sessions that gradually extend over time. Practitioners must learn to recognize signs of fatigue early and implement rest periods strategically to avoid injury. Mental focus becomes as important as physical strength; the ability to maintain concentration despite discomfort is essential for sustaining proper technique during extended holds. This mental discipline often develops alongside physical capability, creating a synergistic relationship between mind and body that enables advanced progressions.
Advanced stages involve manipulating body position to achieve various intermediate holds like the straddle planche or L-sit variations, each requiring precise control of pelvic tilt and shoulder elevation. Practitioners must constantly refine their technique to adapt to changing weight distributions as they progress through more challenging positions. Mental preparedness becomes even more critical during these phases, where practitioners learn to manage discomfort and push beyond perceived limits without compromising form.
Effective technique progression in ring planche work depends on a holistic approach that integrates physical conditioning with mental fortitude. Practitioners must develop awareness of their body’s capabilities and limitations while maintaining a commitment to safe training practices. This balance between challenge and safety enables continuous improvement without risking injury or setbacks. As each technique mastery is achieved, it serves as a stepping stone toward more complex movements, creating a cumulative effect that results in sustained progress over time.
Ring Planche Tutorial for Beginners

The ring planché, a hallmark of impressive bodyweight strength and control, represents a solid entry point into the world of advanced calisthenics. A successful progression often starts with solid foundational strength; a good baseline includes comfortable pull-ups, reliable dips, and a decent pistol squat or single-leg squat endurance. These movements highlight core stability and shoulder girdle mobility, both crucial for mastering the planché’s unique demands. The mathematical model underpinning tip quantification here generally involves a force balance analysis considering bodyweight (a constant), lever arm length (easily measured), and the resultant vector of ring pull forces – this vector’s angle relative to vertical becomes a key “tip angle” parameter tracked over time for progression assessment.
A good starting point is often the Ring Dips, which builds strength and gets the body used to the slightly different feel of the rings compared to parallel bars. This drill emphasizes pushing power with the core engaged to maintain a relatively straight line from head to heels. Next, move onto the Ring Scull – this great for shoulder mobility and good control in the ring environment. Then try the Tuck Planche, where the knees are tucked towards the chest, making it easier to hold the bodyweight. The key here is keeping the core tight so the hips don’t sag too much. This often involves a focus on engaging the lower transverse abdominal muscle group.
The next progression typically sees a move to the Knee Tuck Planche, with legs slightly extended from the tucked position – this increases the lever arm and thus the degree of difficulty. Here, paying attention to scapular depression is key; allowing the shoulders to blade up here tends to leak power and make the hold harder than it needs to be. Many beginners find a good visual cue to be focusing on pressing their mid-back into the rings. Another useful drill is the One Legged Planche, which helps build stability and core control.
The full Ring Planché requires excellent shoulder girdle mobility, allowing for optimal lever arm positioning. Think of the body as an inverted pendulum – the closer the center of mass is to the line between the two ring points, the easier it becomes. This also means that good core bracing can make a surprisingly big difference in how easy or hard a planché feels! A simple way to quantify this for tracking progress involves measuring the distance from the top of the head to a vertical line – aiming for a smaller distance shows a generally more efficient body position.
