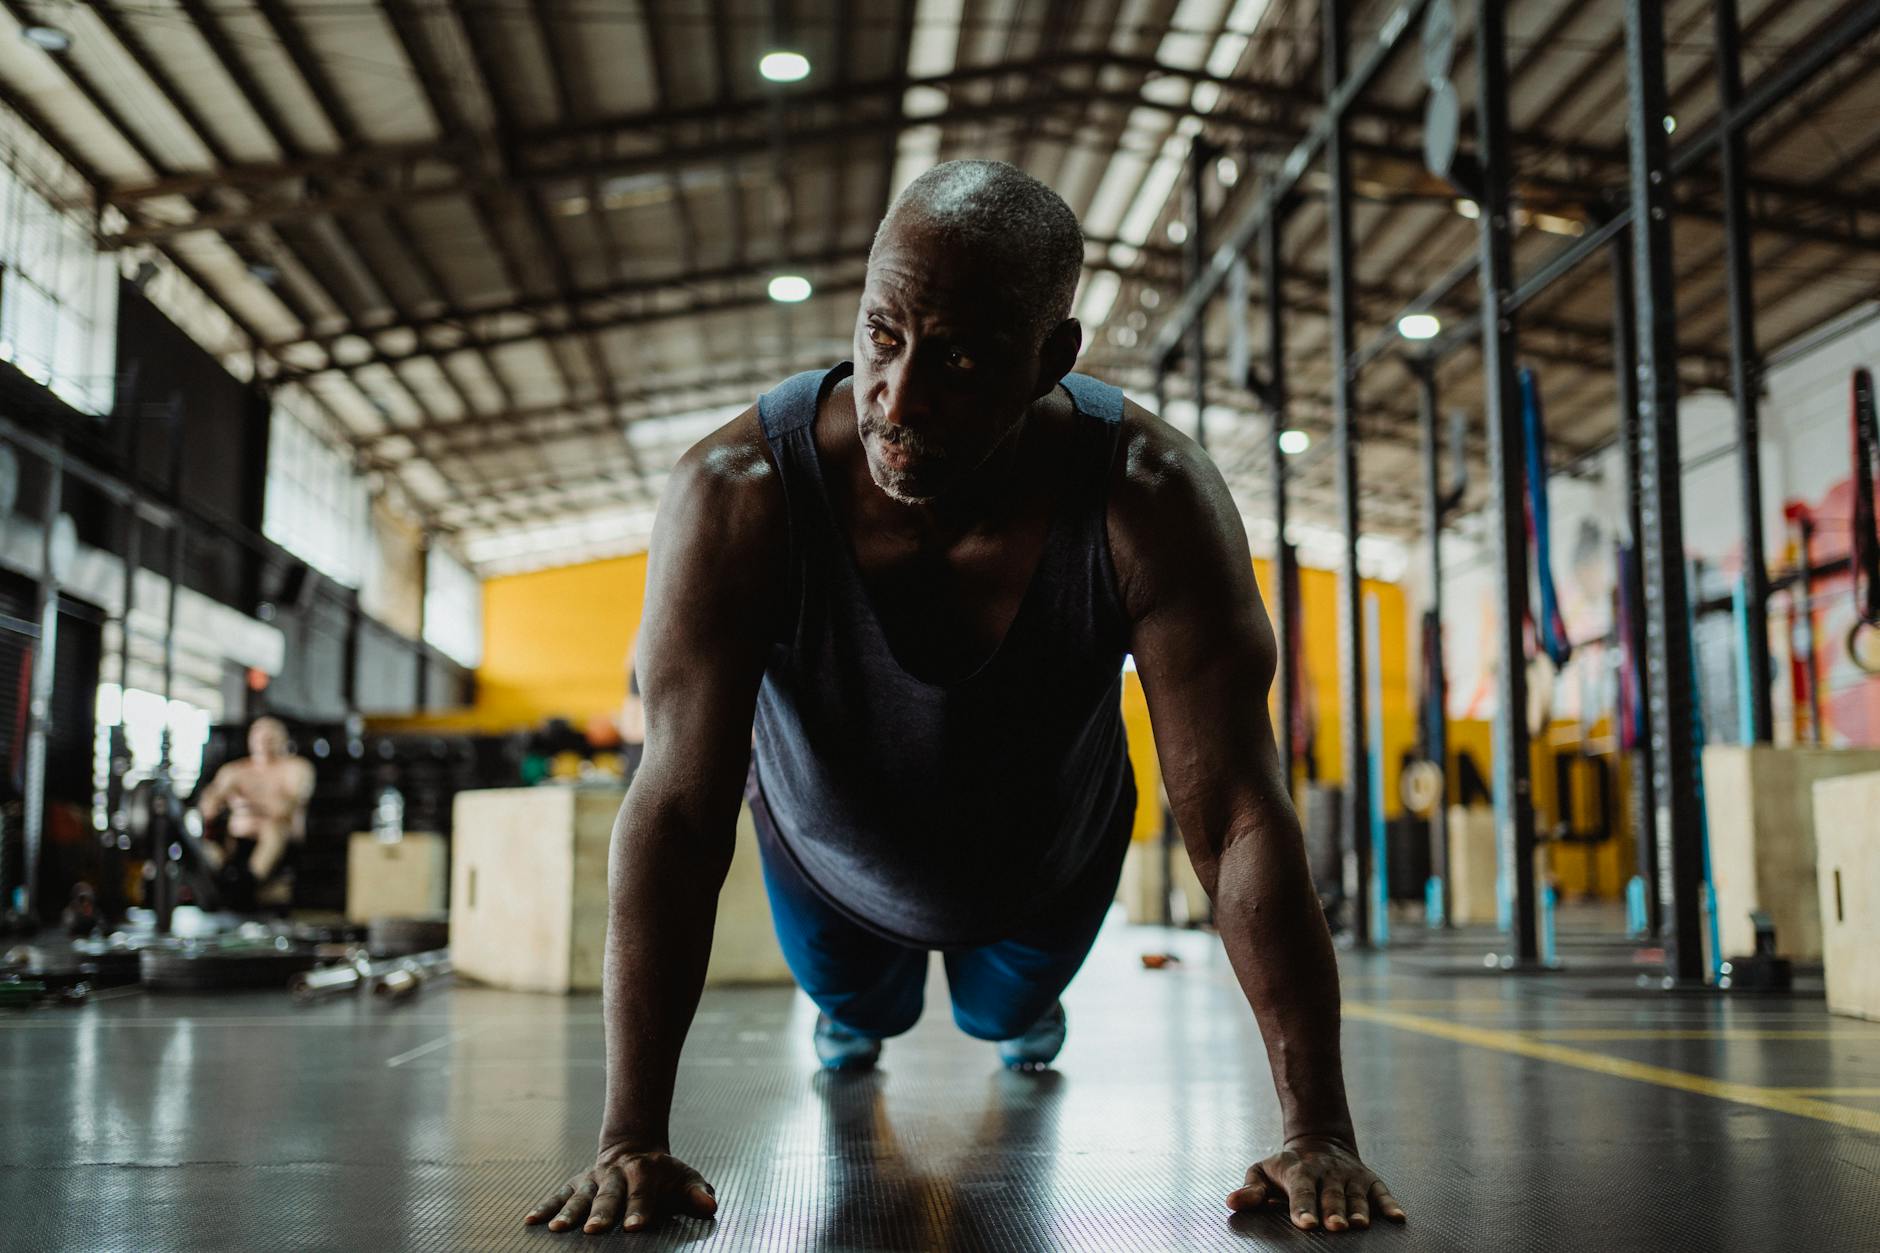
Achieving perfect one-arm push-ups requires a systematic approach to troubleshooting and progression. Begin by assessing your current strength, flexibility, and body control. One-arm push-ups demand a high level of core stability, shoulder mobility, and tricep strength. If you struggle with these elements, focus on building foundational skills before advancing.
Evaluate your form during standard push-ups to identify any compensations or imbalances. Ensure your body remains in a straight line from head to heels, engaging the core to prevent hip sagging or hiking. Poor form can lead to injury and hinder progression. If you consistently maintain proper alignment, transition to one-arm push-ups with controlled movements, prioritizing quality over quantity.
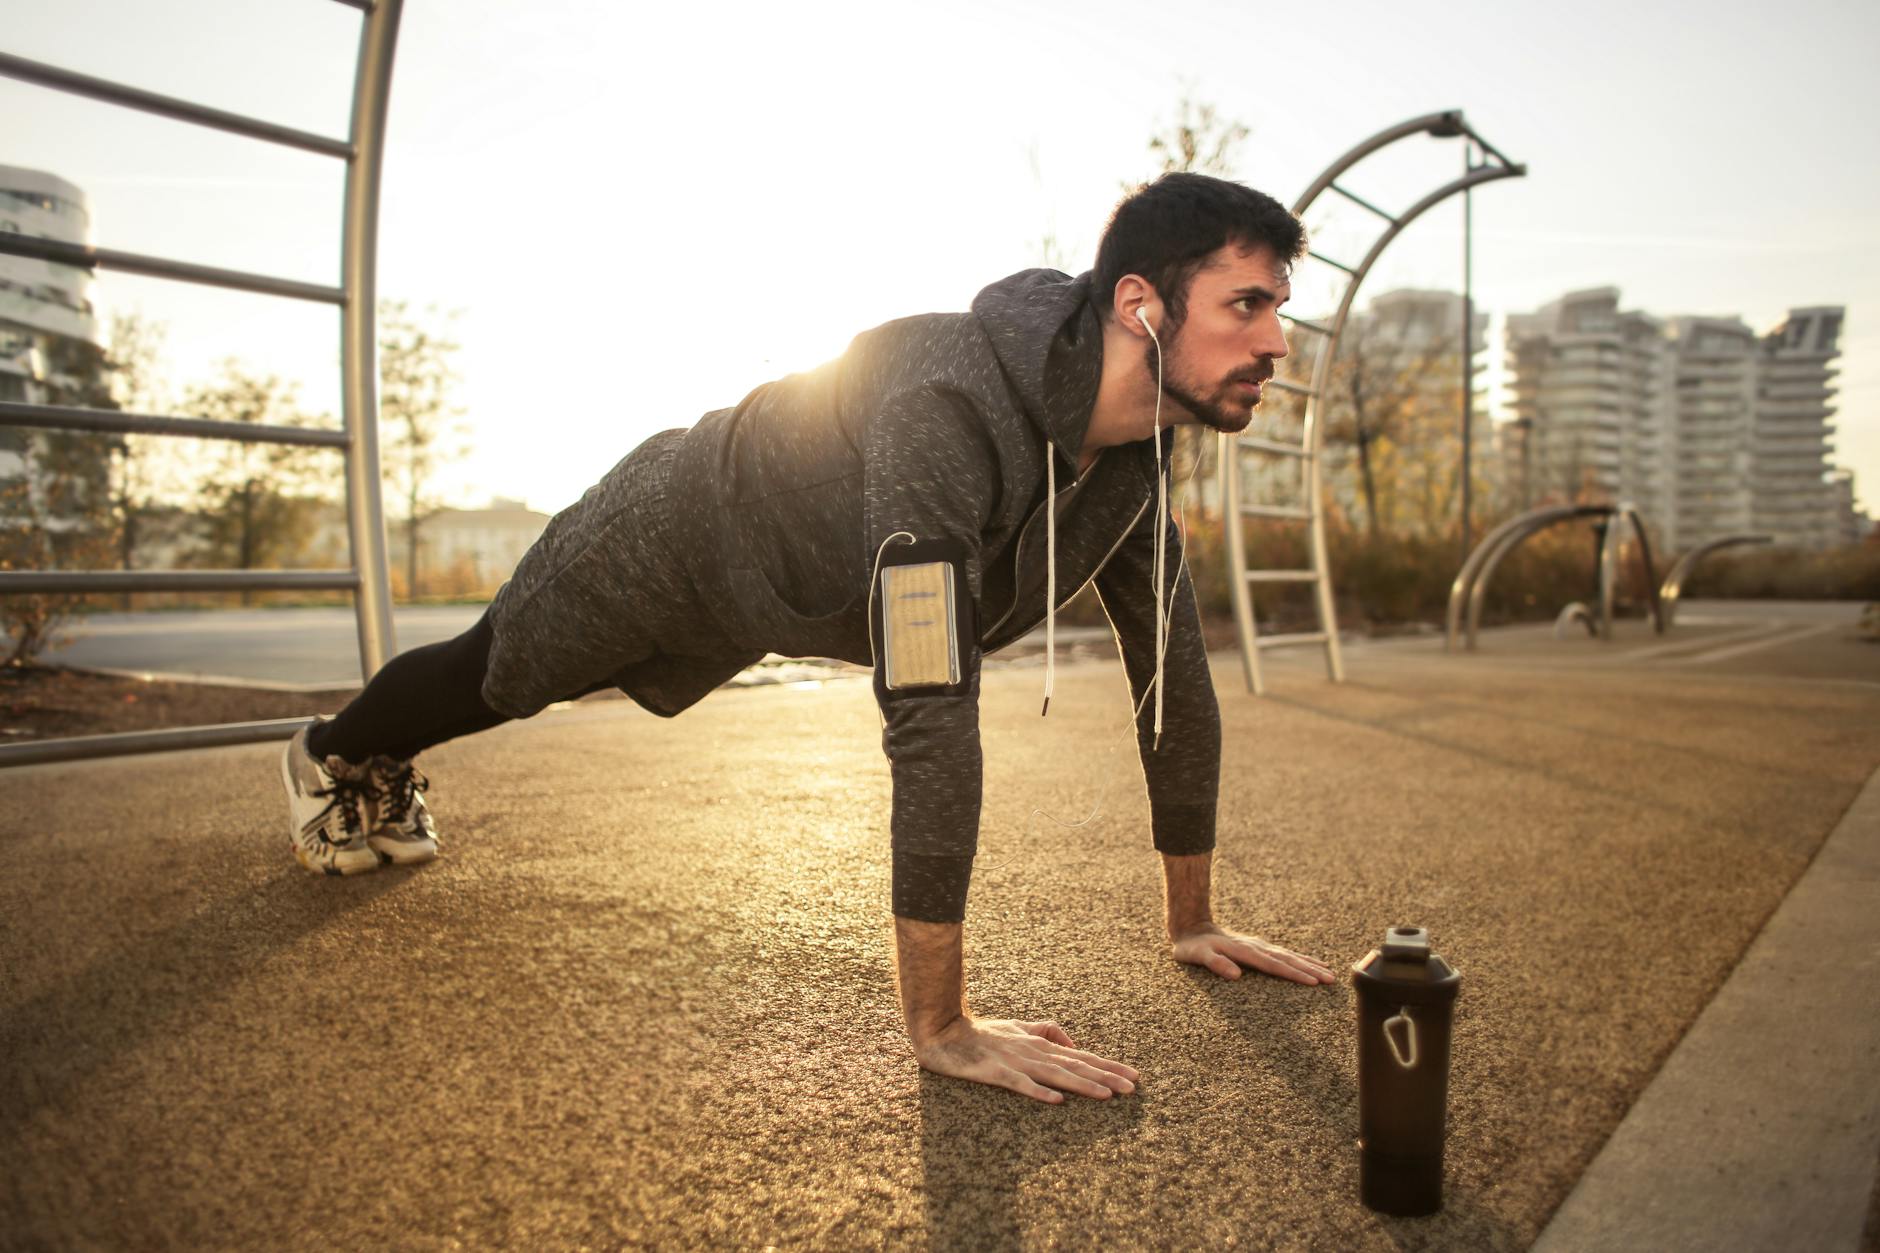
For those new to one-arm push-ups, start with partial reps or assisted variations. Use a bench or wall for support to build confidence and muscle memory. Gradually reduce assistance as strength improves. Incorporate exercises targeting the shoulders, such as lateral raises and rotator cuff strengthening, to enhance stability during one-arm push-ups.
Flexibility plays a crucial role in maintaining proper form. Dynamic stretches and mobility drills for the chest, hips, and shoulders can alleviate tension and improve range of motion. Incorporate these into your warm-up routine before attempting one-arm push-ups. Additionally, practice planks and hip bridges to strengthen the core and glutes, which stabilize the body during the exercise.
If progress stalls, reassess your training program. Ensure a balanced approach with adequate rest and recovery. Overtraining can lead to fatigue and decreased performance. Consider varying intensity and volume to stimulate continuous improvement. Incorporate strength training for the triceps, such as close-grip bench presses and dips, to support one-arm push-up execution.
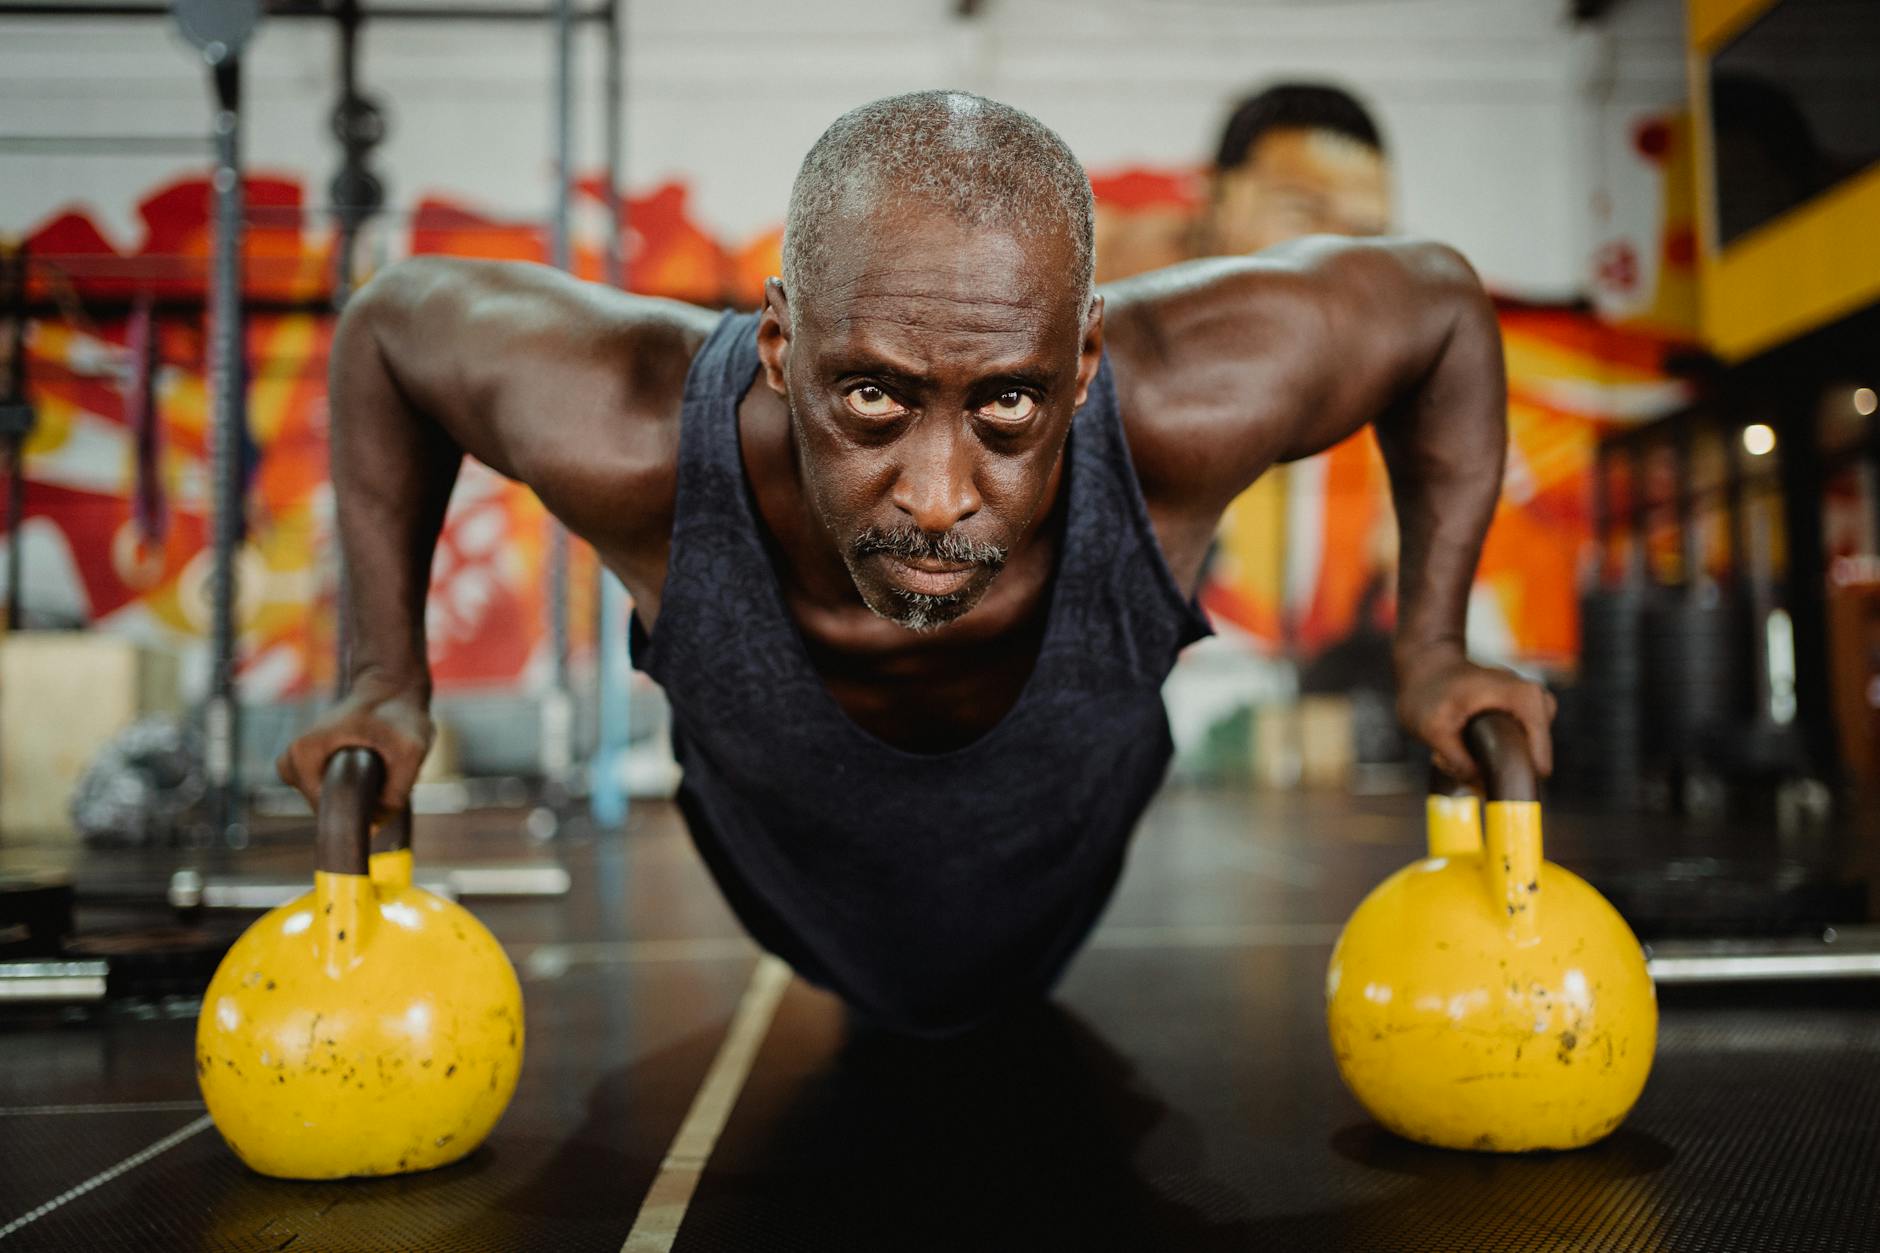
Visualization and mindfulness are valuable tools for troubleshooting technique issues. Record yourself performing one-arm push-ups to identify flaws in form or movement patterns. Focus on maintaining a steady breath throughout the exercise, avoiding sudden jerks or collapses. Practice slow, controlled repetitions to emphasize muscle engagement and control.
For advanced progression, explore variations such as one-arm push-ups with pauses at the top or bottom, or incorporating dynamic movements like clapping. These challenges enhance strength and coordination. However, prioritize proper form over complexity to avoid injury. Consistency is key; dedicate specific days each week to one-arm push-up practice, gradually increasing reps or sets as proficiency grows.
How to Do a Perfect Push-Up
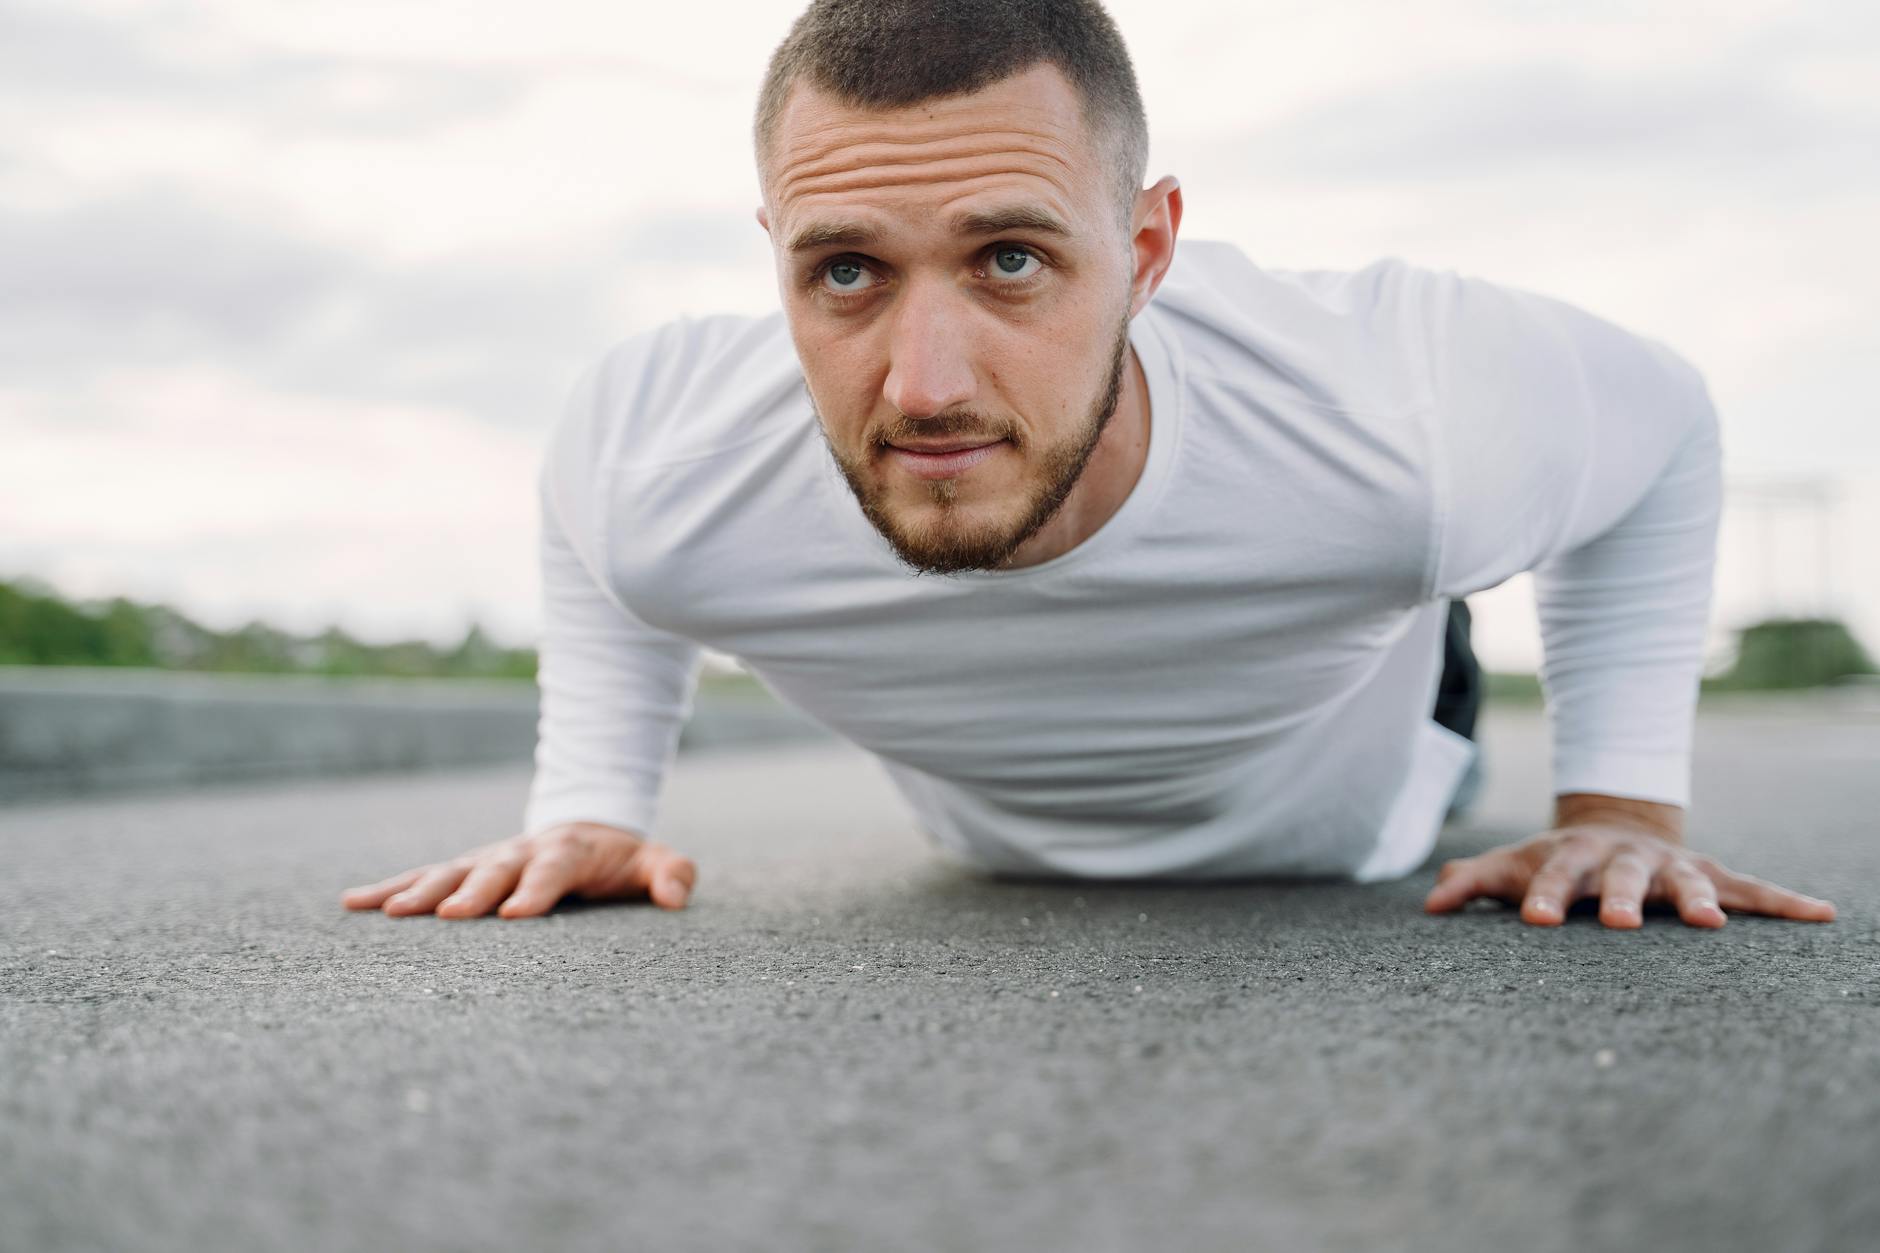
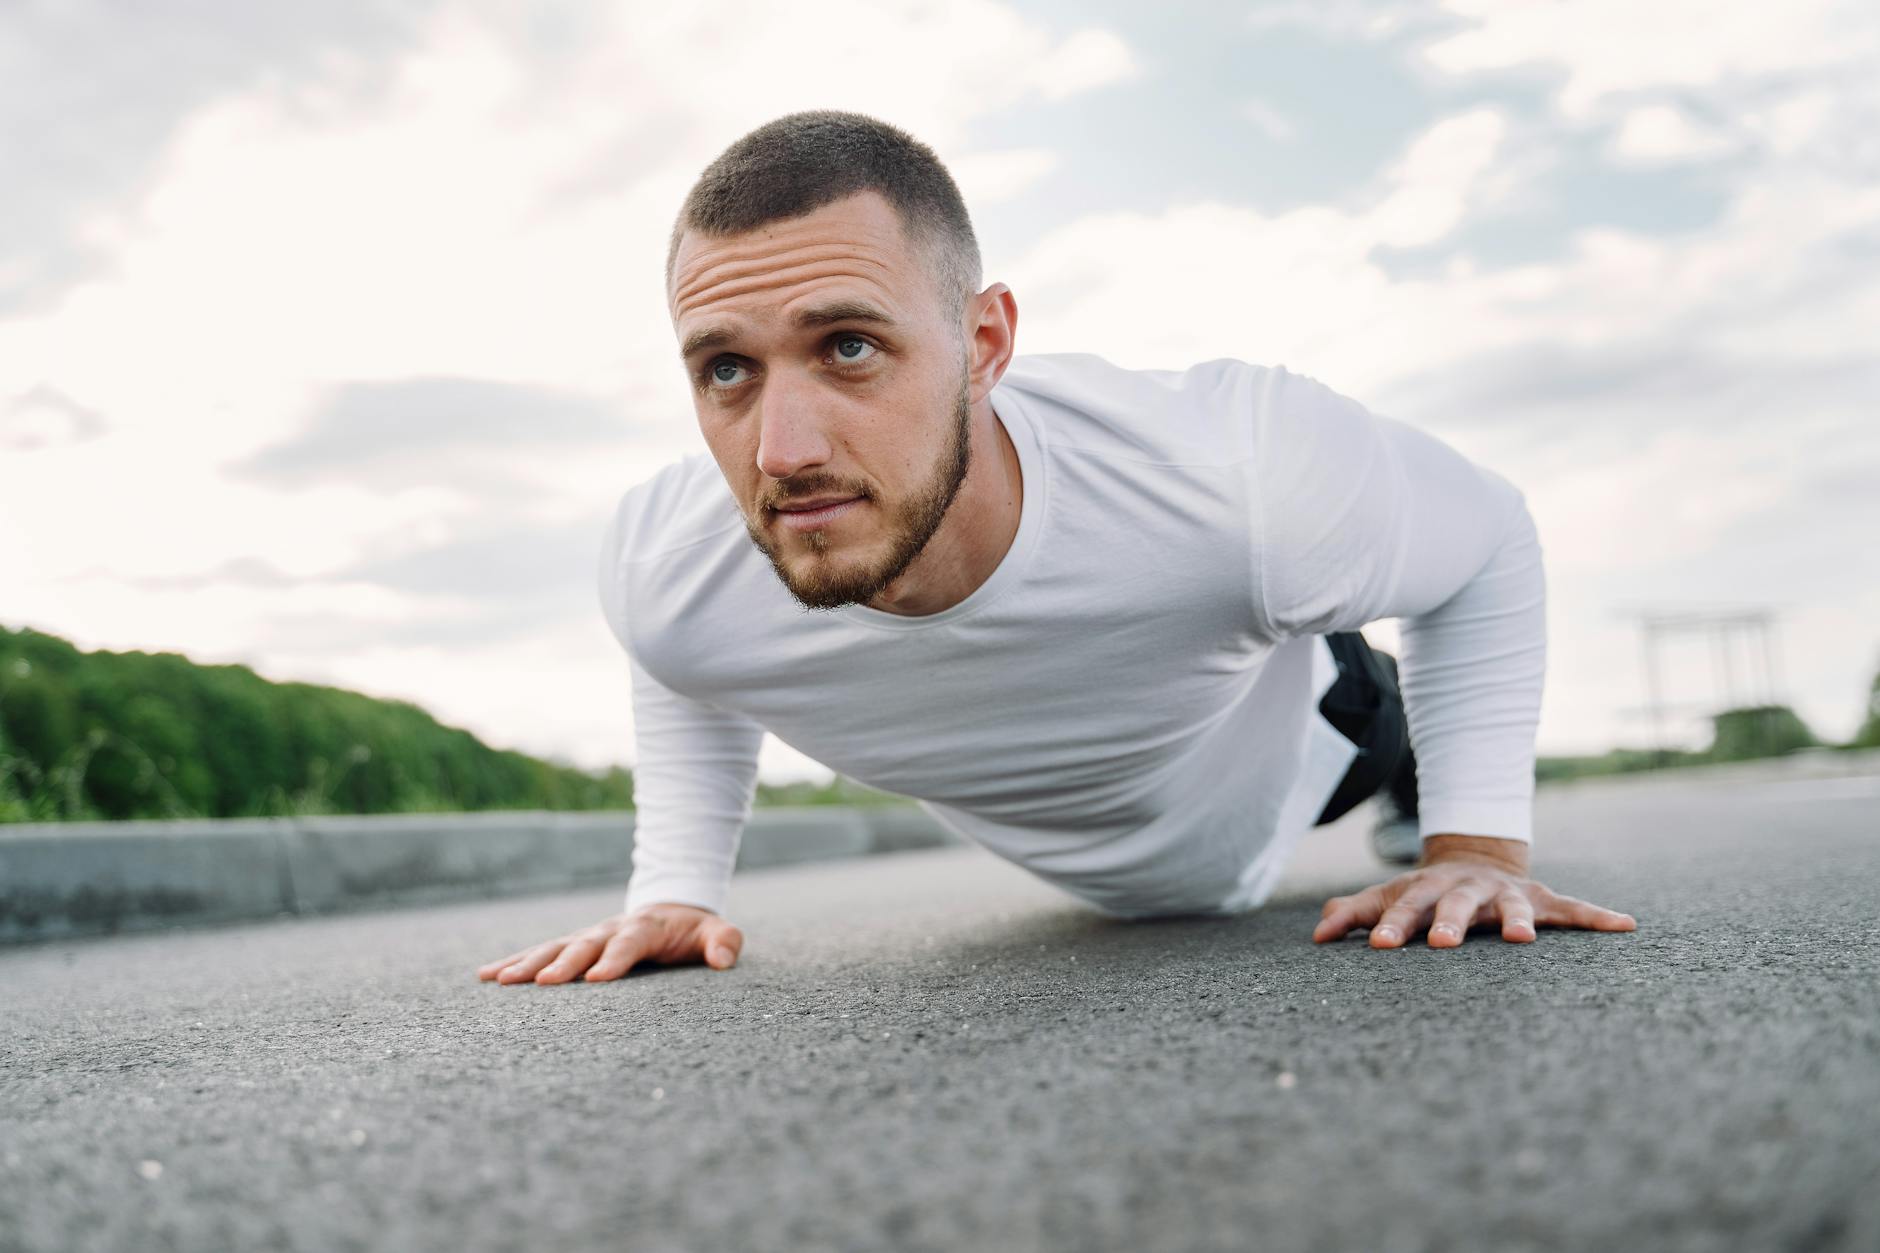
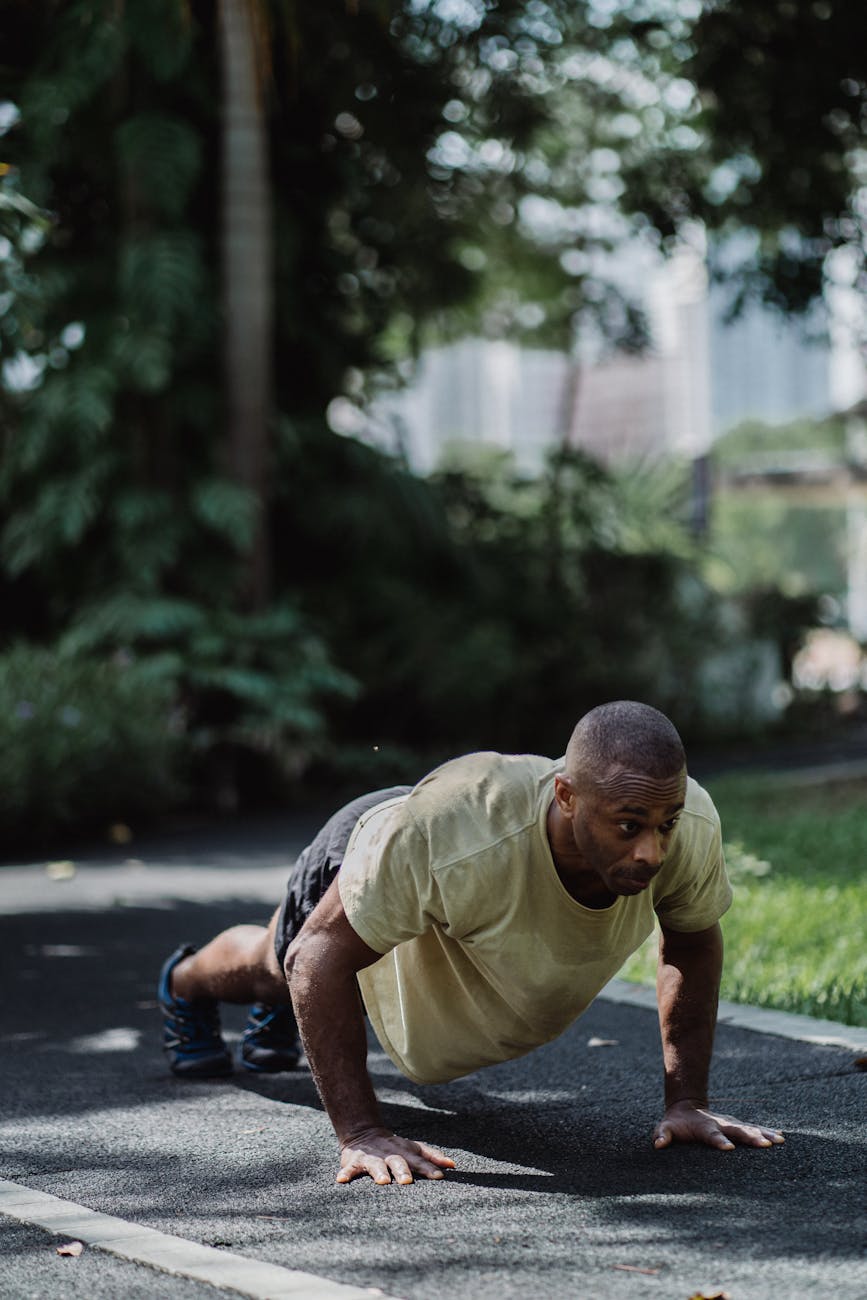
Performing a perfect push-up requires precise body alignment, controlled movement, and consistent practice to enhance strength and technique. To achieve this, begin by assuming the plank position with hands placed slightly wider than shoulder-width apart, elbows aligned beneath shoulders, and feet hip-distance apart if performing a standard push-up or together for a more advanced variation. Engage the core muscles to maintain a straight line from head to heels, avoiding sagging hips or lifting the pelvis. Inhale as you lower your body by bending at the elbows, allowing the chest to descend toward the floor until it is approximately one inch above the surface. Ensure elbows flare out to the sides, not inward, to stabilize the shoulder joints and prevent injury. Exhale as you press back up to the starting position, fully extending the arms while keeping the body in a straight line.
To progress from basic push-ups to more challenging variations, incorporate handstand push-ups, which dynamically engage the arms and upper body. Begin by practicing handstand push-ups against a wall or stable surface for safety. Assume a handstand position with hands shoulder-width apart, pressing into the wall or support. Lower the body by bending the elbows while maintaining control, ensuring the shoulders move parallel to the supporting surface. As strength increases, attempt free handstand push-ups on a sturdy platform or mat, focusing on controlled descent and ascent. This variation demands significant upper body strength, particularly in the triceps and shoulders, while also engaging the core for stability.
To maximize progress, focus on maintaining proper form throughout each exercise to prevent injury and ensure effectiveness. Incorporate rest days to allow muscles to recover and adapt, gradually increasing intensity through heavier weights, faster tempo, or more complex variations. By integrating push-ups, handstand push-ups, and pull-ups into a well-structured routine, you can dynamically engage the arms and upper body, achieving a balanced and functional strength regimen.
How to Do a Perfect Archer Push-Up
The archer push-up is a dynamic and challenging variation of the traditional push-up that demands strength, control, and precision. To achieve a perfect form in this exercise, it is crucial to understand its mechanics and progression. Begin by assuming a standard plank position with hands shoulder-width apart, elbows aligned under the shoulders, and the body forming a straight line from head to heels. The key historical milestone in handstand evolution dates back to ancient civilizations, where yoga practitioners first mastered balancing on their hands, laying the groundwork for modern handstand techniques. This foundational knowledge is essential as it informs the development of the necessary core and upper body strength required for advanced push-up variations like the archer push-up.
To execute the archer push-up, initiate the movement by lifting one leg off the floor while maintaining a stable plank position with the other leg anchored. The lifted leg should be extended straight back, parallel to the ground, creating an archer’s pose, hence the name. As you descend into a push-up, focus on keeping the core engaged and the body in a straight line. The arching leg serves as a counterbalance, challenging the stabilizing muscles of the core and shoulders. This dynamic integration of movement and balance sets the archer push-up apart from traditional push-ups, offering a more comprehensive workout.
Proper execution requires attention to detail in both the descent and ascent phases. As you lower your body toward the ground, ensure that elbows flare out to the sides, maintaining a 45-degree angle relative to the torso. This movement engages the triceps and shoulder stabilizers effectively. Upon reaching the lowest point of the push-up, explosively drive through the hands to return to the plank position while simultaneously lowering the lifted leg back to the floor. The simultaneous motion of the body returning to stability and the leg resuming its position demands coordination and power.
The archer push-up is an exemplary exercise for developing upper body strength, core stability, and dynamic flexibility. By drawing upon historical insights into handstand evolution, practitioners can better appreciate the complexity and benefits of this advanced push-up variation. Through consistent practice and progressive challenges, one can master the archer push-up, unlocking new levels of physical prowess and technique.
How to Do a Perfect One-Arm Chin-Up
To transition into one-arm chin-ups, start by practicing chin-ups with a single arm while holding onto a support structure, such as a bar or wall, for stability. This intermediate step helps acclimate the body to the imbalance and muscle activation required for the single-arm movement. As comfort and control improve, gradually reduce reliance on the support until it is no longer needed.
Key factors in executing a perfect one-arm chin-up include maintaining a neutral wrist position, engaging the core muscles for stability, and ensuring the shoulder remains stable throughout the movement. The elbow should be directed backward during the lift to maximize latissimus dorsi activation while minimizing strain on the shoulder joint. Breath control is also crucial; exhale as you pull up and inhale as you lower back down to maintain proper spinal alignment and reduce pressure on the cervical spine.
To further progress, incorporate variations such as one-arm chin-ups with a pause at the top or slower eccentric phases to enhance muscle strength and control. Additionally, practice handstand push-ups and other inverted exercises to build the necessary shoulder and core stability required for advanced chin-up variations. Consistency and patience are essential; regular practice with proper technique will gradually lead to increased proficiency and mastery of the one-arm chin-up.

How to Do a Perfect Clap Push-Up
To achieve a perfect clap push-up, begin by understanding the foundational elements that contribute to its execution. The clap push-up is an advanced variation of the traditional push-up, incorporating a dynamic handstand pull move followed by a clapping motion with the legs. This exercise demands exceptional core strength, explosive power in the arms and shoulders, and precise body control. To progress toward mastering this skill, it is crucial to build a strong foundation through targeted training that emphasizes strength, flexibility, and technique.
Flexibility plays a pivotal role in executing clap push-ups with precision. The range of motion required to transition from a handstand pull into a push-up demands mobility in the shoulders, hips, and wrists. Begin by stretching the chest, shoulders, and hips regularly to enhance flexibility. Incorporate dynamic stretches before training sessions to prepare the muscles for explosive movements. Practicing yoga or Pilates can also contribute to improved flexibility and body awareness, which are beneficial for mastering complex push-up variations.
To progress toward clap push-ups, it is essential to familiarize yourself with intermediate push-up variations that build upon your current skill level. Handstand pull-offs and handstand push-ups are fundamental movements that lay the groundwork for clap push-ups. Begin by perfecting these skills in a controlled manner, focusing on maintaining proper form and control throughout each repetition. Gradually increase the difficulty by attempting these exercises with a partner or using assistive equipment such as resistance bands to enhance explosiveness.
Once you have established proficiency in handstand pull-offs and push-ups, it is time to integrate the clapping motion into your training. Begin by practicing the handstand pull followed by an immediate transition into a push-up without the clap. Focus on maintaining a continuous flow between the movements, emphasizing control and power generation from the core. As you become more comfortable with this sequence, introduce the clapping motion by swinging the legs upward as you transition from the handstand pull to the push-up phase. Initially, prioritize form over speed, ensuring that the clap is synchronized with the movement of the arms and shoulders.
Incorporating plyometric exercises into your training routine can further enhance the explosive power required for clap push-ups. Box jumps, medicine ball slams, and clap jacks are effective methods for improving lower body strength and coordination, which translate to greater power output during push-up variations. These exercises not only condition the muscles but also improve neuromuscular efficiency, enabling more dynamic movements such as the clapping motion in clap push-ups.
To monitor progress and refine technique, consider recording your practice sessions or seeking feedback from a qualified instructor. Analyzing video footage can help identify areas for improvement, such as hip positioning, arm angle, and leg synchronization during the clap. Regularly adjusting your approach based on these insights will accelerate your development toward mastering clap push-ups.
How to Do a Perfect Push-Up
In the realm of calisthenics and bodyweight exercises, few movements encapsulate strength, control, and versatility quite like the push-up. The humble push-up, with its seemingly simple formula, is a cornerstone for building upper body mass and power. This article will delve into the intricacies of performing a perfect push-up, elucidating the techniques to ensure optimal results.
Let us discuss the prerequisites for executing a push-up effectively. A solid foundation is essential, with hands shoulder-width apart and fingers pointing forward. For those seeking an added challenge, a slightly narrower grip targets the triceps more intensely. The body should be in a straight line from head to heels, with feet hip-width apart and toes curled back for maximum surface contact.
The starting position is crucial. Lower yourself to the floor, placing your hands on the ground, ensuring they are directly beneath your shoulders. Engage your core muscles to maintain a rigid torso throughout the movement. Pressing your hands into the floor, lift your body off the ground, keeping your back straight and glutes engaged.
Now, let us delve into the mechanics of the push-up itself. As you lower yourself towards the ground, keep your elbows close to your sides, forming a 45-degree angle with your body. The descent should be controlled and fluid, with a slight pause at the bottom before pushing back up. Exhale as you press yourself back to the starting position, ensuring your shoulders do not hunch forward or arch backward.
The benefits of mastering this fundamental exercise are manifold. Push-ups bolster upper body strength, specifically targeting the chest, shoulders, and triceps. They also promote core stability and functional fitness, as the engagement of your abs helps maintain a solid base throughout the movement. Moreover, push-ups can be modified to suit various skill levels, allowing for progression and continuous improvement.
As one progresses towards advanced variations of the push-up, such as the diamond or decline push-up, the foundation laid through consistent practice becomes invaluable. These more intricate movements not only challenge the muscles involved but also refine technique and control, ultimately leading to a stronger, more capable body.
How to Do a Perfect Handstand Push-Up
Performing a perfect handstand push-up requires a combination of strength, balance, and technique. To achieve this complex movement effectively, it is essential to follow a structured approach that emphasizes gradual progression and proper form. Begin by establishing a solid foundation in basic push-ups and handstands, as these exercises build the necessary muscle groups and coordination for the advanced maneuver.
Focus on mastering standard push-ups. Ensure that your body forms a straight line from head to heels, engaging your core muscles to maintain stability. Push through your palms, lowering your chest toward the ground until it is just above the floor before explosively returning to the starting position. Repeat this motion for several sets, gradually increasing the number of repetitions as your strength improves. This foundational work will enhance your upper body strength and familiarize you with the mechanics of a push-up.
Simultaneously, work on building handstand proficiency. Start by practicing against a wall to develop balance and control. Place your hands shoulder-width apart on the wall, lift one leg until it is perpendicular to the ground, then follow with the other leg. Maintain this position for as long as possible, focusing on keeping your body straight and your weight evenly distributed. Over time, progress to freestanding handstands using a spotter or mirror for guidance. This will sharpen your proprioception and prepare you for the dynamic nature of the handstand push-up.
Once you feel confident in both push-ups and handstands, integrate the two movements into a preparatory exercise. Begin in a handstand position with your heels parallel to the ground. Perform a controlled push-up by bending your elbows to lower your body toward the floor, then press back up to the starting position. Initially, this may be challenging, so consider using a spotter or practicing near a mat for safety. As you gain confidence, aim to maintain a plank position throughout the movement, avoiding any sagging or arching of the spine.
Consistency is key in progressing toward a perfect handstand push-up. Dedicate time each week to practice and gradually increase the difficulty of your exercises. Consider incorporating supplementary workouts, such as planks, dips, or yoga poses that strengthen the core and improve flexibility. As your strength and technique improve, you will be able to execute the handstand push-up with greater ease and precision.
Prioritize safety and progression. Listen to your body and adjust your training accordingly, avoid pushing beyond your limits, as this can lead to injury. Seek feedback from a qualified instructor or coach to refine your form and address any potential issues. With patience, dedication, and a focus on proper technique, you will successfully master the handstand push-up, achieving a testament to your physical prowess and perseverance.
How to Do a Perfect One-Arm Pull-Up
Progress in physical fitness, particularly in exercises like one-arm pull-ups, can be quantified and modeled mathematically through various metrics. These models help individuals and coaches understand the relationship between training volume, intensity, and performance improvements over time. One fundamental aspect of modeling progress is tracking the number of repetitions (reps) performed, which serves as a direct measure of strength and endurance. By analyzing trends in reps across multiple workouts, one can identify periods of improvement or stagnation.
Periodization, a structured approach to training that cycles through phases of high and low intensity, is another mathematical framework used to optimize progress. By quantifying the amount of work done in each phase and adjusting variables such as rest periods and recovery strategies, individuals can maximize their gains while minimizing the risk of injury. Furthermore, mathematical modeling can incorporate biological markers like heart rate variability or muscle activation patterns to provide a more comprehensive understanding of an individual’s progress.
In the context of one-arm pull-ups, progression can be modeled by analyzing the time it takes to complete a set number of reps, known as time under tension. This metric helps identify inefficiencies in technique or muscle imbalances that may hinder performance. Additionally, the rate of perceived exertion (RPE), a subjective measure of effort, can be quantified and used in conjunction with objective data to create personalized training plans.
Advanced models may employ machine learning algorithms to analyze large datasets comprising individual workouts, genetic predispositions, and environmental factors. These algorithms can identify patterns and predict optimal training strategies for specific individuals, enhancing the precision of progress modeling. By integrating these mathematical approaches, athletes and coaches can refine their understanding of how to structure training programs to achieve peak performance in exercises like one-arm pull-ups.
Quantifying progress through mathematical models provides a systematic way to evaluate and enhance fitness outcomes. By continuously monitoring and adjusting variables based on data-driven insights, individuals can ensure steady, sustainable improvements in their physical abilities, ultimately reaching higher levels of proficiency in challenging exercises such as one-arm pull-ups. This evidence-based approach not only optimizes performance but also promotes long-term health and wellness by minimizing the risk of overtraining or injury.
How to Do a Perfect One-Arm Chin-Up
The one-arm chin-up represents a pinnacle of upper-body strength, blending technical precision with raw power. Its execution hinges on integrating foundational strength elements into a cohesive, controlled motion. Beginners must first establish sufficient lat activation through pull-ups to ensure shoulder stability during the single-arm transition. This prerequisite underscores how compound movements like chin-ups interact with isolation exercises, muscles trained in one context inform performance in another. Progression pathways often involve integrating assistance bands or neutral grip variations to progressively reduce mechanical advantage, allowing lifters to adapt their form before attempting unassisted repetitions.
Handstand training, though distinct, shares biomechanical principles with the one-arm chin-up. Both require core stability and coordinated limb control. Practitioners often transition between these movements to reinforce neuromuscular patterns, as they demand comparable shoulder girdle engagement and hand placement precision. This cross-training synergy demonstrates how isolated exercises can synergize within broader fitness paradigms.
Progression typically follows a three-phase model: mastering the two-arm chin-up variant; developing unilateral control through assisted one-arm variations; and finally executing unassisted repetitions. Each phase builds upon previous achievements, with grip width adjustments serving as a critical variable in progression strategy. Wider grips engage more latissimus dorsi fibers, while narrower grips intensify biceps recruitment, a distinction that informs how athletes structure their training blocks.
Strength gains from the one-arm chin-up transfer to numerous athletic endeavors. Olympic weightlifters utilize its explosive power in jerk transitions, while martial artists integrate it into grip strength training for grappling applications. Rock climbers benefit from improved finger and forearm endurance, which complements their vertical progression needs. These cross-domain applications underscore the exercise’s versatility as both a specialized skill and general fitness tool.
The one-arm chin-up also interacts with rehabilitation protocols through its capacity to isolate specific muscle groups without excessive joint stress. Isometric holds at key positions, such as the top or midpoint of the movement, serve as valuable assessment tools for shoulder stability. Rehabilitation professionals often integrate these static holds into recovery routines to reinforce proper movement patterns before reintroducing dynamic repetitions.
The exercise’s technical demands necessitate consistent form monitoring. Common errors include excessive trunk rotation, which compromises lat engagement, or premature arching of the lower back, increasing lumbar strain risk. Advanced athletes may utilize video analysis tools to capture their movement mechanics from multiple angles, enabling precise corrections. This attention to detail transforms what could be a high-risk endeavor into a controlled strength development tool when executed properly.
How to Do a Perfect Ring One-Arm Push-Up
Technique refinement is crucial; ensure the working arm remains locked at the top of the push-up while the opposite elbow drives the descent. Breath control, exhaling during the eccentric phase and inhaling during the concentric, helps maintain tension and stabilize the body. Consistent practice with proper form prevents injury and fosters muscle memory, allowing for smoother transitions to more challenging variations like one-arm push-ups on rings or progressively increasing the number of reps.
Mastering the one-arm push-up demands patience, dedication, and a structured approach that balances strength development with technical precision. By systematically building foundational skills, refining movement mechanics, and gradually increasing challenge, individuals can achieve a perfect ring one-arm push-up through consistent, well-planned progression.
How to Do a Perfect Ring Clap Push-Up
The Ring Clap Push-Up is a dynamic and advanced bodyweight exercise that combines elements of strength, coordination, and explosive power. To execute this movement effectively, one must understand the fundamental mechanics involved in performing a perfect Ring Clap Push-Up. The primary goal is to generate sufficient force from the core and upper body while maintaining full control over the momentum generated during the clap phase.
The process begins with establishing a strong and stable grip on the rings, ensuring that the hands are positioned slightly wider than shoulder-width apart. This grip allows for optimal engagement of the lats, triceps, and forearms, providing a solid foundation for the push-up. The body must be fully extended, with the core tightly engaged to prevent any sagging or unwanted movement in the hips. The feet are tucked under, creating a straight line from head to heels.
The initial phase of the Ring Clap Push-Up involves descending slowly and controlled into a push-up position. As the chest approaches the rings, the elbows flare outwards to engage the pectoral muscles effectively. The descent should be smooth, with the focus on maintaining tension throughout the body. Once in the bottom position, the body must quickly reverse direction, explosively pushing upwards while simultaneously initiating the clap phase.
The clap is executed by rapidly rotating the wrists and releasing one hand from the ring, allowing it to swing downward in a controlled arc. This action generates momentum that propels the body upward. Simultaneously, the legs are drawn up towards the chest, creating additional force through the core and hips. The clapping hand then catches the other hand as it swings back up, ensuring a clean transition into the next repetition.
To achieve a perfect Ring Clap Push-Up, it is crucial to synchronize the timing of the push, clap, and recovery phases seamlessly. This requires a deep understanding of body mechanics and the ability to isolate specific muscle groups effectively. The core serves as the central link between the upper and lower body, transferring power efficiently from the legs to the arms and vice versa.
As one progresses in their Ring Clap Push-Up journey, it is essential to focus on increasing both strength and technique. This can be achieved through targeted strength training exercises that emphasize the muscles responsible for executing the movement, such as the push-ups, dips, and planks. Additionally, practicing the clap phase separately can help improve muscle memory and coordination, ultimately leading to a more fluid and powerful performance.
How to Master the Turkish Get-Up
Mastering the Turkish Get-Up is a comprehensive full-body exercise that enhances strength, balance, and coordination. To achieve proficiency, it is crucial to follow specific guidelines meticulously. Begin by assuming a supine position with your right hand beneath your head and your left arm extended along your body, palm facing up. Your legs should be bent at the knees with feet flat on the ground, approximately hip-width apart.
The initial phase involves lifting your hips off the floor while maintaining contact with your elbow on the opposite side of your head. This requires engaging your core muscles and glutes to stabilize your body. As you lift, extend your left arm towards the ceiling, ensuring it remains straight but not locked at the elbow. The movement should be fluid and controlled, avoiding any jerky motions that could compromise balance.
Once your hips are elevated, shift your weight to your left hand, which will now serve as your primary support point. Simultaneously, extend your right leg upwards, keeping it parallel to the floor. This action demands strong abdominal engagement and hip stability to prevent any tilting or loss of equilibrium. Maintain a neutral spine throughout this phase to protect the lower back.
The next step is to straighten your left arm completely while continuing to support your bodyweight on your left hand. As you do so, rotate your torso slightly, bringing your right hand towards your left knee. This rotation engages the obliques and further enhances core stability. The hand-to-knee movement should be smooth and deliberate, ensuring that the arm does not lose contact with the body or become overly strained.
After completing the hand-to-knee phase, prepare to return to the starting position. Lower your hips back towards the floor while maintaining control over your movements. As you descend, ensure that your right arm remains in contact with the ground and does not detach prematurely. This controlled descent is essential for preventing injury and reinforcing proper form.
To increase the difficulty of the Turkish Get-Up, one can introduce additional weights or perform the exercise on uneven surfaces. Holding a dumbbell or kettlebell in the hand that performs the hand-to-knee movement adds resistance, challenging the muscles further. Performing the exercise on an incline or decline surface increases the demand on balance and stability, pushing the body to adapt and strengthen.
A common point of confusion arises when differentiating between the pull phase and the push phase. The pull refers to the movement where the hand moves towards the knee, engaging the lats and obliques. Conversely, the push involves extending the arm fully while supporting the bodyweight, primarily activating the triceps and deltoids. Clarifying this distinction is crucial for executing each phase effectively and avoiding muscle imbalances.
Consistent practice of the Turkish Get-Up is vital for progression. Begin with a manageable number of repetitions on each side, focusing on form before increasing reps or adding weight. Incorporating variations such as single-leg stands or partial gets can also enhance strength and flexibility. As proficiency improves, the exercise becomes not only a testament to physical prowess but also a tool for holistic body development.
How to Do a Perfect One-Arm Pull-Up
Performing a perfect one-arm pull-up requires strength, balance, and technique. Begin by selecting an appropriately sturdy bar that is at least 24 inches wide to provide stability during the exercise. Ensure the bar is placed slightly wider than shoulder-width apart for better control.
Start with proper grip placement; grasp the bar using an overhand grip with one hand positioned closer to your body and the other further away. This asymmetrical grip allows for a more even distribution of effort between the arms, reducing the likelihood of one arm compensating for the other. Engage your core muscles and gluteal muscles to maintain a stable position throughout the movement.
Initiate the pull-up by pulling your shoulder blades back and down while simultaneously lifting your body weight upwards using the dominant arm. Focus on maintaining a straight line from your shoulders to your hips, avoiding any rocking or swinging motion that could compromise form. As you reach the top of the pull-up, pause briefly to ensure full shoulder engagement before slowly lowering yourself back down to the starting position.
Incorporate mobility work into your routine to enhance shoulder flexibility and rotator cuff strength, which are crucial for maintaining proper form during one-arm pull-ups. Regularly practice planks and hip bridges to strengthen the core and stabilize the body during the exercise. Additionally, consider integrating variations such as one-arm pull-ups with a pause at the top or performing them on a ring dip station to challenge different muscle groups and promote further progression.
How to Do a Perfect Ring One-Arm Push-Up

Firstly, it is crucial to understand the biomechanics of a standard push-up. During a traditional push-up, your body forms a straight line from head to heels as you lower yourself towards the ground by bending at the elbows. The key to an efficient push-up lies in maintaining a tight core and keeping your glutes engaged throughout the movement. Once your chest touches the ground, you push yourself back up to the starting position, repeating the process.
Now, let us explore the modifications required for performing a ring one-arm push-up. This variation introduces several challenges due to the instability provided by the ring or resistance band. The primary muscles involved remain the same, but the instability forces your stabilizing muscles to work harder, leading to an increased training effect.
To begin, assume a starting position with one hand gripping the ring and the other resting on your hip for balance. Make sure that your body forms a straight line from head to heels when viewed from the side. Brace your core and squeeze your glutes to maintain proper alignment.
Engage your shoulder blades by pulling them down and back, creating tension throughout your upper body. As you initiate the push-up, keep your hips stacked directly above your shoulders and press your hand through the ring as if trying to touch the opposite wall. During this phase, focus on keeping your elbow close to your body and your core braced.
As you lower yourself back towards the ground, resist the urge to let your hips drop or allow your elbow to flare out. Instead, maintain a controlled descent while keeping your core engaged and glutes squeezed. When your chest is just above ring level, push yourself back up to the starting position. Repeat this process for several repetitions before switching sides.
The progression of increasing the difficulty of one-arm push-ups can be achieved through various methods. One common approach involves starting with a resistance band and gradually reducing the assistance as your strength improves. Another method is to perform a traditional one-arm push-up on a raised surface, such as a bench or step, before transitioning to the ring or band variation.
How to Master the Turkish Get-Up
Mastering the Turkish Get-Up is a comprehensive exercise that integrates strength, coordination, and balance. It begins with a strong foundation in push-ups, which are fundamental for building upper body strength and stability. Push-ups enhance muscle endurance and power, directly contributing to efficiency in executing complex movements like the Turkish Get-Up. By strengthening the pectoral muscles, triceps, and shoulders, push-ups optimize the force production necessary for transitioning from a lying position to an upright stance.
Pull exercises, such as chin-ups or rows, play a significant role in balancing muscle development and preventing imbalances that could hinder progress. They strengthen the latissimus dorsi, rhomboids, and biceps, which are crucial for stabilizing the shoulder blades during the Turkish Get-Up. This upper body symmetry ensures that forces are evenly distributed, reducing the risk of injury and enhancing performance. Incorporating pull exercises into a training regimen promotes a more balanced muscular structure, allowing for greater control and precision in complex lifts.
Progress in mastering the Turkish Get-Up is achieved through consistent practice and gradual increases in difficulty. Starting with basic variations allows individuals to develop foundational skills before advancing to more complex versions. Regularly incorporating push-ups, handstands, and pull exercises into a training routine ensures that all necessary muscle groups are strengthened and balanced. By focusing on proper technique and incremental improvements, one can optimize their performance in the Turkish Get-Up, achieving greater efficiency and control in this challenging exercise.
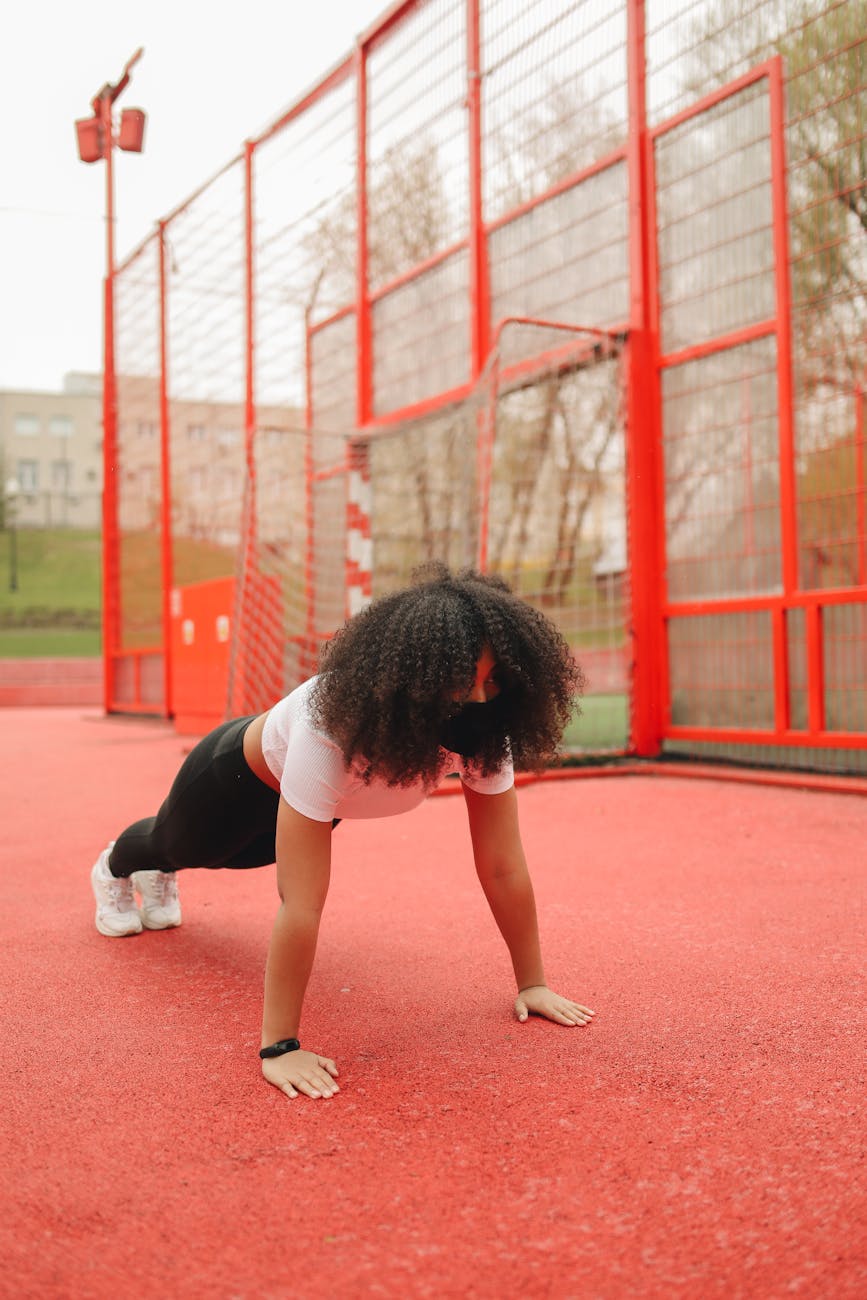
How to Progress One-Arm Push-Ups
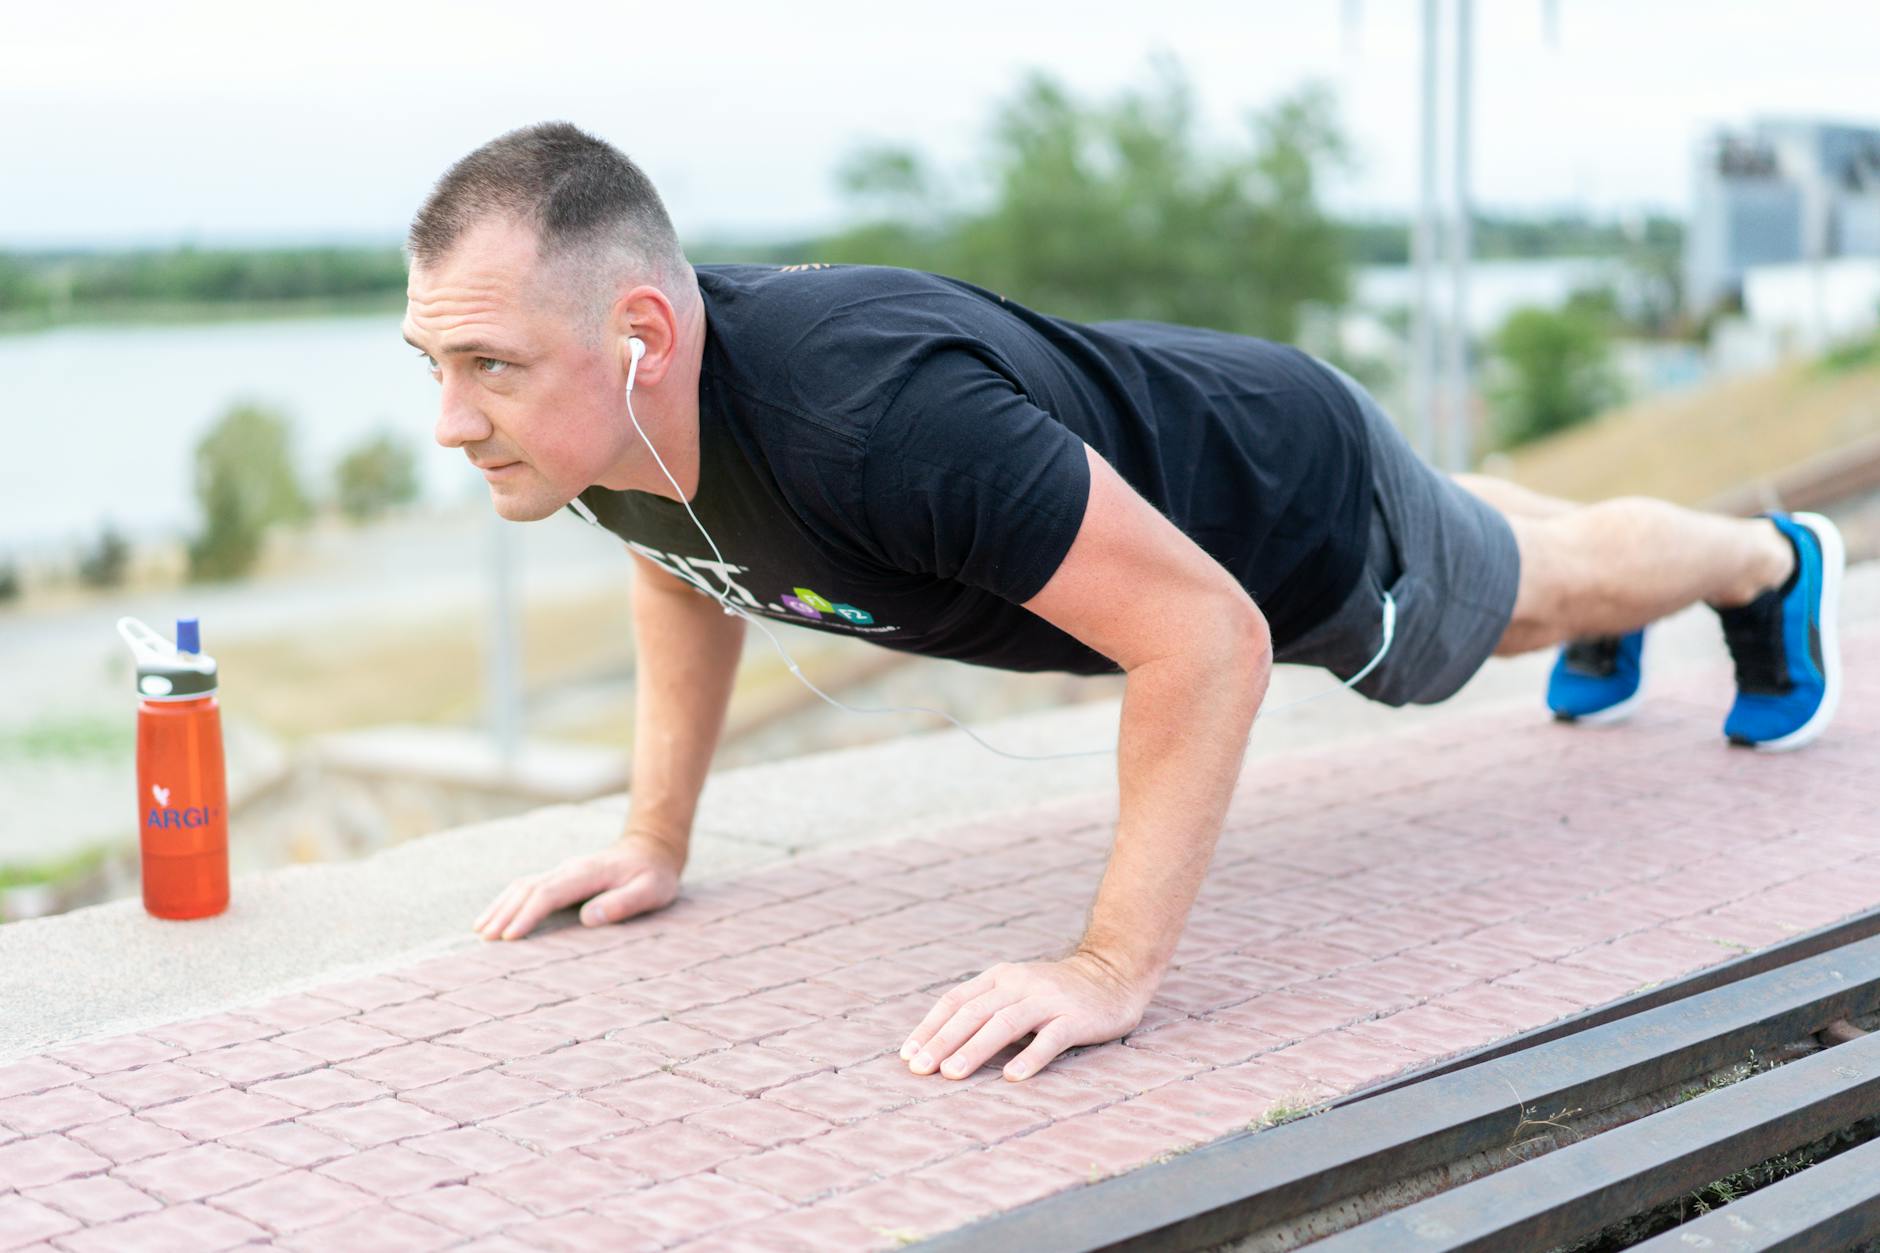
One-arm push-ups are a demanding exercise that challenge upper body strength, core stability, and balance. To progress effectively in one-arm push-ups, it is essential to understand the biomechanics involved and develop a structured approach to gradually increase difficulty. Begin by mastering standard one-arm push-ups with proper form to ensure joint health and muscle activation. Maintain a straight line from head to heels, engaging the core to prevent sagging or lifting the hips. The arm supporting your body should be directly beneath your shoulders, with the elbow positioned at a 45-degree angle to the torso during the lowering phase.
Once proficient in standard one-arm push-ups, progress by increasing the range of motion. Lower yourself closer to the ground, maintaining control and tension throughout the movement. This increases the demand on the target muscles and enhances muscle fibre recruitment. As you become more comfortable with a deeper range of motion, consider performing negative phases, slowing down the descent while holding the top phase for a set time, to emphasize eccentric strength development.
To further challenge your body, incorporate handstand push-ups, which require significant upper body and core strength. Begin by practicing handstand push-ups against a wall or with partial support to build confidence and control. Gradually transition to full handstand push-ups, focusing on maintaining proper form and avoiding excessive arm strain. Handstand push-ups can be scaled down by performing them at an angle or using a spotter for assistance until you feel ready for the full movement.
Another progression method is to increase the tempo of your push-ups. Perform faster reps while maintaining strict control and form, which challenges muscular endurance and neural efficiency. Conversely, slowing down the movement can enhance time under tension and promote hypertrophy. Combining these tempos in a circuit or superset format can create a well-rounded training stimulus.
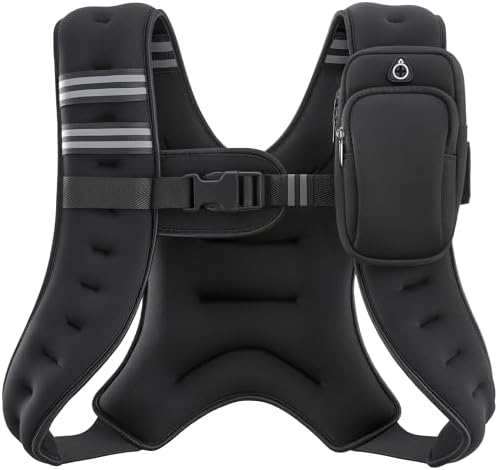
Incorporating external resistance, such as a weight vest or added weights held in the non-supporting hand, can provide an additional challenge. This progression should be implemented cautiously to avoid overloading joints and muscles not accustomed to increased load. Monitor your form closely and adjust the weight accordingly to ensure safety and effectiveness.
To address the common confusion surrounding the term “increase,” it is crucial to clarify that increasing difficulty in one-arm push-ups can be achieved through various means, such as range of motion, tempo, resistance, or complexity (e.g., handstand variations). It is essential to track progress and adjust training parameters systematically to avoid plateaus and ensure continuous improvement.
Prioritize rest and recovery to support muscle adaptation and prevent injury. Incorporate mobility work and stretching to maintain joint flexibility and muscle balance, which are critical for executing one-arm push-ups safely and efficiently. By methodically progressing through these techniques and maintaining a focus on form and control, you can effectively advance your one-arm push-up capabilities over time.
How to Do a Perfect 90-Degree Push-Up
The 90-degree push-up, a variation on the standard exercise, serves as an excellent bridge between traditional push-ups and the full handstand push-up (HSUP), particularly effective for building shoulder stability and upper body strength needed to progress towards the HSUP. This progression relies heavily on the often-underestimated role of the arm in providing a stable lever during the movement. The primary benefit stems from how it isolates the key stabilizing muscles, supraspinatus, infraspinatus, teres minor, and rhomboids, and challenges them more acutely than standard push-ups, which tend to rely more on chest and triceps strength. Essentially, the arm acts as a fulcrum, requiring greater control and proprioception around the shoulder joint.
Execution begins with finding a comfortable wall or sturdy surface for foot placement. The goal is to achieve a 90-degree angle at the elbows when in the bottom position; this ensures good scapular engagement and targets the right muscles. A common mistake is having elbows too close to the body, which increases triceps involvement, or too far away, which can lead to elbow strain. Generally, aiming for the elbows tracking slightly inward towards the body’s centerline works well for most individuals. The hands are placed shoulder-width apart on a stable surface allowing for a good base of support and a comfortable range of motion. A slight rotation outwards can often assist with this.
To increase difficulty, move feet further away from the wall gradually to decrease the angle and increase the lever arm. This adds more load on the shoulders and increases the range of motion required for each rep. Another good way to progress is to incorporate a pause at the bottom of the movement allowing for greater time under tension which boosts muscular endurance. This also forces increased stability. Finally, consider adding a slight wobble or micro-movement during the push phase to increase proprioceptive awareness around the shoulder joint, another key element in preparing for the HSUP. Consistent practice with attention to these technical details will ensure a solid foundation for progressing towards more challenging variations and ultimately, the full handstand push-up.
How to Do a Perfect 90-Degree Push-Up
A diagnostic approach for troubleshooting issues with handstand progression involves a systematic evaluation of biomechanical, strength, and flexibility factors that may hinder proper execution. Firstly, assess the individual’s handstand alignment by observing their posture from various angles. A stable handstand requires a straight line from the shoulders through the hips to the heels, with the head positioned between the arms. Deviations in this alignment, such as drooping hips or arching the back, indicate areas needing correction.
Evaluate the strength and stability of the core muscles, particularly the transverse abdominis and obliques, which are crucial for maintaining a rigid body position during handstand. Weakness in these muscles can lead to instability and early fatigue. Additionally, assess the shoulder and arm strength, focusing on the deltoids, triceps, and rotator cuff muscles. Inadequate strength here can result in poor support and control during the handstand.
Flexibility is another critical factor; limited range of motion in the shoulders, wrists, and ankles can impede the ability to achieve a proper handstand position. The shoulder joint should allow for full external rotation to align the arms correctly, while the wrist extensors must be sufficiently flexible to prevent hyperextension and potential injury. Ankle mobility is also essential for maintaining balance and control during the handstand.
To address these issues, implement targeted exercises to strengthen the core and upper body muscles involved in handstand performance. Incorporate planks, side planks, and hollow body holds to enhance core stability. For arm and shoulder strength, focus on push-ups, dips, and rotator cuff exercises. Flexibility work should include dynamic stretches for the shoulders, wrists, and ankles, as well as static holds to improve range of motion.
Progressive handstand training can also be beneficial. Begin with wall handstands to build confidence and alignment awareness, gradually transitioning to freestanding handstands with assistance or spotting. Practice controlled transitions into and out of the handstand to refine balance and control. Regularly reassess alignment and strength levels to track progress and adjust training strategies as needed.
In cases where significant biomechanical flaws persist, consider consulting a fitness professional or physical therapist for personalized guidance and corrective exercises. By systematically addressing each aspect of handstand performance through targeted training and assessment, individuals can overcome common issues and achieve a more stable and controlled handstand execution.
How to Progress One-Arm Push-Ups
One-arm push-ups are a challenging yet effective exercise for building upper body strength, particularly in the triceps and shoulders. To progress effectively in one-arm push-ups, it is essential to focus on maintaining proper form throughout each repetition. Proper technique not only minimizes the risk of injury but also ensures that the target muscles receive the intended stimulus for growth and development. Begin by performing a standard push-up with both hands, ensuring your body forms a straight line from head to heels. Once comfortable, transition to one-arm push-ups by placing one hand slightly ahead of the other and lowering the body until the chest nearly touches the ground before pushing back up.
Incorporating rest-pause techniques can also facilitate progression by allowing the muscles to recruit additional motor units during brief moments of rest within a set. This method involves performing a repetition, briefly resting for 5-10 seconds, and then continuing with subsequent reps until failure. By employing such strategies, individuals can push beyond their comfort zone and stimulate further muscle growth.
How to Do a Perfect Handstand Push-Up
Achieving a perfect handstand push-up requires understanding the intricate balance of strength, technique, and body control. To begin, focus on building foundational strength in your core, shoulders, and arms through exercises such as planks, shoulder presses, and tricep dips. This strengthening process is crucial for maintaining proper form during the movement. As you progress, incorporate handstand holds to acclimate your body to the inverted position, enhancing proprioception and stability.
The initial phase of learning involves mastering the handstand itself. Start by practicing against a wall or with spotting to ensure safety. Gradually increase the duration of handstand holds, working up to 30 seconds or more. This will build endurance and confidence as you transition into dynamic movements. Once comfortable in the static position, progress to short, controlled push-ups with partial ranges of motion. Begin by lowering your body slowly from the handstand position and pushing back up to a plank, gradually increasing the depth of each repetition.
As proficiency grows, focus on maintaining a straight line from head to heels throughout the movement, avoiding sagging or arching. This requires engaging the core muscles tightly and squeezing the shoulder blades together to prevent collapse. The push-up should be performed with controlled, fluid motion, emphasizing quality over quantity. Incorporate negative phases, the eccentric portion of the lift, to increase muscular endurance and strength adaptation.
Incorporating variations can also enhance progress. Try single-arm push-ups to develop unilateral strength and balance, or practice with external resistance bands for increased demand. As proficiency increases, challenge yourself with slower tempos or incorporating pauses at the top of the movement to emphasize isometric holds. These challenges not only build strength but also enhance neural connections necessary for complex movements.
It is imperative to listen to your body and allow adequate recovery time to prevent overtraining and injury. Incorporate stretching, mobility work, and foam rolling into your routine to maintain flexibility and joint health. As you continue to progress, consider working with a qualified coach or trainer to provide personalized feedback and ensure safety during advanced techniques.
The journey to mastering the handstand push-up is iterative, requiring patience and persistence. By systematically building strength, refining technique, and incorporating constructive feedback, you can achieve a perfect execution that showcases balance, power, and control. Remember, each incremental improvement represents progress within the dynamic cycle of training and development.
How to Do a Perfect Clap Push-Up
A perfect clap push-up is a dynamic and challenging exercise that demands precise form, strength, and synchronization. To achieve this skill, one must first understand the foundational elements of push-ups and gradually progress toward incorporating claps. Begin by performing standard push-ups with a focus on maintaining a straight line from head to heels, engaging the core, and avoiding sagging hips or lifting the hips too high. As proficiency increases, introduce variations such as incline or decline push-ups to target different muscle groups and further build strength.
The clap push-up involves explosive power and coordination. To prepare for this movement, incorporate plyometric exercises into your training routine, such as box jumps or wall jumps, to enhance lower body power and leg drive. Additionally, work on improving upper body strength through progressive overload in push-up variations, such as diamond push-ups or one-arm push-ups. Flexibility and mobility are also crucial; regularly stretch the chest, shoulders, and hips to ensure a full range of motion during the clap phase.
When attempting the clap push-up, start with a modified version where the clap is performed at the bottom of the movement rather than at the top. This allows for greater control and reduces the risk of injury. Position the hands slightly wider than shoulder-width apart, and begin the push-up by lowering the chest toward the ground while maintaining a steady breath. As you reach the lowest point, explosively drive through the legs to propel the body upward, clapping the hands above the head simultaneously. Land softly on the hands, ensuring they remain aligned with the shoulders, and immediately initiate the next repetition to build momentum and muscle memory.
To increase the difficulty of the clap push-up, gradually transition from performing the clap at the bottom to executing it at the top of the movement. This requires greater upper body strength and explosive power. As you progress, focus on maintaining a tight core and scapular stability throughout the exercise to prevent excessive strain on the shoulders. Incorporate resistance band work or weighted vests to further challenge the muscles involved in the clap push-up.
Consistency and progressive overload are key to mastering the clap push-up. Track your progress by monitoring the number of repetitions, sets, and time under tension. Challenge yourself with variations such as tempo clap push-ups, where you pause at the top and bottom of the movement, or incorporating a second clap mid-rep for increased complexity. Remember to prioritize proper form and control over speed and volume to prevent injury and ensure long-term progress.
Under extreme conditions, such as high-intensity training or competition settings, the clap push-up demands not only physical strength but also mental resilience. Mental preparation involves visualization, setting specific goals, and cultivating a growth mindset to overcome obstacles and setbacks. Physical conditioning should include adequate rest, nutrition, and recovery strategies to support muscle repair and adaptation. By integrating these elements into your training regimen, you can optimize performance in the clap push-up and continue to progress toward advanced feats of strength and agility.
How to Do a Perfect Diamond Push-Up
In the realm of calisthenics and bodyweight exercises, the diamond push-up stands out for its unique challenge and effectiveness in engaging the triceps, chest, and core muscles. This variation of the traditional push-up is characterized by a narrow hand placement that forms a diamond shape when viewed from above. In this text, we will delve into the intricacies of performing a perfect diamond push-up.
To begin, it’s essential to understand the anatomical context and muscle activation involved in this exercise. The triceps brachii is the primary muscle targeted during a diamond push-up. It consists of three heads: the lateral, medial, and long head. These muscles extend the elbow, thereby facilitating pushing actions in various movements, such as dips, bench presses, or push-ups.
Start in a high plank position with your hands shoulder-width apart on the floor, fingers pointing forward, and palms pressing into the ground. Keep your core engaged, back straight, and gaze fixed between your hands.
Move your hands closer together, bringing them to the point where they touch when forming a diamond shape. This narrow hand position is crucial for engaging the triceps effectively during the push-up.
Lower yourself down towards the ground by bending at the elbows while maintaining control over your body. Keep your chest lifted and core engaged throughout the movement. Aim to touch your chest or upper chest to the ground, then press back up to the starting position.
Repeat this process for desired repetitions, ensuring proper form throughout each rep. This exercise can be challenging due to its intense muscle engagement; however, with practice and consistency, mastering the diamond push-up will yield noticeable strength gains in your triceps, chest, and core.
To increase the difficulty of the diamond push-up, try elevating your feet on an object such as a bench or stability ball. This variation targets more muscle fibers due to the increased range of motion and bodyweight leverage.
To further challenge yourself, you can also attempt this exercise in a handstand position. Begin by performing handstands against a wall for support and balance. Once comfortable, transition into a diamond push-up while maintaining your handstand form. This advanced variation not only targets the triceps but also engages the shoulders, core, and upper body muscles extensively.
How to Do Proper Push-Ups
The human body operates on intricate feedback loops and cycles that govern progress and adaptation, particularly in strength training contexts such as performing push-ups. These biological mechanisms ensure efficiency and resilience, allowing individuals to incrementally increase their performance over time without risking injury or burnout. To understand how proper push-up execution contributes to this process, one must explore the physiological responses triggered by resistance exercise.
Muscle adaptation begins with mechanical stress. When performing push-ups, muscles like the pectoralis major, triceps brachii, and anterior deltoids experience tension as they contract against gravity and body weight. This stress initiates a cascade of cellular events: damaged muscle fibers release biochemical signals that recruit satellite cells to repair and rebuild tissues. These cells fuse with existing myofibrils, increasing the number of cross-bridges between actin and myosin filaments, key components for muscular contraction. Over time, this process leads to hypertrophy, where muscle mass grows due to enhanced protein synthesis and fiber splitting.
The nervous system also plays a crucial role through neuroplasticity. Repeated push-up executions strengthen neural pathways that coordinate movement, improving motor unit recruitment efficiency. Initially, muscles fire only dominant or strong units; with practice, weaker units are incorporated, allowing for greater force production without overexertion. This improvement in neuromuscular coordination not only enhances performance but also reduces injury risk by promoting balanced muscle activation and joint stability.
Feedback loops further refine this process by regulating hormonal responses. Resistance exercise stimulates the secretion of hormones like testosterone and growth hormone, which facilitate protein synthesis and tissue repair. Elevated levels of these anabolic hormones during recovery periods promote faster healing and adaptation. Additionally, cortisol, a catabolic hormone released during intense exertion, decreases once exercise stops, preventing excessive muscle breakdown. This hormonal balance ensures that the body prioritizes growth and repair over destruction, creating a sustainable cycle of improvement.
Another critical component is the interplay between energy systems. Push-ups primarily rely on the phosphocreatine system for short bursts, the glycolytic system for moderate efforts, and the oxidative system for sustained activity. Repeated training shifts these systems’ efficiency: improved aerobic capacity extends endurance; enhanced glycolytic metabolism reduces lactic acid buildup; and increased phosphocreatine stores delay fatigue. These adaptations enable individuals to perform more push-ups with greater ease, forming a virtuous cycle where performance improvements fuel further progress.
The body also adapts through mechanical loading thresholds. To stimulate growth, muscles must experience progressive overload, a gradual increase in intensity or volume. This principle applies to push-ups: adding reps, decreasing rest periods between sets, or incorporating variations like diamond push-ups or decline push-ups targets different muscle groups and challenges the nervous system. Each adjustment creates new stressors that initiate adaptive responses, ensuring continuous improvement without stagnation.
Recovery periods are equally vital in this feedback cycle. While muscles repair during rest, the body also synthesizes new proteins to replace damaged components. Adequate sleep, nutrition, and hydration amplify these processes by providing essential building blocks like amino acids and carbohydrates. Sleep, in particular, regulates hormones related to muscle growth, such as insulin-like growth factor 1 (IGF-1), ensuring optimal recovery conditions for ongoing adaptation.
Over time, the cumulative effect of these feedback loops results in measurable progress: increased strength, enhanced endurance, and greater muscular definition. Each successful push-up reinforces neural pathways, strengthens connective tissues, and promotes hormonal balance, creating a positive reinforcement loop that drives continuous improvement. This cycle underscores why proper form and progression are paramount, any deviation from established patterns risks disrupting the delicate equilibrium necessary for safe and effective adaptations.
How to Do Perfect Pull-Ups (Even If You Can’t Yet)
To track progress, use diagrams to note improvements in grip width, pull-up depth, and muscle recruitment. Narrow grips emphasize bicep involvement, while wider grips engage the lats more. A deeper pull (chest below the bar) increases difficulty but enhances back strength. Diagrams can also illustrate handstand push-ups as a parallel exercise to build upper body endurance and control, mirroring pull-up mechanics with feet on a wall or elevated surface, focusing on elbow alignment and scapular retraction.
For those unable to perform full pull-ups yet, diagrams can guide negatives (slowly controlled descents) and assisted pull-ups using resistance bands or weighted vests. As strength increases, progress to bodyweight exercises like inverted rows on a TRX bar, emphasizing back width and lat development. Each step forward should be visually documented through diagrams that highlight improved form, muscle activation patterns, and joint stability. Regular assessment of these visual aids ensures consistent refinement of technique, preventing plateaus and minimizing injury risk by maintaining proper alignment throughout the movement spectrum.
How to Do a Perfect Ring One-Arm Pull-Up
Performing a perfect ring one-arm pull-up requires a combination of strength, technique, and progression. The underlying mechanism involves leveraging the body’s weight against the resistance provided by the ring while maintaining proper form to maximize muscle engagement. To achieve this, it is essential to understand the biomechanics involved and systematically build up the necessary skills and strength.
Begin by assessing your current pull-up abilities. If you are unable to perform a single one-arm pull-up, start with negative pulls or assisted pulls using a resistance band. Hold the ring with one hand and use the other hand to help lift your body until you can gradually reduce the assistance. As you progress, focus on maintaining a straight line from head to heels, engaging the core muscles to prevent swaying, and keeping the shoulder stabilized.
The key to executing a proper one-arm pull-up is to initiate the movement with a strong grip and a clear understanding of the muscle groups involved. The latissimus dorsi, deltoids, and trapezius work synergistically to raise the body, while the core muscles stabilize the torso. Inhale as you lower down and exhale as you pull up to engage the necessary muscles effectively.
Consistency is crucial in developing the skills needed for perfect ring one-arm pull-ups. Dedicate specific training days to focus on pull-up variations, ensuring proper recovery to prevent overtraining. Monitor your progress by recording the number of reps and sets completed, adjusting the difficulty as needed. Over time, the combination of targeted strength training, technique refinement, and strategic progression will lead to mastery of the perfect ring one-arm pull-up.
How to Do a Perfect Diamond Push-Up
The diamond push-up is a challenging exercise that requires strength, balance, and precision. To execute a perfect diamond push-up, it’s essential to focus on form, breathing, and progression. Begin by assuming a plank position with your hands placed shoulder-width apart. Your arms should be fully extended, elbows locked, and wrists aligned under your shoulders. Engage your core muscles to maintain a straight line from head to heels. With your hands together, squeeze them into a diamond shape, ensuring your thumbs and fingers touch to form the peak of the diamond.
Inhale as you lower your body toward the ground by bending your elbows at a 45-degree angle. Keep your elbows close to your torso and avoid flaring outward. As you descend, focus on maintaining a steady breath, avoiding any sudden movements or jerks. Lower yourself until your chest is just above the floor, then exhale as you push back up to the starting position. Throughout the movement, keep your core tight and your body stable to prevent any rocking or wobbling.
To increase the difficulty of diamond push-ups, consider progressively challenging yourself with variations such as incorporating pauses at the bottom of the movement or adding a weighted vest for added resistance. Another effective method is to perform the exercise on an unstable surface, like a BOSU ball or a wobble board, which engages additional stabilizer muscles and enhances core strength.
As you become more proficient in diamond push-ups, gradually increase the number of repetitions or sets. A typical progression might start with one set of five to ten reps, aiming to reach three sets of fifteen reps over several weeks. Consistency is key; incorporate diamond push-ups into your routine at least twice a week to maximize strength gains and muscle development.
How to Increase Your Pull-Up Numbers Fast
Increasing your pull-up numbers requires a strategic approach that combines progressive overload, proper technique, and targeted exercises. To achieve rapid progress in pull-ups, it is crucial to focus on the precise engagement of arm muscles, particularly the latissimus dorsi (lats), biceps brachii, brachialis, and brachioradialis. Understanding the anatomy and biomechanics involved ensures that you target these muscle groups effectively.
Begin by assessing your current pull-up capacity to establish a baseline. This will help in designing a program tailored to your specific needs. A common method is to perform sets of pull-ups with rest periods that allow for near-maximal effort on each repetition. Track the number of pull-ups you can complete in a set, noting any variations in technique or form that may affect performance.
Incorporate progressive overload by gradually increasing the difficulty of your pull-up routine. This can be achieved through weighted pull-ups, where additional resistance is added to increase arm muscle activation and strength. Another method is to reduce rest periods between sets, challenging endurance and muscular coordination. Additionally, varying grip width, from wide to narrow, engages different aspects of the arm muscles, promoting balanced development.
Technical precision is paramount in pull-ups. Ensure that your shoulder blades are retracted and scapular stabilization is maintained throughout the movement. This prevents excessive strain on the shoulder joint and enhances lats engagement. Focus on a controlled descent, lowering yourself slowly to increase time under tension, which stimulates muscle growth. The eccentric phase of the pull-up places greater demands on arm muscles, making it an effective component for progression.
To complement your pull-up training, incorporate strength-specific exercises that target the arm muscles in isolation or as part of compound movements. Lat pulldowns and chin-ups can serve as supplementary workouts, focusing on different muscle fibers and providing cross-training benefits. Handstand push-ups are particularly effective for developing upper body strength, as they require precise control of the arm muscles to maintain balance and perform the movement.
Flexibility and mobility should also be addressed to ensure optimal pull-up performance. Stretching exercises targeting the shoulders, chest, and back enhance range of motion, reducing the risk of injury and allowing for more efficient arm muscle activation during pull-ups. Incorporate dynamic warm-ups before training sessions to prepare the muscles for the demands of the exercise.
Recovery is an essential component of any progression plan. Adequate rest between training sessions allows for muscle repair and growth. Prioritize sleep, nutrition, and hydration to support recovery efforts. Consider incorporating active recovery techniques such as light cardio or yoga to improve circulation and flexibility without overtaxing the arm muscles.
Monitor your progress regularly by revisiting your pull-up baseline and adjusting your training program as needed. This iterative process ensures that you continue to challenge your arm muscles, leading to consistent improvements in pull-up numbers. Stay committed to the principles of progressive overload, technique precision, and holistic strength development to achieve your goals efficiently.
How to Do Perfect Pull-Ups (Even If You Can’t Yet)
Perfect pull-ups require a combination of strength, technique, and progression. To master the perfect pull-up even if you can’t yet perform one, start by understanding the anatomy and biomechanics involved. The primary muscles engaged during a pull-up are the latissimus dorsi, trapezius, biceps brachii, and rhomboids, with the arm muscles playing a crucial role in stabilization and control. Beginners should focus on building foundational strength through exercises like negatives, assisted pulls, or bodyweight rows to gradually increase their pull-up capacity.
The initial step is to assess your current ability. If you cannot perform a single unassisted pull-up, use a resistance band or machine-assisted pull-ups to create controlled movements that challenge your muscles without compromising form. As you progress, incorporate negatives, lowering yourself slowly while holding the top position for a few seconds to build muscular endurance and mental focus. Simultaneously, work on perfecting your grip; a neutral or pronated grip engages the lats more effectively than a supinated grip, which targets the biceps.
Technique is paramount. Start with a wide grip on the pull-up bar, arms fully extended and shoulders retracted. Inhale as you pull your body upward by squeezing your lats and trapezius, keeping your elbows close to your torso. At the top, exhale and maintain a slight arch in your back before slowly lowering yourself down, controlling the movement throughout. Avoid swinging or jerking, as these compensations reduce the effectiveness of the exercise and increase injury risk.
To integrate handstand push-ups into your routine for balanced development, recognize that both movements engage the upper body but target different muscle groups. Handstand push-ups emphasize triceps, shoulder stability, and core strength, complementing the pull-up’s focus on the back and arm muscles. However, be cautious of overtraining; these exercises are physically demanding and require adequate recovery time.
For progression, consider progressive overload by gradually increasing the number of reps or using added weight once you can comfortably perform 3 to 5 perfect pull-ups. Incorporate variations like close-grip pull-ups for bicep emphasis or wide-grip for broader lat engagement. As your strength improves, experiment with handstand-assisted pull-ups to bridge the gap between traditional pull-ups and more advanced movements.
How to Do a Perfect Ring Clap Push-Up
The ring clap push-up is a highly advanced and dynamic variation of the traditional push-up, demanding exceptional strength, control, and coordination. To achieve a perfect execution, it’s crucial to understand the biomechanics involved and meticulously progress through intermediate skills. Begin by ensuring you possess a strong foundation in basic calisthenics, particularly in push-ups and ring exercises. Adequate shoulder mobility, grip strength, and core stability are prerequisites for this movement.
Assume a handstand pull position with rings, maintaining a straight body line from head to heels. The hands should be comfortably gripping the rings, palms facing forward, elbows tucked in to stabilize the body. Initiate the movement by performing a controlled negative push-up, lowering your body towards the ground while maintaining full extension and control throughout the descent. As you approach the lowest point of the push-up, rapidly extend your arms to propel yourself upward, simultaneously swinging your legs up and around in preparation for the clap phase.
The clap is executed by bringing your feet together in mid-air, creating a loud audible clap with precise foot contact. This requires precise timing and explosive power from the lower body, coordinated with the upper body’s momentum. Following the clap, land back into a handstand position with the rings, ensuring a soft and controlled impact to prevent injury. The key to mastering this movement lies in synchronizing the upward push, leg swing, and clap into a seamless motion.
To progress toward the perfect ring clap push-up, focus on incrementally increasing the range of motion during the push-up phase. Start with partial push-ups, gradually deepening the descent until you can perform a full push-up without compromising form. Concurrently, work on strengthening your grip and shoulder stability through exercises like ring dips, planche holds, and scapular stabilization drills. Enhancing explosive power in the legs is also essential; plyometric exercises such as box jumps and squat jumps can contribute to this development.
Visualization and practice are vital components of the learning process. Observe videos of experienced performers to analyze their technique, paying attention to the fluidity of movement and the precision of the clap. Repetition under controlled conditions will help ingrain the correct neuromuscular pathways, reducing the likelihood of error during high-intensity execution. It’s important to recognize that progress may be slow, as this skill demands a high level of technical proficiency.
In extreme conditions, such as reduced grip strength or fatigue, the ring clap push-up becomes even more challenging. Muscle endurance and mental resilience play significant roles in overcoming these obstacles. To adapt, focus on maintaining strict form even when strength reserves are depleted. Breath control and pacing can help manage fatigue, allowing for a more sustained effort. Additionally, incorporating rest periods between sets and ensuring adequate recovery will facilitate progress in extreme scenarios.
Mastering the ring clap push-up requires a combination of technical skill, physical conditioning, and mental fortitude. By methodically building strength, flexibility, and power while refining technique through deliberate practice, one can successfully navigate the demands of this complex movement under various conditions.
How to Do a Perfect Ring Archer Push-Up
The Ring Archer Push-Up is a challenging variation of the classic push-up exercise, which engages not only the chest, shoulders, and triceps but also the core and upper back muscles. To perform this advanced move with proper form and reap maximum benefits, consider the following techniques for analysis and execution.
Firstly, understand the ring’s role in the Ring Archer Push-Up. The training rings provide instability due to their rotational movement. This instability increases the engagement of stabilizer muscles like the core, obliques, and lower back, making this exercise more effective for functional strength development.
To begin, select a pair of rings with appropriate resistance based on your current fitness level. Adjust the ring size to suit your hand width. Place them on the floor about shoulder-width apart. Position yourself facing the rings, placing your hands inside them. Your body should be in a straight line from head to heels, forming a plank position.
Now, brace your core as if bracing for a punch. This engagement will help stabilize your spine and maintain proper form throughout the exercise. Inhale deeply through your nose, keeping your chest up. As you exhale through pursed lips, lower your body down into a push-up motion, keeping your elbows close to your sides. Press back up to the starting position, inhaling as you return to the top.
Incorporating the Ring Archer Push-Up into your workout routine can lead to significant strength gains, especially in the chest, shoulders, triceps, core, and upper back muscles. Perform this exercise 2-3 times per week for best results, aiming for 2-4 sets of 8-10 repetitions per set.
To analyze your progress, keep track of the number of repetitions you can perform with good form over time. Increase resistance by selecting larger rings as needed to challenge yourself further. Remember, proper form is essential in this exercise to avoid injury and maximize benefits. If you feel any pain during execution, stop immediately and consult a medical professional or fitness expert for guidance.
How to Do a Perfect Ring One-Arm Pull-Up
A common starting point involves assisted ring pull-ups using a band or partner assistance, allowing focus on the pull’s path and good core engagement without full bodyweight resistance. Ring rows offer another useful entry point, building scapular stability and pulling strength with a slightly more horizontal pull. Focus should be given to achieving a solid “dead hang” position – often a weak point for beginners – where shoulders are relaxed and blades are depressed. This allows for optimal muscle recruitment during the upward phase of the pull. Core engagement is key throughout, preventing excessive hip sway or rotation that can rob efficiency from the movement.
For those ready to transition to a more challenging progression, try practicing “one-arm ring rows” – essentially pulling oneself up using primarily one arm while the other hangs relaxed. This builds strength in the core and the working arm’ commonly done with lighter resistance or easier angles than the full pull-up. A good indicator of readiness for the full one-arm pull-up is when a solid two-arm ring pull-up can be performed with relatively easy control, and assisted one-arm variations feel comfortable and stable.
When attempting the unassisted one-arm ring pull-up, focus on initiating the pull from the chest, pulling the rings down towards the sternum rather than just pulling with the arms. This helps to engage the lats more effectively and increases leverage. Visualizing a slightly upward trajectory during the pull can also help keep the body relatively straight. Consistency in practice is vital; small improvements accumulate over time with good form and diligent effort. A focus on scapular control, core stability, and efficient lever arm usage will all contribute to a successful one-arm ring pull-up.
How to Do a Perfect Ring Archer Push-Up
The movement begins with a handstand push-up position on rings, where the arms are fully extended and the body is in a straight line from head to heels. The legs are tucked close to the body, forming an arch shape, hence the name “archer.” This initial position demands strong grip strength and shoulder stability. As the movement progresses, the shoulders must remain stable to prevent rotation or impingement, which can lead to injury.
To execute the push-up, initiate the descent by bending the elbows while maintaining the arch shape with the legs. The chest should dip below the rings as the triceps and pectoral muscles contract. It is crucial to control the descent to avoid momentum-driven movements that compromise form. During the ascent, engage the pecs and triceps to return to the starting position, ensuring the body remains in a straight line without sagging or arching excessively.
The ring archer push-up exhibits symmetrical patterns due to the bilateral nature of the movement, engaging both arms equally. This symmetry is essential for developing balanced muscle strength and preventing imbalances that can lead to injury. Additionally, the exercise demonstrates a progression from static holds to dynamic movements, highlighting the importance of incremental strength development.
For those new to this exercise, starting with partial reps or using resistance bands can help build foundational strength. Gradually increasing the range of motion and maintaining proper form is crucial for advancing to full push-ups. Flexibility training, particularly in the shoulders and hips, can enhance the ability to maintain the arch shape and prevent compromised form.
Incorporating variations such as tempo control or pausing at specific points can further challenge the muscles and promote muscle tension. Consistency in practice, combined with proper recovery and nutrition, ensures progressive improvement in both strength and technique. By focusing on the biomechanics and symmetrical patterns inherent in the ring archer push-up, individuals can optimize their performance and achieve a perfect execution of this advanced exercise.
How to Do Archer Pull-Ups Step-by-step
The archer pull-up is a challenging yet effective exercise that targets the muscles of the upper body, particularly the shoulders and arms. To perform an archer pull-up correctly, one must first understand its mechanics and visualize it in diagrams as a handstand position combined with a pull-up movement. In such diagrams, the individual would be depicted with their hands gripping the bar at a wide overhand grip, forming a V-shape with their elbows as they lift their body towards the bar. This archer pose is crucial for activating the target muscles effectively.
To begin, position yourself under a sturdy pull-up bar, ensuring it is set at an appropriate height to allow your hands to comfortably grasp the bar without straining. Stand with your feet shoulder-width apart and reach up to grip the bar using an overhand grip wider than shoulder-width. As you grip the bar, visualize forming a V-shape with your elbows, as if you are holding a bow in the archer’s stance. This positioning is essential for maintaining proper form throughout the exercise.
With your hands gripping the bar and your body hanging straight, engage your core muscles to stabilize your torso. Inhale deeply and begin to pull your body upward towards the bar by contracting your lats and deltoids. As you lift, maintain the archer’s position by keeping your elbows flared out to the sides, creating a triangular shape with your upper arm and forearm. This movement not only engages the targeted muscles but also helps prevent strain on the wrists and shoulders.
Continue pulling until your chin is slightly above the bar, ensuring that your chest is engaged and your body forms a straight line from head to heels. Hold this peak position for a moment to fully activate the muscles before slowly lowering back down to the starting position. As you descend, control the movement by extending your arms gradually, keeping your elbows flared to maintain the archer’s posture. This controlled descent allows for muscle growth and prevents momentum from taking over, which could compromise form.
To increase the difficulty of the archer pull-up, one can add weight or progress to more advanced variations such as handstand pull-ups. Handstand pull-ups, depicted in diagrams as an inverted V-shape with the body forming a straight line from head to heels, require significant strength and balance. To visualize this, imagine flipping the archer pull-up into an upside-down position where your feet are on the ground and you’re pulling yourself up using only your arms. This advanced move demands a strong core and excellent grip strength, making it a testament to one’s progress in upper body strength training.
How to Do Proper Push-Ups
One effective way to progress is by altering the hand position. Starting with a neutral grip, where the hands are placed shoulder-width apart, you can gradually shift to a wider or narrower stance. A wider grip emphasizes the pectoral muscles more, while a narrower grip increases the demand on the triceps. Another variation involves placing the hands closer together in a diamond push-up, which targets the chest and triceps simultaneously due to the reduced leverage.
Incorporating pauses or tempo changes can also increase the intensity of your push-ups. By holding the bottom position for several seconds before pushing back up, you enhance muscle endurance and strength. Similarly, slowing down the eccentric (negative) phase, the descent portion of the movement, can place greater stress on the muscles, leading to increased hypertrophy over time.
Handstand push-ups represent one of the most advanced forms of this exercise, requiring significant upper body strength and balance. This variation shifts the emphasis from the chest and triceps to the shoulders and core, as these muscles must stabilize the body throughout the movement. Progressing to handstand push-ups typically involves months of consistent training in regular push-ups and related exercises to build the necessary foundation of strength and control.
To ensure proper form throughout these progressions, it is crucial to maintain a straight line from head to heels, keeping the hips level and engaging the core muscles to prevent sagging or arching. The shoulders should remain stable and not hike up towards the ears during the movement. Breath control is also important; exhaling as you push up and inhaling as you lower yourself helps maintain rhythm and control.
How to Do a Perfect Ring One-Arm Chin-Up
To achieve a perfect ring one-arm chin-up, it is essential to follow a structured progression that builds strength, control, and technique. Begin by establishing a solid foundation through negatives, focusing on controlled descents from the top position to build muscle memory and neuromuscular connections. Gradually incorporate partial reps, performing chin-ups with partial range of motion, such as starting from the chest-to-bar position or halfway up, to increase volume without overloading the muscles. Incorporate pauses at key points in the movement, such as a pause at the top and bottom positions, to enhance muscular activation and control.
Transition to full reps using bodyweight alone, prioritizing form over quantity. Ensure the elbows flare outwards and maintain a straight body position, engaging the lats and stabilizing the core. As proficiency increases, introduce external resistance, such as weighted vests or added plates, to challenge the muscles further and stimulate hypertrophy. Periodically reassess grip width to target different muscle groups; a wider grip emphasizes the lats, while a narrower grip targets the biceps more intensely.
Monitor progress through consistent recording of reps, sets, and variations, adjusting the training program as needed to prevent plateaus. Prioritize rest and recovery, allowing muscles to adapt and grow. Finally, integrate advanced variations such as ring dips or push-ups once foundational skills are mastered, continuing to challenge the body in new ways while maintaining proper form. By following this structured progression, one can achieve a perfect ring one-arm chin-up with precision and power.
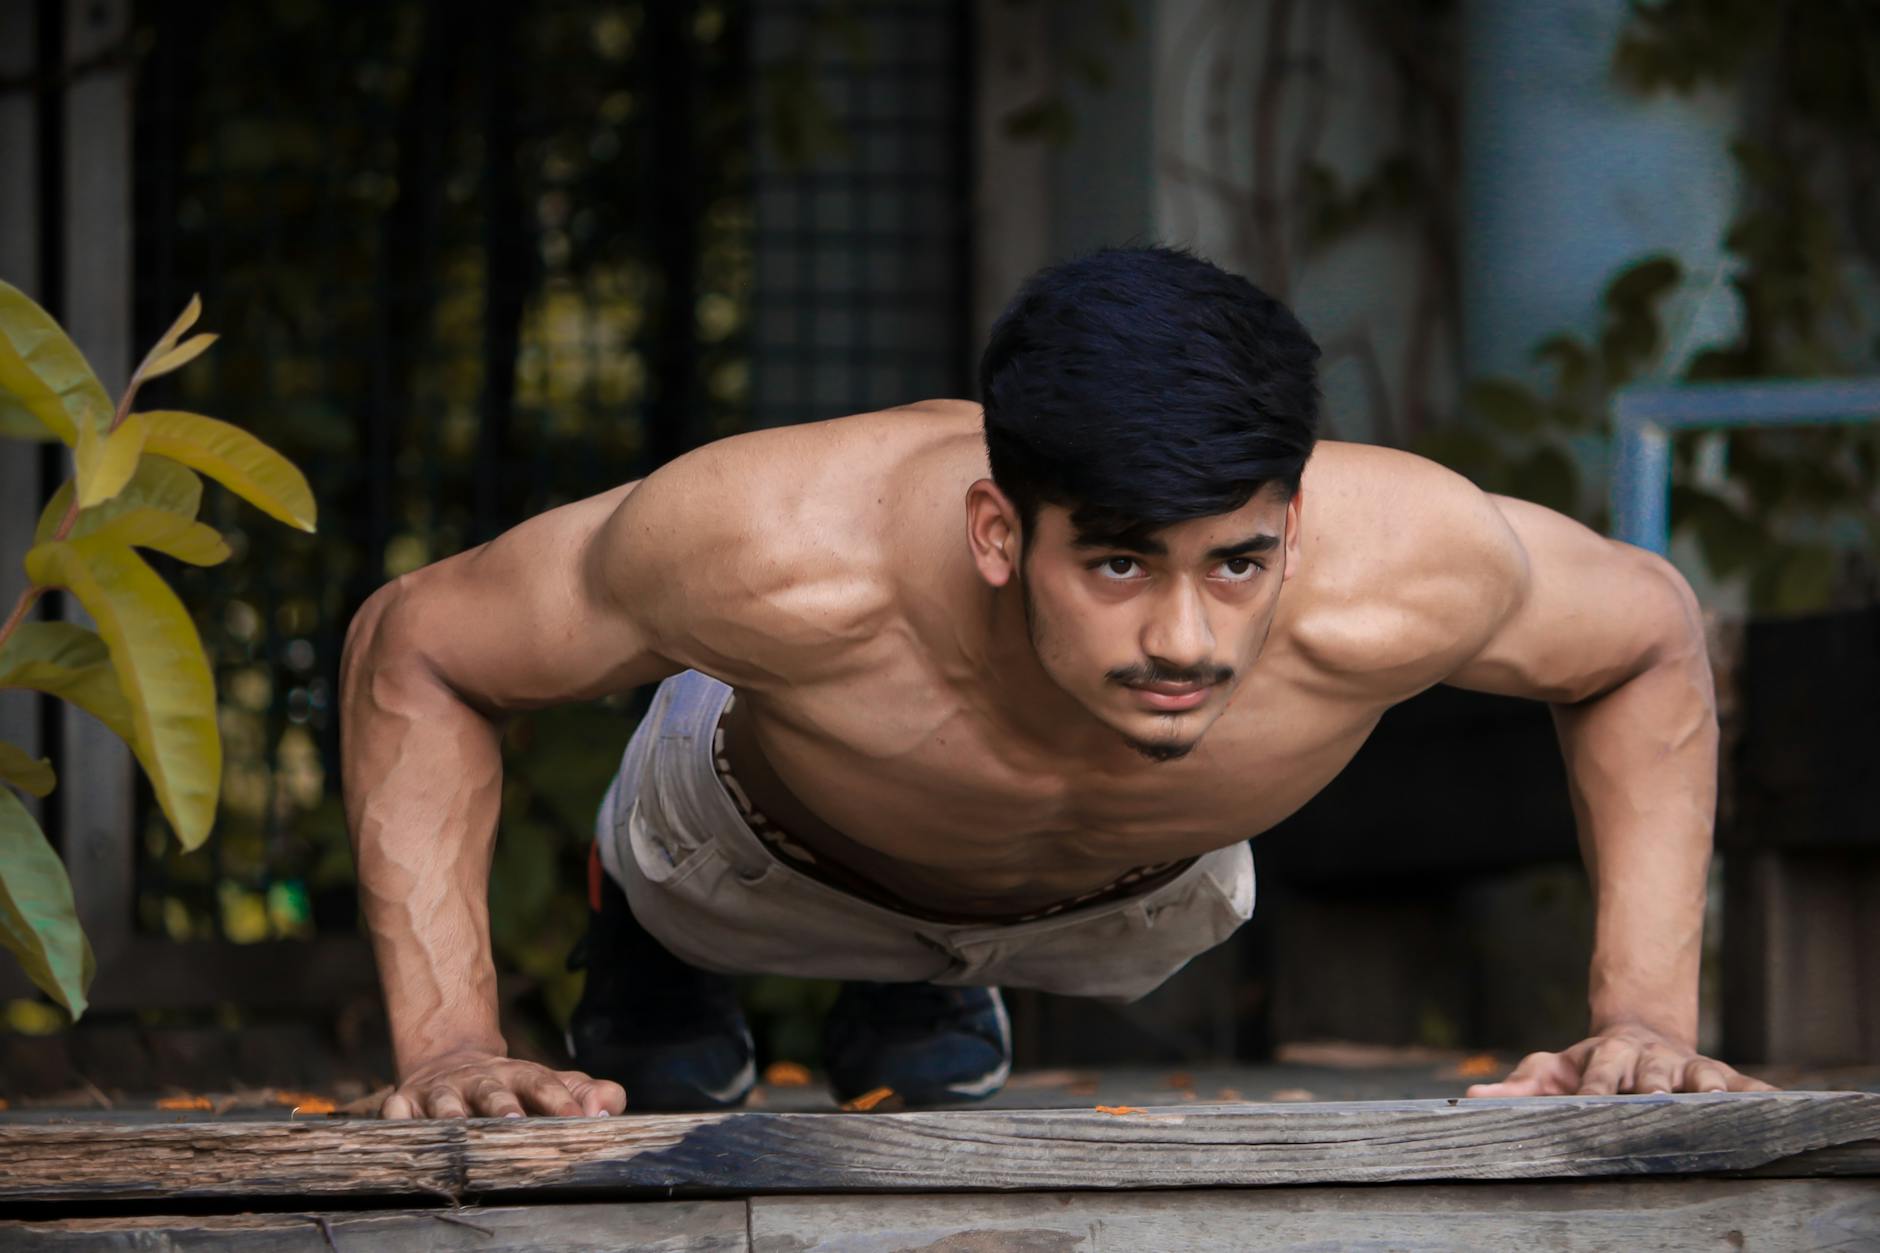
How to Do a Perfect Ring One-Arm Chin-Up
Performing a perfect ring one-arm chin-up requires a combination of strength, technique, and progression. To achieve this advanced exercise, it is essential to understand the fundamental mechanics involved and build up gradually. Begin by ensuring you have access to a sturdy ring or bar that can support your body weight safely.
The first step in mastering the one-arm chin-up is to establish a strong foundation with basic chin-ups using both arms. Focus on maintaining proper form, engaging the lats, and controlling the movement throughout the range of motion. As you gain confidence and strength, progress to one-armed chin-ups by alternating arms, ensuring symmetry in effort and control.
To execute a perfect ring one-arm chin-up, start with a wide grip on the ring, slightly wider than shoulder-width apart. Position your dominant hand on the ring, ensuring it is securely gripped. The non-dominant arm will serve as support but should not bear weight; keep it positioned to assist in maintaining balance and control.
Initiate the movement by pulling your body upward until your chest reaches the height of the ring. Throughout this phase, maintain a straight line from head to heels, avoiding any sagging or swinging. Inhale as you descend and exhale as you ascend to optimize breath coordination with the effort.
As you progress, focus on increasing the range of motion by lowering your body until your arm is fully extended below parallel to the ground. This deep pull engages the muscles more effectively and prepares you for the full chin-up. Incorporate negative phases into your training, where you slow down the controlled descent to enhance muscle strength and endurance.
To further challenge yourself, introduce variations such as pausing at the top of the movement to increase time under tension, or performing the exercise on a progressively heavier ring to simulate external resistance. Additionally, integrating grip-strengthening exercises can help improve your ability to maintain a secure hold during the one-arm chin-up.
Incorporate rest periods strategically, allowing muscles to recover while continuing to challenge them progressively. Monitor your form closely and seek feedback from a qualified professional to ensure proper technique and prevent injury. Over time, with consistent practice and gradual progression, you will be able to execute a perfect ring one-arm chin-up, showcasing strength, control, and precision in this advanced exercise.
How to Do a Perfect Archer Push-Up
The archer push-up is a dynamic and challenging exercise that demands precise form, core stability, and upper body strength. To achieve mastery of this move, it’s crucial to understand the biomechanics involved and progress systematically through various stages of difficulty. This article will delve into the intricacies of executing a perfect archer push-up while elucidating the patterns and symmetries that govern progress in this exercise.
The archer push-up begins with the practitioner assuming a plank position, hands placed shoulder-width apart. As the body is aligned in a straight line from head to heels, the core muscles are engaged to maintain stability. The movement initiates with a simultaneous push off the feet and pull of the arms, propelling the body into an arching motion resembling that of a drawn bowstring. This arch is sustained momentarily before returning to the starting position.
One of the key patterns observed in progressing through archer push-ups is the development of symmetry between the left and right sides of the body. Asymmetry can lead to imbalances, reducing efficiency and increasing the risk of injury. To ensure symmetry, it’s essential to maintain even pressure on both hands throughout the exercise. This requires conscious effort to engage the muscles bilaterally, particularly the pectorals, triceps, and deltoids.
Another critical aspect of progress is the role of core strength in maintaining proper form. The archer push-up demands a stable core to prevent excessive hip drop or hiking, which compromises the integrity of the movement. As one progresses, the ability to sustain the arch position for longer durations becomes increasingly important. This is achieved through targeted core workouts that emphasize isometric holds and plank variations, gradually building endurance and stability.
The symmetrical distribution of force across the body also plays a pivotal role in advancing through the skill levels of archer push-ups. Initially, practitioners may find it challenging to maintain balance during the arch phase, often relying on momentum rather than controlled movement. Over time, as strength and coordination improve, the ability to initiate and sustain the arch with deliberate force becomes more attainable. This shift in focus from momentum-driven to power-based execution marks a significant milestone in progression.
To biomechanical factors, the pattern of progress can be influenced by the individual’s existing physical conditioning. Those with a strong foundation in traditional push-ups and handstand exercises may find it easier to transition into archer push-ups due to established muscle pathways and neural efficiency. Conversely, beginners may need to dedicate more time to building foundational strength through regressive variations, such as wall push-ups or knee push-ups, before attempting the full movement.
The symmetrical nature of the archer push-up also necessitates a focus on joint health and mobility. Ensuring that the shoulders, wrists, and elbows are aligned properly during the exercise helps to prevent strain and injury. Flexibility work, particularly in the shoulders and hips, can enhance the range of motion required for a perfect archer push-up, allowing for more fluid progression through the skill levels.
As practitioners advance, they may explore variations of the archer push-up to further challenge their bodies and maintain progress. These could include incorporating pauses at the top of the arch or adding dynamic elements such as rotations. However, it’s important to approach these modifications with caution, ensuring that form is maintained and symmetry is preserved to avoid regression in skill acquisition.
How to Do Archer Pull-Ups Step-by-step
Ensure that you have a sturdy pull-up bar or other suitable equipment that allows for a gripping position with one hand wider than the other. Begin in a hanging position with both hands grasping the bar, one hand (preferably the right) approximately 12 inches (30 cm) further from the body than the other. This starting position will create an asymmetrical grip.
Engage your core muscles and extend your legs out in front of you, keeping them slightly bent. Inhale deeply through your nose and brace your abs as if preparing for a punch. This stabilization of the core is crucial to maintain proper form throughout the exercise.
Now, initiate the pull-up by engaging your back muscles and pulling yourself up with the hand that’s closer to your body. Keep your elbow tucked in close to your torso during this phase. As you reach the top of the movement, try to twist your torso slightly towards the side of the extended arm. This will further engage the oblique muscles on that side.
As you lower yourself back down, control the descent with your extended (rear) arm, keeping it as straight as possible. Maintain a steady and deliberate pace throughout the entire set, focusing on proper form and muscle engagement rather than speed. Repeat this process for each repetition, alternating which hand initiates the pull.
To increase the difficulty of archer pull-ups, you can try several progressions. One such progression involves using a resistance band to provide assistance with the initial lift, gradually reducing the assistance as your strength improves. Another option is to perform the exercise on parallel bars or rings instead of a pull-up bar.
How to Increase Your Pull-Up Numbers Fast

Step and push methods represent two distinct approaches to increasing pull-up numbers, each with unique advantages based on muscle recruitment, training volume, and adaptability. While both are rooted in progressive overload principles, their efficacy varies depending on individual goals, current fitness levels, and recovery capacity. Understanding the nuances of these methodologies allows for tailored strategies that optimize strength gains and minimize injury risk.
Push methodologies emphasize the use of external resistance to augment challenge. This includes techniques like band-assisted pull-ups, which reduce bodyweight during ascent by distributing force through elastic tension. Another variation involves using chains or weighted vests, where added mass increases load proportionally with elevation. Push methods can also incorporate tempo training, slowing the lowering phase of a pull-up to increase time under tension, or partial range-of-motion variations that focus on specific muscle fibers without compromising form. These approaches enhance muscular hypertrophy and strength endurance but require careful management of resistance levels to prevent excessive fatigue or compromised recruitment patterns.
In similar applications, such as hypertrophy training for the biceps or latissimus dorsi, step programs might use linear periodization with periodic increases in load to peak at 12-15 repetitions per set. Push methodologies could instead apply drop sets, reducing resistance mid-set to extend time under tension, or supersets combining pull-up variations with push exercises like dumbbell rows or bench presses for metabolic conditioning. The choice between step and push depends on desired outcomes: step programs are preferable for those prioritizing strength endurance or precise loading control, while push methods suit hypertrophy aims or when external resistance is logistically constrained.
Both strategies benefit from periodization, alternating phases of strength accumulation with recovery periods. Step programs might follow a 4 to 6 week hypertrophy phase followed by a strength maintenance block, while push methodologies could incorporate deload weeks or active recovery days to counteract accumulated fatigue. Recovery protocols, such as foam rolling, static stretching, and contrast baths, are equally critical to mitigate injury risks associated with high-volume training.
The decision between step and push hinges on contextual factors: program length, available resources, and individual response to loading parameters. Step programs offer predictability but may lack the versatility of push methodologies for diverse adaptation demands. Push approaches provide dynamic adaptability at the cost of requiring more nuanced management of external resistance and recovery strategies. Combining elements from both, such as using step-like increments in resistance with push-style tempo variations, can create hybrid programs that balance progression efficiency with muscular engagement.
Understanding the interplay between these methodologies underscores their complementary roles in strength development. Step programs establish a stable foundation, while push methods challenge and expand physiological limits. The optimal strategy often emerges from iterative experimentation: alternating step and push parameters to identify thresholds of diminishing returns and adjusting volume or intensity accordingly. This adaptive approach ensures both technical proficiency and muscular resilience, key components for sustained progress in pull-up performance.
