
As practitioners began to refine their understanding, they discovered that achieving a flawless back lever involved more than just brute force. It required a precise alignment of the body in an overhead position, with the torso parallel to the ground and the legs extended straight behind. This alignment not only showcases strength but also demands an acute awareness of body mechanics and spatial orientation.
The progression toward perfection typically begins with simpler variations of the back lever, such as the tuck back lever or the straddle back lever. These foundational exercises help build the necessary strength and stability required for more advanced movements like the full back lever. Each stage in this progression builds upon the previous one, gradually increasing the difficulty by altering body angles or adding additional support elements, such as parallel bars or a raised platform.
A critical component of perfecting the back lever lies in understanding and correcting common mistakes that often hinder progress. One prevalent issue is improper hip alignment, where excessive arching or rounding can compromise the exercise’s effectiveness and increase the risk of injury. Practitioners must focus on maintaining a neutral spine throughout the movement to ensure optimal muscle engagement and stability.
Flexibility plays an equally essential role in achieving a perfect back lever. Tight hamstrings and hip flexors often limit the range of motion necessary for maintaining proper alignment during the exercise. Regular stretching, particularly focusing on the posterior chain muscles, can help increase flexibility and reduce the risk of injury. Yoga or dynamic stretching routines that incorporate poses like downward dog or pigeon pose can be particularly beneficial.
Progress tracking is another vital aspect of perfecting the back lever. Maintaining a detailed log of training sessions, noting any improvements in strength, stability, or range of motion, allows practitioners to identify areas for further development. Additionally, setting incremental goals and celebrating milestones helps maintain motivation and momentum throughout the learning process.
Recovery is equally important in this journey toward perfection. Overtraining or neglecting rest days can lead to injury or burnout, hindering progress rather than enhancing it. Practitioners should prioritize adequate sleep, hydration, and proper nutrition to support muscle recovery and growth. Active recovery methods like foam rolling or light stretching on rest days can also aid in maintaining flexibility and reducing soreness.
Seeking guidance from experienced coaches or mentors can provide invaluable insights into technique refinement and injury prevention strategies. These professionals can offer personalized feedback, identify subtle errors that might otherwise go unnoticed, and provide targeted exercises to address specific weaknesses.
Tips for Perfecting Your Front Lever
Perfecting your front lever requires a deep understanding of the biomechanics involved and adherence to specific techniques that ensure safety, efficiency, and progression. The front lever, also known as the muscle-up or overhead press, is a foundational exercise in calisthenics and gymnastics that demands strength, flexibility, and precise technique. To achieve mastery, it’s crucial to recognize the inherent patterns and symmetries within the movement.
The front lever exhibits symmetry primarily in the distribution of forces across the body. As you perform the exercise, your body must remain aligned vertically from head to heels, with the hips slightly behind the shoulders. This alignment ensures that the weight is evenly distributed, minimizing strain on any single joint or muscle group. The symmetrical nature of the front lever also emphasizes the importance of equal shoulder width and engagement of the scapular muscles, which work in tandem to stabilize the shoulder joints throughout the movement.
Biomechanically, the front lever involves a combination of concentric and eccentric muscle contractions. During the ascent phase, or lifting phase, the pectoral muscles, triceps, and anterior deltoids contract concentrically to elevate the body towards the bar. Conversely, during the descent phase, these same muscles work eccentrically to control the movement back downward. This balance between contraction types is essential for building strength and muscle endurance while preventing injury.
Another critical pattern in front lever technique is the role of core engagement. The abdominal and oblique muscles must be tightly engaged to maintain a straight body position, preventing sagging or arching of the spine. This core stability transfers force efficiently from the upper body to the lower body, ensuring that the movement remains smooth and controlled.
Flexibility also plays a significant role in front lever technique. The range of motion required for a perfect front lever demands adequate shoulder mobility, elbow flexibility, and hip hinge capacity. Limited flexibility can lead to compensatory movements, such as flaring the hips or extending the elbows excessively, which disrupt the symmetry and efficiency of the exercise. Regular stretching and mobility exercises are therefore integral to progressing toward a mastered front lever.
To perfect your front lever, focus on incremental improvements in technique rather than immediate strength gains. Begin by practicing controlled ascents and descents, emphasizing slow, deliberate movements that prioritize form over speed. Utilize bodyweight exercises such as dips, pull-ups, and push-ups to build the necessary muscle groups while maintaining proper alignment.
As you progress, incorporate drills that target specific aspects of the front lever, such as hollow holds or negative assisted reps, to reinforce core stability and scapular engagement. Consistently analyze your form through video recordings or mirror reflections to identify and correct asymmetries in posture or movement.
The symmetrical patterns and biomechanical demands of the front lever highlight the importance of a holistic approach to training. By understanding and adhering to these principles, you can refine your technique, enhance performance, and achieve a perfectly executed front lever that showcases strength, control, and precision.
How to Do a Perfect Front Lever
The Front Lever is a classic bodyweight exercise that targets the upper body, core, and lower back. It’s an advanced move in calisthenics progression and requires significant strength and control. In this tutorial, we will provide you with essential tips for perfecting the Front Lever technique.
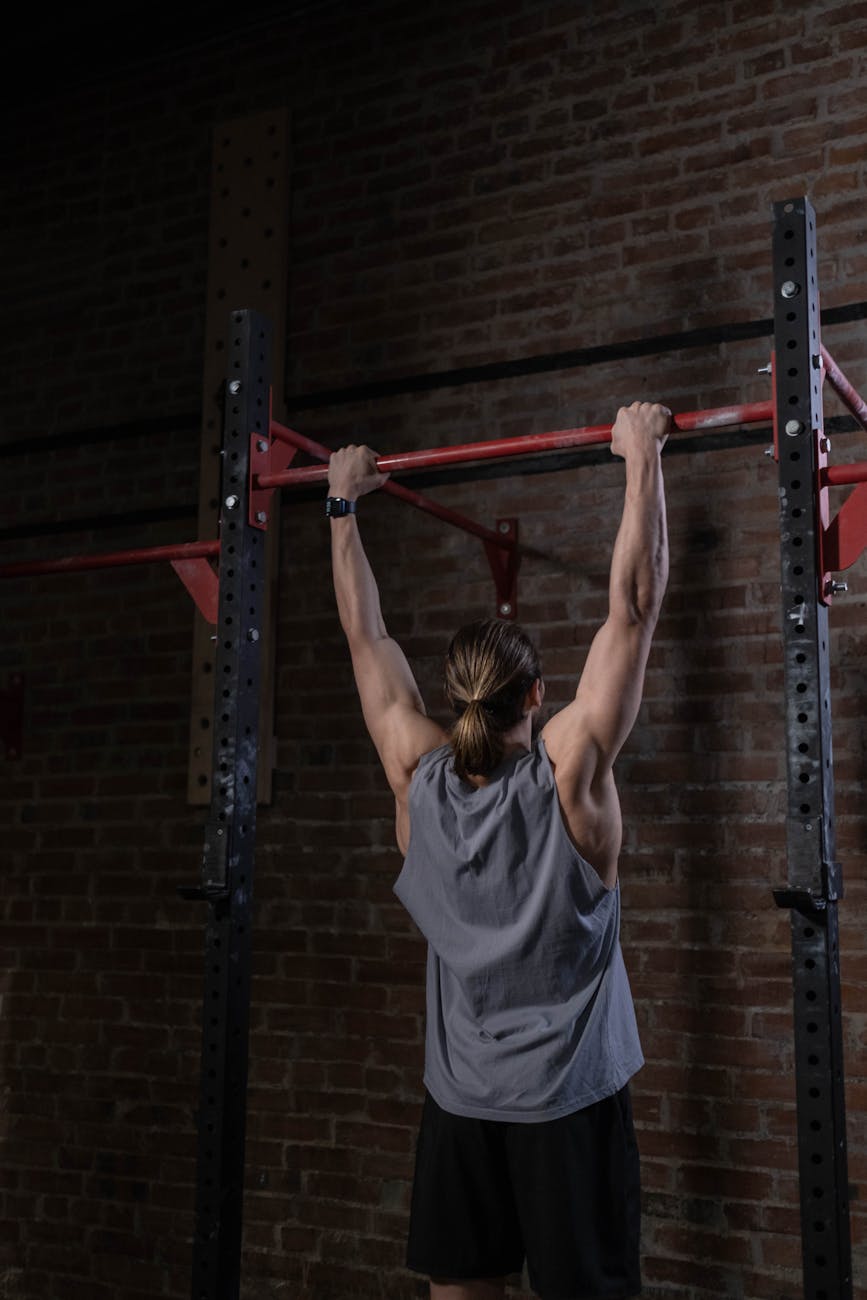
To begin, find a sturdy pull-up bar or any other horizontal support that can sustain your body weight. Hang from the bar with an overhand grip, slightly wider than shoulder width apart. Keeping your legs together, extend them behind you while pushing your hips forward and keeping your back straight. Engage your core and maintain a hollow body position – this is the starting position.
Maintaining the correct posture is crucial. Your shoulders should be retracted and your scapulas engaged. Your spine should form a straight line from your head to your heels, with your chest lifted and your gaze focused on a point in front of you. Keep your elbows locked throughout the movement.
Now, to execute the Front Lever, slowly raise your body upwards while keeping your legs extended behind you. Your body should form a “V” shape, with your hips hovering just above the bar. Pause briefly at the top and then lower yourself back down to the starting position with control. Repeat this movement for desired repetitions or sets.
One common mistake is swinging or using momentum instead of controlled movements. Avoid this by focusing on engaging your core, keeping your back straight, and maintaining a hollow body throughout the exercise. Incorrect form can lead to injuries, so always prioritize proper technique over attempting more reps or sets.
Another helpful tip is practicing the Front Lever progressions. Begin with a partial Front Lever where you only lift your hips slightly off the ground. Gradually increase the range of motion as your strength improves. Additionally, using resistance bands or weights can add extra resistance and help build the necessary muscle endurance and strength for mastering this advanced exercise.
Front Lever Pull Tutorial
The front lever pull, a dynamic overhead strength feat, builds upon the foundational front lever and adds an element of vertical pulling. It demands core stability, shoulder girdle mobility, and good hip flexor control to execute efficiently. The typical progression begins with mastering the controlled descent from a solid front lever hold. This ensures good scapular depression and upward rotation, key components for a clean pull. A common starting point is often the “kinked” front lever – a slight bend in the arms indicates some extra work remains on shoulder flexibility or core engagement.
The scissored front lever pull is another useful variation; legs are split apart during the pull, increasing the range of motion slightly and encouraging greater lat activation. It’ a great way to build strength for the full movement. Focus on keeping the hips relatively stable throughout the entire motion – wobbly hips often indicate core weakness or inconsistent hip flexor engagement. Good practice here is also incorporating some slight knee-drive during the pull, helping find that extra bit of power from the lower body.
Once a comfortable tuck front lever pull is achieved, transition to the half-tuck front lever pull, then eventually the knees-up front lever pull. This requires more core engagement and good hip flexor control. Think about leading with the chest towards the bar during the pull, rather than just pulling with the arms. This helps keep the body relatively straight and ensures a clean, efficient movement pattern. The goal is to feel like the upper body is driving the lower body upwards.
The full front lever pull arrives! Here, good scapular control is key for maximizing leverage and minimizing unnecessary shoulder strain. A slight pre-pull hip hinge can help initiate the movement and allows for a little extra “oomph” at the bottom of the pull. Experiment with different grip widths to find what feels most comfortable and efficient – slightly wider grips often allow for better lat engagement, while narrower grips tend to engage the biceps more. Perfecting this move is about fine-tuning these smaller details over time through consistent practice and focused attention to detail.
How to Do a Perfect Back Lever Pull
Performing a perfect back lever pull requires a combination of strength, flexibility, and precise technique. To achieve this, it’s essential to understand the biomechanics involved and gradually build up your skills through a structured progression plan. Begin by focusing on developing a strong core, as it forms the foundation for executing any overhead movement efficiently. Engage in exercises such as planks, Russian twists, and leg raises to strengthen the abdominal muscles and obliques. Additionally, work on improving your grip strength through activities like pull-ups, chin-ups, and handstand push-ups.
Before attempting a back lever pull, ensure you have adequate flexibility in your shoulders, hips, and hamstrings. Incorporate dynamic stretching routines before training sessions to prepare the muscles for the intense effort required. Static stretches can be performed post-workout to enhance recovery and maintain flexibility over time. Pay particular attention to hip mobility, as it plays a crucial role in achieving a full range of motion during the back lever pull.
The back lever pull involves hanging from a bar with your arms fully extended above your head, then swinging your legs up to align them with your torso before attempting to lift your body weight overhead. To perfect this technique, start by practicing the dead hang, focusing on maintaining a straight line from head to heels without any sagging or slouching. Gradually progress to performing partial back levers, where you lift your body only halfway up before lowering it back down. This will help build endurance and muscle memory for the full movement.
As you become more comfortable with the partial back lever, focus on refining your technique by engaging your core throughout the entire movement. Avoid relying solely on your arms, as this can lead to premature fatigue and poor form. Instead, initiate the lift from your hips and engage your glutes and quadriceps to assist in propelling your body upward. Maintain a neutral spine by avoiding excessive arching or rounding, which can increase the risk of injury.
Incorporate specific drills to enhance your back lever pull performance. One effective exercise is the scapular retraction, which strengthens the muscles responsible for stabilizing the shoulder blades during overhead movements. Perform this by squeezing your shoulder blades together while hanging from a bar and holding the position for several seconds. Another valuable drill is the inverted row, which targets the lats and trapezius muscles, crucial for supporting the bodyweight during a back lever pull.
To ensure progression without compromising safety, periodically assess your form and adjust your training accordingly. If you notice any pain or discomfort, pause to analyze the cause and make necessary modifications. Consider seeking guidance from a qualified coach or trainer who can provide feedback on your technique and offer personalized recommendations for improvement.
To strength and flexibility, mental fortitude is essential for mastering the back lever pull. Embrace challenges and push beyond your comfort zone while maintaining a positive attitude. Celebrate small victories along the way to stay motivated and committed to your goals. By combining consistent practice with a focused mindset, you can achieve a perfect back lever pull and unlock new possibilities in your overhead movements.

How to Do a Perfect Overhead Press

The overhead press is a fundamental exercise in strength training that targets the deltoids, triceps, and upper back muscles. To perform an overhead press correctly, begin by standing with your feet shoulder-width apart and holding a barbell or dumbbells at chest height with your arms fully extended. Keep your elbows slightly behind your shoulders to maintain proper form. Inhale as you lower the weight back down to chest level, then exhale as you press the weight overhead, squeezing your deltoids at the top of the movement before slowly controlling the weight back down.
For beginners, it is crucial to prioritize safety by using a spotter or performing the exercise in front of a mirror to monitor form continuously. Starting with lighter weights allows you to focus on technique without risking injury. Maintain a neutral spine and avoid arching your back or shrugging your shoulders during the press. Keep your core engaged to stabilize your body and prevent excessive strain on the lower back.
Proper breathing is another essential aspect of executing an overhead press safely and effectively. Inhaling as you lower the weight and exhaling as you push it upward helps create intra-abdominal pressure, which supports the spine and enhances stability. Avoid holding your breath, as this can lead to increased blood pressure and reduce oxygen flow to muscles.
To progress over time, gradually increase the weight while maintaining proper form. Incorporating variations such as dumbbell overhead presses or seated presses can also help target different muscle groups and prevent plateaus. Additionally, incorporating rest days into your training schedule allows for muscle recovery and adaptation, ensuring long-term progress without overtraining.
By adhering to these techniques and prioritizing safety, beginners can effectively develop strength and technique in the overhead press, laying a strong foundation for more advanced exercises.
Perfect Back Lever Beginner’s Guide
Mastering the back lever is a challenging yet rewarding progression in calisthenics. This advanced bodyweight exercise primarily targets the upper back, rhomboids, and biceps. Performing a perfect back lever involves suspending your entire body above the ground with straight arms, shoulders retracted, and legs extended behind you. Your body forms an inverted ‘U’ shape.
To begin, start with preparatory exercises to build the necessary strength and flexibility. Here are some steps to follow
Hollow Body Hold: Strengthening your core is crucial for maintaining proper form during a back lever. Lie face-down on the floor and engage your abs, pressing your lower back into the ground. Lift your head, chest, and legs a few inches off the floor while keeping your body rigid. Hold this position for 30 seconds to begin with and gradually increase the duration over time.
T-Raise: This exercise helps develop the necessary scapular control needed for the back lever. Hinge at your hips, lean forward slightly, and raise your arms to form a ‘T’ shape with your body. Lower your arms back down with control before repeating the movement. Aim for 3 sets of 10 reps.
Scapular Pull-Ups: To engage the rhomboids and build upper back strength, perform scapular pull-ups. Hang from a bar or a TRX suspension trainer with your arms extended and palms facing outward. Retract your shoulder blades while keeping your arms straight. Release the contraction and repeat for 3 sets of 8 reps.
False Grip Pull-Ups: Another essential exercise for back lever progression is false grip pull-ups. Adopt a false grip by wrapping your hands around the bar, fingers pointing towards one another. Perform pull-ups with an overhand grip while maintaining this position. Aim for 3 sets of 6 reps.
Once you’ve built sufficient strength and flexibility through these preparatory exercises, it’s time to attempt a back lever. Begin by hanging from a bar or a pull-up rig, shoulders relaxed and arms extended. Engage your core, retract your shoulder blades, and push your body backwards until your feet leave the ground. Keeping your legs straight and body tense, raise them up behind you while maintaining control of the movement. Lower yourself back down with control to complete one rep.
One notable variation of the back lever is the ‘straddle back lever.’ Instead of keeping your legs together during the exercise, they are spread apart in a wide straddle position. This variation places more emphasis on the glutes and hamstrings while still targeting the upper back muscles. Make sure to progress through the preparatory exercises before attempting this variation to ensure proper form and prevent injury.
How to Do a Perfect Front Lever Pull
Performing a perfect front lever pull requires a combination of strength, technique, and gradual progression. This exercise is often used in gymnastics and calisthenics to build upper body strength, core stability, and shoulder mobility. To achieve mastery, it’s essential to understand the biomechanics involved and follow a structured progression plan that builds from foundational movements up to the full front lever pull.
Begin by understanding the anatomy of the front lever pull. The movement primarily engages the latissimus dorsi, pectoralis major, triceps brachii, and posterior deltoids, while the core muscles stabilize the body. Proper execution involves a combination of pulling and hip tuck, ensuring that the hips remain tucked under throughout the movement to maintain a straight body line.
For beginners, starting with bodyweight exercises that mimic the front lever pull is crucial. Plank rows, inverted rows on a low bar or TRX suspension trainer, and dips are excellent foundational movements. These exercises help build the necessary shoulder and core strength while familiarizing yourself with the pulling motion required for the front lever.
As you progress, incorporate bodyweight front levers using assisted methods such as bands or spotting from a partner. Progressive overload is key; start with partial reps, where you perform only the top half of the movement, gradually increasing the range until full repetitions are achievable. Focus on maintaining control throughout the movement to prevent momentum-driven repetitions that compromise form.
Incorporating drills to improve shoulder mobility and scapular control is also essential. Exercises like shoulder external rotations, scapular retractions, and prone Y retractions can enhance your ability to maintain proper shoulder alignment during the front lever pull. These drills should be performed regularly alongside strength training to ensure a balanced approach to skill development.
The most frequent use case for this progression is in gymnastics and calisthenics routines, where performers aim to seamlessly integrate the front lever into their repertoire. Mastery of the front lever allows for dynamic transitions between movements, adding flair and complexity to routines. By following a structured progression plan that emphasizes technique and gradual strength building, beginners can successfully achieve the perfect front lever pull, paving the way for more advanced skills in their training regimen.
Perfect Front Lever Progression
Perfecting the front lever requires a deep understanding of energy consumption and transfer, as these elements are crucial for maintaining balance, stability, and control throughout the movement. The front lever is an overhead position where the body is suspended by the arms, with the torso parallel to the ground and legs extended. Achieving mastery in this skill involves optimizing the use of energy to maintain proper form and alignment while minimizing unnecessary muscle fatigue.
Energy consumption in the front lever is primarily managed through efficient muscle activation and coordination. The body must engage core muscles, scapular stabilizers, and shoulder muscles to maintain a stable position. Proper alignment ensures that the weight is evenly distributed across the shoulders, reducing the strain on any single muscle group. Energy transfer occurs as kinetic energy from the body’s movements is converted into potential energy to sustain the overhead position. This interplay is essential for maintaining balance and preventing energy leaks that can lead to instability or collapse of the form.
To perfect the front lever, it is vital to focus on muscle synchronization and joint stability. The shoulder joint, in particular, requires precise control to prevent dislocation or strain. Engaging the rotator cuff muscles and scapular muscles ensures a stable base from which to perform the front lever. Energy consumption is minimized when these muscles work in harmony, allowing for sustained overhead positions without rapid fatigue.
Breathing techniques also play a significant role in energy management during the front lever. Controlled breathing patterns help maintain core stability and support the muscular efforts required to hold the position. Exhalation can be synchronized with the most demanding phases of the movement, such as lifting into the front lever or resisting gravity while maintaining form. This strategy enhances efficiency by ensuring that energy is used effectively during critical moments.
How to Get a Perfect Back Lever
The guide to achieving a perfect back lever is an essential complement to tutorials, particularly those designed for beginners. While a tutorial might provide the foundational knowledge, such as muscle engagement, positioning, and basic movements, a guide further enhances its effectiveness by offering structured progression pathways that ensure continuous improvement without overwhelming the learner. A well-crafted guide systematically breaks down complex skills into manageable steps, allowing users to build confidence incrementally. This methodical approach is vital for beginners who may struggle with maintaining proper form or understanding the nuances of balance and alignment.
The guide also serves as a repository of supplementary resources, such as recommended stretching routines or mobility exercises that complement the tutorial’s core content. These additions prevent muscular tightness and joint strain, common pitfalls when transitioning from tutorials to advanced stages. By addressing holistic physical health alongside skill acquisition, the guide ensures learners develop durable strength rather than temporary gains. Furthermore, it may include safety protocols for various environments, whether training at home or in a gym, emphasizing proper equipment usage and risk mitigation strategies.
For advanced practitioners seeking refinement, guides can offer variations of the back lever that challenge muscle endurance or flexibility. They might introduce tiered progressions, such as elevating feet on blocks before attempting full leverage, or integrating weighted movements to increase resistance gradually. This adaptability makes the guide invaluable across age groups and fitness levels, accommodating individuals with different starting points while maintaining a cohesive framework.
The synergy between a tutorial and a guide is rooted in their complementary functions: tutorials convey foundational knowledge, while guides provide strategic guidance for sustained growth. Together, they create an immersive learning environment where users feel supported at every stage of mastery. This combination also fosters independence, as learners become adept at self-analyzing their form and adjusting their approach without external direction. The result is a more efficient, safer, and enjoyable journey toward achieving the perfect back lever.
The guide’s value lies in its ability to contextualize tutorials within a broader learning ecosystem. By addressing not just “how” but also “why” and “when,” it transforms isolated skill acquisition into a cohesive practice that nurtures long-term mastery. For beginners navigating the complexities of strength training, this partnership between instructional materials is indispensable, turning theoretical knowledge into physical proficiency with precision and confidence.
Easy Way to Do a Perfect Back Lever Pull
The back lever pull is a challenging bodyweight exercise that targets the upper back, shoulders, and core. This technique requires a great deal of control and stability to execute properly, making it an excellent progression from traditional rowing movements. In this guide, we will outline the key components and techniques for performing a perfect back lever pull.
Firstly, understanding the anatomy involved in the exercise is crucial. The primary muscles engaged during a back lever pull include the rhomboids, middle and lower trapezius, teres major, and the core muscles such as the rectus abdominis and obliques. Proper form ensures that these muscles are working effectively while minimizing the risk of injury.
To begin, assume an inverted hang position on a pull-up bar with an overhand grip, arms fully extended, and legs straight behind you. This is the starting position for the back lever pull. Engage your core to keep your body stable and maintain a straight line from head to heel.
Focus on initiating the movement from your upper body. Keeping your arms locked, slowly begin to lift your legs forward, bringing them towards the bar. As you raise your legs, your body will naturally invert, creating an upside-down ‘V’ shape. Maintain a strict and controlled movement throughout the exercise, avoiding any excessive swinging or rocking motions.
As you reach the top of the movement, pause briefly to ensure proper form before lowering yourself back down to the starting position with control. Repeat this process for the desired number of repetitions. It’s essential to master the controlled descent as it helps build the necessary strength and stability for the next stage of progression, such as the full back lever.
A common mistake to avoid when performing a back lever pull is arching your lower back excessively or rounding your shoulders during the movement. Maintaining proper form throughout the exercise ensures that you’re targeting the intended muscles while minimizing the risk of injury. Additionally, be sure to engage your core and keep your legs straight throughout the movement for maximum effectiveness.

How to Do Face Pulls Correctly
Face pulls are an effective exercise for strengthening and conditioning the posterior deltoids, trapezius muscles, and upper back. To perform face pulls correctly, start by setting up a cable machine or resistance band at chest height. Sit or stand in front of the machine with your feet shoulder-width apart, grasping the handle or rope with an overhand grip. Keep your arms slightly bent and your elbows tucked in close to your body throughout the movement.
Inhale as you slowly pull the handle toward your face by squeezing your shoulder blades together. Maintain a neutral spine and engage your core muscles for stability. As the handle approaches your collarbone, pause briefly to ensure proper form before gradually releasing the resistance back to the starting position while exhaling. Repeat for the desired number of repetitions.
To maximize the benefits of face pulls, focus on maintaining controlled movement and avoiding swinging or jerking motions. Proper technique is crucial to prevent strain on the shoulders and ensure that the targeted muscles receive the intended stimulus. As you progress in strength and proficiency, consider incorporating variations such as using a wider grip or different handle types to challenge various muscle fibers and promote further development.
In terms of future advancements related to tutorials on exercises like face pulls, virtual reality (VR) technology holds significant promise. VR could provide immersive, interactive experiences that offer real-time feedback and guidance during performance, helping users refine their technique more effectively than traditional methods. Additionally, augmented reality (AR) applications might integrate with fitness apps to overlay instructional cues directly onto the user’s environment, enhancing learning and adherence to proper form. These technological advancements could revolutionize how individuals learn and perfect exercises like face pulls, making training more accessible, engaging, and effective for beginners and experienced athletes alike.
How to Do a Perfect Thruster
Performing a perfect thruster requires precise technique, body awareness, and consistent practice. Thrusters are a fundamental compound movement that combine a squat and a press, targeting multiple muscle groups including the quadriceps, glutes, hamstrings, shoulders, trapezius, and core. To achieve optimal form and prevent injury, it is essential to focus on key aspects of the exercise.
Begin by setting up with a barbell loaded with the desired weight. Assume a squat position with your feet shoulder-width apart, toes slightly angled outward. Engage your core and lift the barbell off the rack, positioning it just above your traps. Take a deep breath to brace your core and initiate the movement by pushing through your heels to descend into a squat. Maintain a neutral spine and avoid rounding the lower back. Keep your chest upright and eyes forward throughout the movement.
As you reach the bottom of the squat, explosively drive upwards while simultaneously pressing the barbell overhead. Coordinate the upward push of your hips with the extension of your arms to create momentum. At the top of the thrust, pause briefly to ensure full extension in your elbows and knees, then slowly lower the barbell back down to the starting position. This controlled descent allows for muscle control and prevents reliance on momentum.
A common mistake is allowing the bar to drift forward or behind the body during the movement. To correct this, visualize a straight line from your heels through your shoulders to the bar. Maintain this alignment by engaging the glutes and scapular stabilizers. Another critical aspect is breathing; exhaling during the upward phase of the press while inhaling as you lower the bar helps stabilize the core and maintain proper spinal alignment.
Consider incorporating variations such as dumbbell thrusters or kettlebell swings to diversify the workout while maintaining the core benefits of the original exercise. Regularly assessing form through mirror reflections or video analysis can help identify areas for improvement. By adhering to these principles, individuals can achieve a perfect thruster, leveraging its full potential as a versatile and effective strength-training tool.
How to Do a Perfect Clean and Press
The clean and press, a classic lift combining the full-body power of the clean with the overhead strength of a press, demands solid technique for efficient execution and injury prevention. Mastering it often benefits from a good grasp of both its component movements; a decent clean helps ensure a stable base while a reliable shoulder press ensures a smooth lockout. The movement begins with the athlete in an athletic stance, feet hip-width apart, knees slightly bent, and the bar over the midfoot, allowing for a comfortable grip just outside the shoulders. Grip pressure should be firm but not overly tight to allow for good wrist mobility throughout the pull.
The initial pull is key – think of it as a strong leg drive upward while keeping the back angle relatively constant. This contrasts with the deadlift where the torso often angles over considerably. Here, maintaining that decent posture allows for a more efficient transfer of power from the legs to the hips and then to the shoulders. A good double chin grip, where the bar sits nicely in the collarbone area, is a useful cue during this phase. As the bar passes knee height, many athletes find a slight pull with the elbows high helpful in keeping the bar close to the body. The second pull, often called the “high pull,” adds some extra oomph and helps drive the bar upwards toward the rack position.
The rack position itself is a critical moment; here, the athlete’-s hips and knees are generally slightly bent, shoulders are back and down, and the elbows are pointing forward, ready to receive the bar. A common weakness reveals itself when athletes have trouble keeping their arms relatively straight in this spot – it often indicates needing to drive those legs a bit more or pull the bar a little higher on the initial pull. From here, the athlete dips the knees slightly while keeping core engaged and then presses the bar overhead with a solid shoulder press technique. A good look through the hands at the ceiling can help ensure a nice, straight track for the bar to travel.
Progression often involves focusing on one aspect at a time; some athletes find that mastering the clean first, then adding the overhead press, works well. Others prefer to work on their shoulder press strength independently before combining them. Good mobility in the shoulders and wrists is also beneficial, ensuring a good range of motion throughout the lift. Finally, consistent practice with an eye toward solid technique ensures consistency and maximizes the benefits of this often-overlooked classic lift.
Good Back Lever Pull Technique
Mastering the back lever pull technique is essential for any beginner looking to enhance their overhead lifting abilities. This exercise not only targets the back muscles but also demands precise coordination and energy transfer between different muscle groups, which is crucial for progression in strength training. To achieve optimal performance, it’s important to understand how energy consumption and transfer play a role in executing this technique correctly.
The back lever pull involves suspending your body from an elevated bar or pull-up bar with straight arms, then performing controlled pulls to bring your chest towards the bar. This movement requires a combination of upper body strength, core stability, and proper breathing mechanics. For beginners, the challenge often lies in managing energy expenditure efficiently to maintain form and avoid injury.
Energy consumption in the back lever pull is primarily derived from the muscles of the back, shoulders, and arms, with secondary support from the core and legs. As a beginner, it’s crucial to focus on maintaining a neutral spine and engaging the core throughout the movement to prevent excessive strain on the lower back. Proper technique ensures that energy is transferred effectively between muscle groups, allowing for a smoother and more controlled lift.
One key aspect of energy transfer in this exercise is the sequential activation of muscles. Beginners should start by activating the lats (latissimus dorsi) to initiate the pull, followed by engaging the trapezius and rhomboids for stabilization. The biceps and brachialis then contribute to the final phase of the lift. This sequential activation optimizes energy transfer and prevents overreliance on any single muscle group, which is vital for progression and injury prevention.
Breathing mechanics also play a significant role in energy consumption during the back lever pull. Inhaling as you lower back down and exhaling as you pull up creates an intrathoracic pressure that stabilizes the spine and supports the muscles involved in the lift. This not only enhances performance but also promotes better energy transfer by optimizing muscle function.
For beginners, it’s essential to start with manageable repetitions and gradually increase intensity as strength and technique improve. Incorporating rest periods between sets allows for adequate recovery, ensuring that energy levels are maintained for each lift. Progressive overload, achieved through increased weight or resistance, can be implemented once the foundational technique is mastered, further enhancing muscle adaptation and strength gains.
Back Lever Pull Form Tips

In the realm of back lever pulls, a beginner’s journey is often visualized as an progression from a banana shape to a straight line. This transformation signifies the development of the necessary strength and control required for this advanced overhead move.
Initially, when attempting a back lever pull, the body may assume a rounded shape with the hips tucked under and the spine rounding excessively. This form deviation can place undue stress on the lower back, potentially leading to discomfort or injury. To counteract this, focus on engaging your core muscles and maintaining a neutral spine throughout the movement.
Visualize your body as an inverted pendulum, with the hips acting as the fulcrum and the shoulders extending overhead. The legs form the longer lever, while the torso forms the shorter one. To initiate the pull, engage your abdominal muscles to hollow your body and simultaneously press into the ground with your feet, raising your hips slightly off the floor.
As you progress through this initial stage, aim to straighten your legs and extend your spine, maintaining control throughout the movement. Keep in mind that perfecting this form takes time and dedication. Regular practice, focusing on proper engagement of your core muscles and control of your body, will lead to gradual improvement.
It’s essential to ensure a solid foundation before attempting more advanced variations or heavier loads. Incorporating exercises like hip hinges, dead bugs, and planks can help build the necessary foundational strength for performing back lever pulls correctly and safely.
When executing the pull itself, focus on using your latissimus dorsi (lats) and upper back muscles to initiate the movement, rather than relying solely on your arms or lower back. Engage your core throughout the entire range of motion, maintaining control and a neutral spine at all times.
